
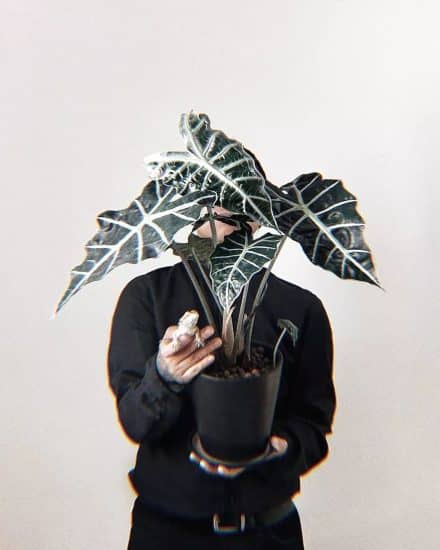
The Alocasia amazonica is one of the most breathtaking tropical plants, coveted mainly for its glossy dark green leaves and unique white veiny markings. While these stars of the plant world can sometimes be a bit finicky, their deep green coloring and lushly sheened leaves are more than worth the effort.
Let’s learn how the Alocasia amazonica got its name (it’s not what you think!) and how to create the ideal temperature, high humidity, soil, and light conditions for this attractive plant.
Bonus: we’ll clue you in on how to tell which variety you might have!
Table of Contents
Alocasia Amazonica Care Guide
History, habitat, and characteristics
The Alocasia Amazonica, also known as the African mask plant or Amazonian Elephant’s Ear, is a tropical houseplant. Surprisingly, though, it isn’t native to the Amazon, as its name might suggest. In fact, Alocasia x amazonica, as it used to be called, is a hybrid produced by crossing two other Alocasia species:
- Alocasia watsoniana (now more correctly known as Alocasia longiloba ‘Watsoniana’), from the tropical forests of Southeast Asia and southern China; and
- Alocasia sanderiana, from the tropical forests of the Philippines
So where does the ‘Amazonica’ bit come in? Turns out a Florida greenhouse grower named Salvadore Mauro first produced this hybrid in the 1950s and named it after his erstwhile business, Amazon Nursery. He never officially registered the new plant’s name, though, which is part of the confusion.
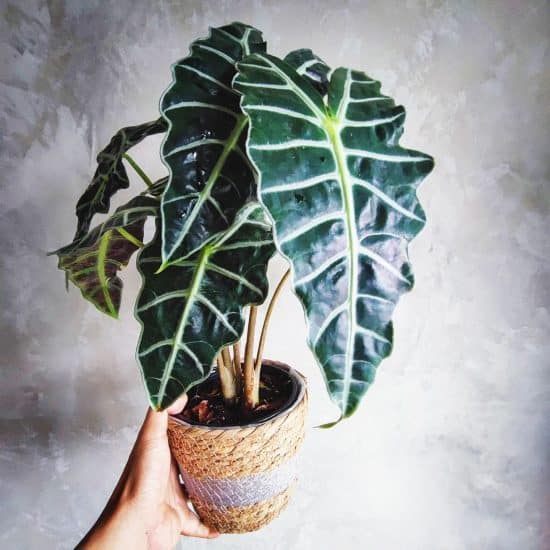
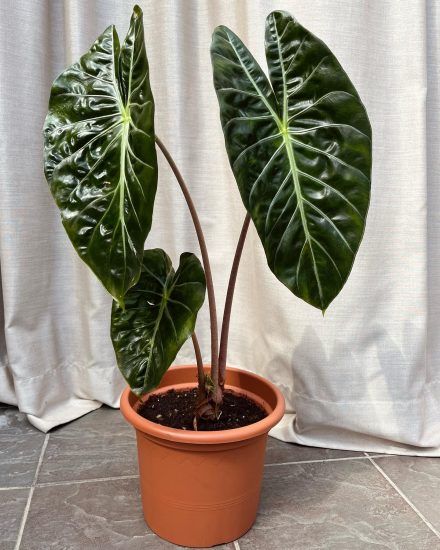
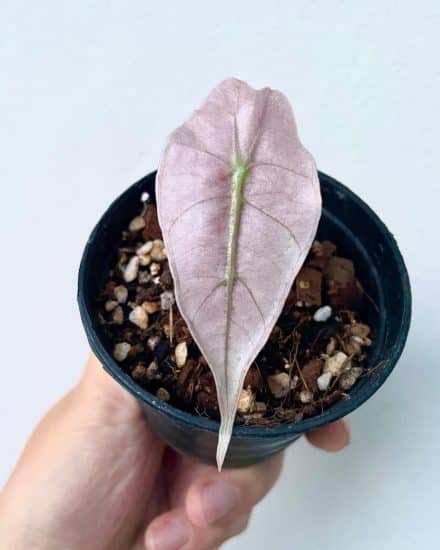
Much love for your work, Salvadore, but for now, back to our plant’s physical appearance. The arrow-shaped leaves of the Amazonica are long and thin, reaching up to two feet in diameter. They have a deep green base that gets lighter towards the leaf’s middle veins, with a deep purple hue on their undersides. Its rosy stems can reach up to six feet tall and four feet wide! (Intimidated? Don’t worry—this plant is a slow grower and can take five to 10 years to reach full maturity).
Did you know: Alocasia ‘Amazonica’ is often mistaken for Alocasia ‘Polly’. The two do look very alike, but Alocasia ‘Polly’ is an altered version of ‘Amazonica’ purposely bred to be smaller. This leads us to our next section…
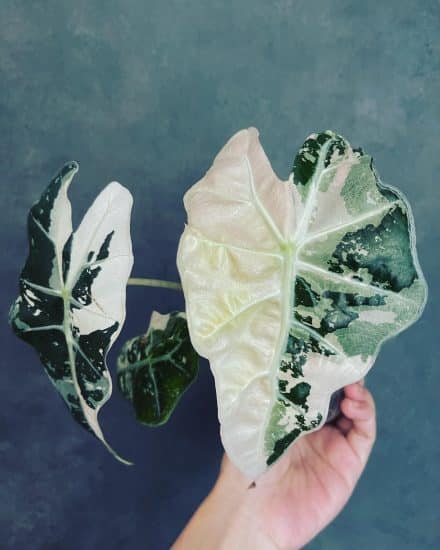
Alocasia Amazonica Varieties
- Alocasia amazonica ‘Polly’: As we discussed earlier, Alocasia ‘Polly’ is a smaller version of Alocasia amazonica proper. It only grows 18 to 24 inches tall and 10 inches wide, although its leaves can grow to be 16 inches.
- Alocasia amazonica ‘Bambino’: ‘Bambino’ is the smallest of them all, clocking in at 12 inches high and wide, with six-inch-long leaves. It’s a dwarf variety of Alocasia x amazonica with arrowhead-shaped, deep green leaves covered in silver veins and sporting purple bottoms.
- Alocasia amazonica ‘Ivory Coast’: This one looks like other alocasia and amazonica hybrids, but it has rosy pink stems and doesn’t have wavy edges. It’s a fast grower, up to 3 or 4 feet high and up to 2 or 3 feet wide.
Now that you’re familiar with some of the amazonica varieties of the genus alocasia, time to go over the ideal environmental conditions for this fabulous plant!
Light
Alocasia amazonica needs bright, indirect light to thrive. To ensure sufficient light coverage, keep the plant near a window or skylight and rotate it regularly. If the light is uneven or you don’t turn your plant every once in a while, some of the larger leaves may become lopsided.
Personally, I find that my alocasia plant does best right in front of a window in bright light and not several feet away. That being said, make sure the light source is not too direct, such as with a south-facing exposure, since this can cause the leaves to scorch.
Signs of low light levels include thin, lanky leaves and fewer leaves than normal. To increase the amount of light your plant receives, try moving it closer to a window or using a grow light. If you go take the latter route, a light intensity of 4300 lux and a spectrum of 4000k to 6000k is ideal.
Conversely, too much direct sunlight can also be damaging for alocasia plants. You can tell the plant is getting too much light if you start noticing yellowing or curling leaves, or if they start drooping. Move the plant away from direct sources of light to prevent this.
Water
Alocasia amazonica water requirements aren’t terribly difficult. Don’t water on a strict schedule, though. The key to monitoring soil moisture is pressing a single finger into the top 1-2 inches of soil—if it feels dry, it’s time to water. If it feels damp or waterlogged, then it doesn’t need to be watered yet. In general, this means you should water this plant about once a week or every two to three weeks, depending on your geographic location and the season (less often in winter).
It’s important to strike the right balance between underwatering and overwatering. The signs of overwatering are yellow or brown leaves that curl on the edges. If you notice this, decrease the frequency of watering and make sure not to leave the plant sitting in standing water.
Alternatively, if the leaves start to turn yellow or brown and droop, it’s a sign of underwatering. This can be fixed by increasing the frequency of watering and ensuring the soil isn’t too dry.
Though Alocasia Amazonica is a moisture-loving tropical plant and requires frequent watering, be careful not to let it sit in standing water for an extended period of time, as this can cause it to go dormant (lose all of its leaves and stop growing!).
Temperature and humidity
Since it thrives in USDA zones 8 to 11, Alocasia amazonica grows best with warm temperatures and high humidity levels. The optimal temperature range for this plant is 60 to 75° F, and it prefers humidity levels of at least 50%. The Amazonian elephant’s ear should be kept out of drafty areas, away from cooling vents and other cold conditions, since it can’t handle sudden temperature changes and is definitely not winter-hardy.
Not everyone’s house is naturally humid enough to accommodate an alocasia plant. In order to maintain the ideal humidity level for your Alocasia amazonica inside, here are some tried and true techniques:
- Running a humidifier near your plant
- Placing the Alocasia Amazonica in a more humid area of your home. The bathroom and kitchen are popular choices, however these areas must be well-lit enough for the plant’s needs.
- Grouping plants with similar humidity requirements together so they can share humidity
- Putting the alocasia amazonica on top of a pebble tray filled with water. This will help increase the humidity around the plant without impacting the rest of your home.
- Misting the leaves of the Alocasia Amazonica regularly to temporarily raise the humidity level in its environment
Soil and planting
Alocasia amazonica loves well-aerated, moist soil that drains quickly. Ideally, you want your potting mix to mimic the decomposing soil found on the forest floor of this plant’s natural habitat. While you can buy special aroid mix from basically any garden store, you can also make your own. For a custom-made soil mixture, use:
- 25% potting soil (aids with water retention)
- 25% sphagnum moss or coco coir (aids with water retention)
- 25% orchid bark or pumice charcoal (helps with water drainage)
- 25% perlite (helps with water drainage)
As long as your mix includes lightweight ingredients to prevent excess water from causing soggy soil, your Alocasia amazonica will settle right in.
Fertilizing
Alocasia amazonica prefers a well balanced liquid fertilizer like NPK 20-20-20. This stands for nitrogen, phosphorus, and potassium, the Big Three macronutrients your plant needs. Ideally, you’ll use a water soluble fertilizer diluted to half strength once a month during the growing season, at the same time you water it.
Don’t fertilize your Alocasia amazonica at all during winter, as it will be dormant and unable to use the nutrients.
Pruning
Elephant ears don’t need much pruning other than cutting off any yellow, brown, or dying leaves to keep its resources directed toward the healthy ones.
Repotting
This plant prefers to be slightly rootbound and is a slow grower to boot, so it will likely only need to be repotted every few years. Chose a pot with adequate drainage holes and a relatively shallow, wide shape to allow room for its roots to grow.
I recommend using a glazed ceramic pot instead of a terracotta, since this keeps the soil moist longer, and you’ll need to water your plant less.
We’ve covered ideal growing environment for the Alocasia amazonica—now let’s dive into how easy it is to propagate!
Propagation guide
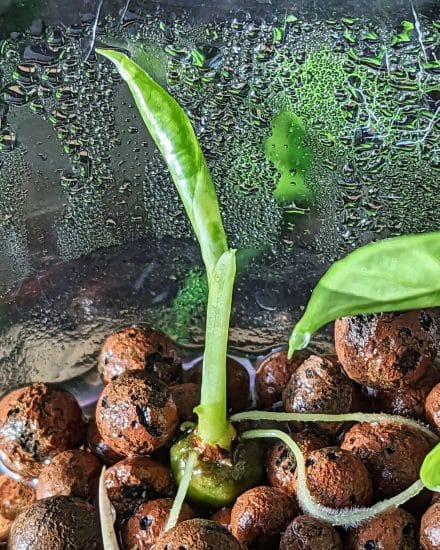
Propagating your indoor Alocasia Amazonica is a fun, easy task that will give you multiple plants to admire. Since these plants grow from a central corm, or bulb-like growth made of fibrous tissue, the best way to propagate them is through rhizome (underground root that grows horizontally) division. The ideal time to do this is when repotting during the growing months.
To propagate your Alocasia Amazonica by division:
- Carefully remove the plant from its pot and shake or brush off any extra soil. Since Alocasia Amazonica grows in a clumping manner, it should be easy to spot the different clumps to divide. There’s a great video about the whole process here.
- Gently pull clumps apart. It’s okay if they are entangled. In this case, use a sterilized knife to cut them vertically without harming their root systems.
- If your clumps are rooted, gently plant them in the same aroid soil mix used for the mother plant and moisten it.Tip: Do you see any clumps without root systems? That’s perfectly all right—root them in sphagnum moss or water for a few weeks first before putting them into soil.
Congratulations, you’ve successfully propagated your Alocasia Amazonica! Next up, we’ll discuss the most common diseases, pests, and other issues that can affect your plant, and how to solve them.
Is your Alocasia amazonica losing leaves? Don’t worry—whether it needs different care or it’s simply going dormant for the winter, we’ve got you covered.
Common issues
Brown, crisp leaves. Brown and crisp edges, as well as a drooping plant, could mean that it’s not receiving enough water. Increase the watering frequency and make sure the soil is lightweight and draining well. If the leaves are curling up, it needs higher humidity or less direct light.
Yellow leaves. Yellowing leaves mean your plant has been receiving either too little or too much water. Water when the top two inches of soil are dry, and make sure it’s kept in indirect sunlight.
Drooping Leaves. Drooping leaves can be a sign that it’s not receiving enough light or water. Place the plant in a place where it receives bright light spot (making sure that it’s indirect!), and check the top of the soil to determine whether it needs more water.
Dying Leaves: If leaves are dying off, the plant may not be warm enough and/or could be going dormant. If this occurs during the growing season, move it to a warmer spot and away from drafts, and pay close attention to its watering schedule. If it happens during winter, don’t worry, your plant is undergoing a natural dormancy process.
Keep in mind that as your Alocasia amazonica gets older, aging leaves may also naturally yellow and die. In this case, you can snip them off with pruning tools.
Diseases and pests
Alocasia amazonica can suffer from fungal infections as well as the usual plant-loving pests. Here’s how to deal with them.
Root Rot
A common ailment of alocasia amazonica is root rot, caused by overwatering or excessively moist soil. Check for discoloration of the plant’s leaves and stems to detect this issue. If you suspect this is the problem, take the root ball out of its pot, cut away any roots that are turning black, as well as the affected leaves and stems, and repot in fresh soil in a pot with drainage holes.
Fungus
Rust is a fungal disease that can cause orange or brown spots on the leaves. This is often caused by wet conditions on the foliage. Cut out any affected leaves and avoid misting the leaves in the future.
Bugs
Alocasia amazonica plants may be susceptible to pests such as leafminers, spider mites, whiteflies, and aphids. All of these critters can cause yellowing leaves, discoloration, and brown and yellow patches on the plant.
To treat this, spray the top and underside of the leaves with insecticidal soap or neem oil. Use a damp cloth to clean your plant’s leaves to promote healthy growth and dislodge any potential pests frequently.
Conclusion
Alocasia is sure to make a statement in any room you place it in. If you want to preserve its dark foliage and exotic flair, you’ll want to keep it out of direct light, offer it a steady temperature, and turn up that humidity as high as you can stand.
While you’re at it, propagate those Elephant ears by division and share the plant wealth.
Drop us a comment on the variety of Alocasia amazonica you have and whether you have any questions—we’re always happy to help in any way we can. If you liked this article, share it with a friend!
FAQ
Is Alocasia amazonica an indoor plant or outdoors?
It’s both! As indoor plants, the Amazonica require bright indirect light, and outside, they need partial shade. Those living in areas with mild winters can even place them outdoors during this time so long as the temperature remains above 60 degrees F.
Does Alocasia amazonica need sunlight?
Yes, but never direct sun, only bright indirect. If put in a location where it receives direct sunlight, this plant will burn.
Is Alocasia amazonica toxic?
According to the ASPCA, Alocasia amazonica is toxic due to the calcium oxalate crystals its stem and leaves contain, so be sure to keep it away from curious pets.
Sources
- https://www.rhs.org.uk/plants/96161/alocasia-x-amazonica/details
- https://www.missouribotanicalgarden.org/PlantFinder/PlantFinderDetails.aspx?taxonid=250070&isprofile=0&=
- https://www.aroidpedia.com/journal/alocasia-amazonica
- https://www.aspca.org/pet-care/animal-poison-control/toxic-and-non-toxic-plants/alocasia
