

This is our complete guide to taking care of indoor plants. Whether you’re looking at buying your first plant or you’re a hopeless plant addict like us, we’ve put together all of our essential advice in one place.
We’ve interviewed experts, consulted with seasoned horticulturists, and compiled together our 21 essential plant care tips.
We’ll cover everything from care, packing out the right house plants for your home, and how to deal with the most common issues that come up.
So whether you’re looking to propagate your 20th plant or find the right location for your first, we should have something for you so that your houseplants are absolutely thriving.
Table of Contents
Our Complete Guide to Indoor Plant Care
How to get enough humidity indoors
Getting humidity right is essential for indoor plants, especially since most of them are used to the high humidities of rainforest floors. When you get this right, you’ll see fast growth, lush plants, and vibrant colors.
Although this won’t be an option for those with limited space, grouping plants helps them to transpire more effectively. While this technically works for all plants, if you have an array of species with different humidity requirements, such as succulents mixed with humidity-loving orchids, it might be best to keep them in separate areas.
When we group plants together we encourage transpiration, which is when plants release their moisture via the stomata on their leaves. When plants are grouped together like this, their shared environment will benefit from an aggregate increase in humidity.
Ever notice that it often feels a bit humid at the plant shop?
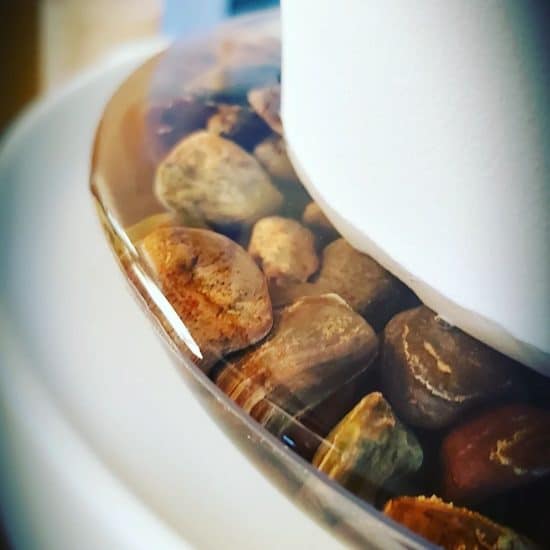
If you only have one plant or your space doesn’t allow for grouping (or you simply need more moisture), we recommend filling a tray with pebbles and adding water. The pebbles increase the surface area of the tray, and as water evaporates, it’ll raise the local humidity between 5-7% without making you feel like your house has become a sauna.
Lastly, if you can, you can grab a small humidifier. These can be a bit costly on your electricity bill, and they do require regular cleaning so that they don’t get too mildewy. If you notice your plant’s leaves getting wet, make sure to wipe them down.
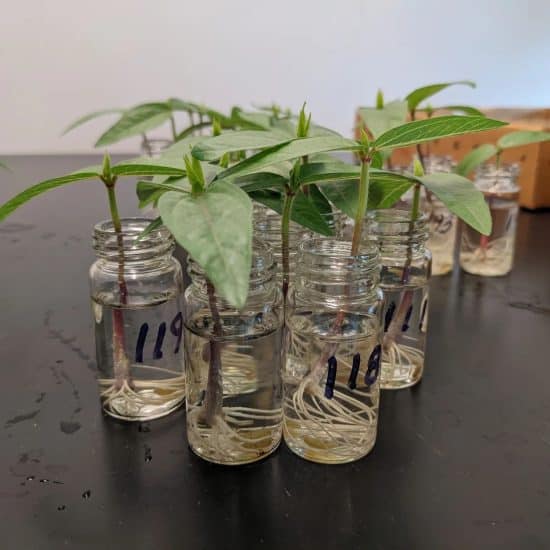
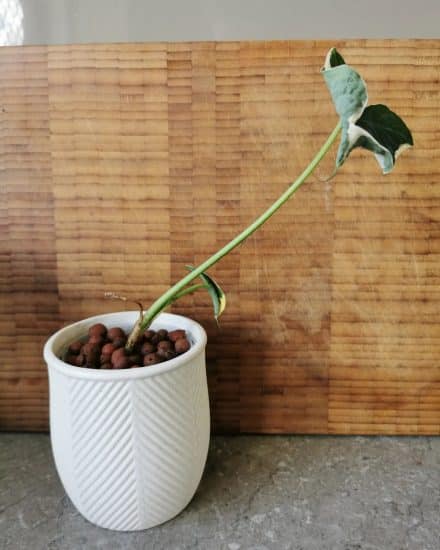
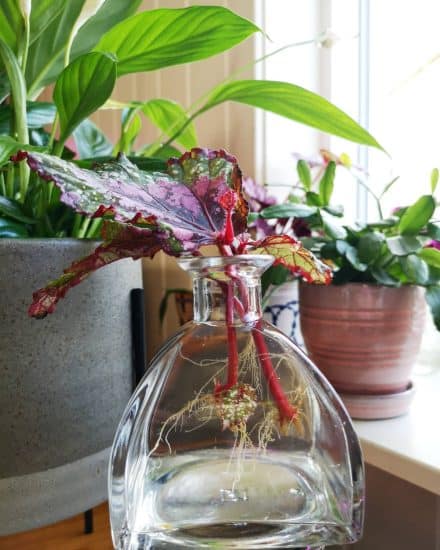
Plant propagation tips
I love propagating new plants, and honestly, it’s an exciting skill to have in your toolkit once you’ve acquired it. With a little bit of knowledge, you can reproduce plants from existing specimens and create your own thriving garden – for free!
You’ll soon be eyeing stem cuttings and plant scraps on the floor of your local garden centers and asking… can I take that?
Your favorite plants? Make clones of them for your friends and family.
It’s understandable if it seems a bit intimidating from the outside, since most of us don’t make a habit of cutting our plants!
Five key tips:
- Select a plant that’s already thriving. Its leaves and stems should both look healthy, and you should propagate during the growing season when plants are a bit more resilient. This will also help with rooting.
- Sterilize your scissors/shears when taking a cutting. You don’t want to introduce any diseases either to the plant you’re propagating or to other plants from that one in the future. You can use rubbing alcohol or boiling water.
- Experiment with different forms of propagation. Most commonly, we take stem cuttings, but root division, air layering, and seeds can all work great too, depending on the plant.
- With stem cuttings, cut the bottom of the stem at a 45-degree angle. This not only keeps it from sitting against the bottom of a container (which can make it hard for roots to form from a node), but also increases the surface area. Also, give yourself at least 3-5 inches to work with, and no fewer than two leaves.
- Give your newly propagating houseplants plenty of humidity, light, and water. You can increase the moisture by either keeping it in a naturally humid environment (bathrooms are great as long as they have enough light) or making a mini greenhouse with a 2-liter bottle. Just cut it in half and place the bottom over the cutting. Water/mist frequently!
Propagation is an exciting (and let’s face it: cheap) way to create your own garden. With the right technique and care, you’ll soon have an indoor space full of vibrant plants that you can take pride in. You grew them yourself!
When to water your plants
Okay, we’ll state the obvious here: watering indoor plants is an essential skill for successful propagation and healthy growth. It’s something you’ll learn how to do over time, and you’ll probably overwater much more frequently than underwater.
We’ve all been there.
So, how frequently should you water indoor plants? Is there an ideal watering schedule?
It’s going to depend on a few factors:
- Type of container. Terracotta pots and other porous materials will dry out faster. Similarly, how many drainage holes they have and their size influence how much water is retained and how quickly it will drain out.
- Soil composition. The more well-aerated soil you have (like cactus/succulent, or perlite-rich), the quicker the water will drain through. Peaty soil will hold a lot more water and require less frequent watering.
- Size of container and plant. Typically, faster-growing, larger plants in more light need more water.
Fortunately, there’s an easy way to determine when to water for almost every plant: check the top few inches of soil with a finger. If it’s dry, time to give it a big drink. You’ll want to water deeply and thoroughly even if it’s a bit less often, as this can prevent root rot.
Is the soil still moist? Trust that finger test and hold off for a while longer.
Tips:
- Assess each plant’s needs individually; larger plants and those with larger root systems will require more water than smaller plants.
- Use filtered or rainwater whenever possible, avoid softened water with salts, and always use room temperature water. You can boil water and let it cool to get rid of chlorine.
- Stick your finger in the soil to the first knuckle to test the soil’s moisture level; if it feels dry, then it’s time to water.
Treating common houseplant pests
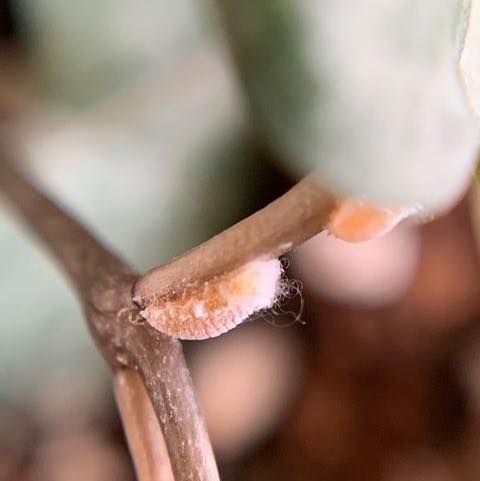
Ah, pests! Just the thought of them can make us shudder. But don’t worry — you can tackle any pest problem if you know what to look for and how to respond correctly. Let’s go through the basics regarding houseplant pests and how to deal with them.
To start, get to know the most common houseplant pests: aphids, spider mites, mealybugs, fungus gnats, and scale. These microscopic bugs feed on the roots, leaves, and sap of your houseplants and are generally visible to the human eye.
Fortunately, they all have similar methods of treatment and prevention.
Our first line of defense is going to be having a well-cared-for houseplant that’s healthy and not overly stressed. When plants are healthy, they naturally repel pests, but if you start to notice broken or discolored leaves, it’s time to pay more attention to the basics: light, water, and temperature.
Those broken leaves? Prune or pinch them off. These are food for bugs, and an indoor plant isn’t able to protect leaves that are no longer part of its living structure.
Second, try to keep pests out of the house. Any new plants you bring in, you should look over, especially underneath the leaves.
If pests have already made themselves comfy, you’ll want to directly treat the problem by removing them (alcohol on a cotton ball or even just soapy water) and then treating the plant with neem oil. It works great on almost all pests you’ll see indoors.
Taking care of succulents
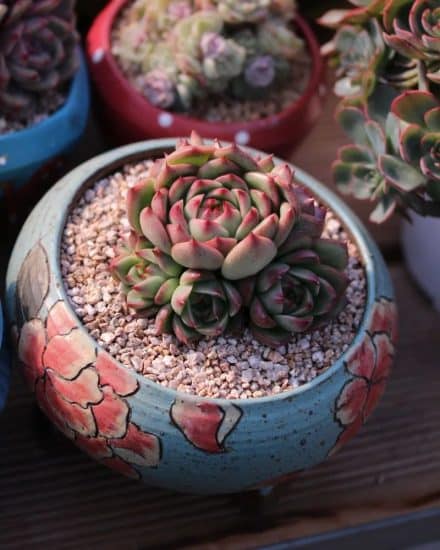
Succulents are a great option for indoor plants, as they require lower amounts of water, light, and care than other houseplants. They do, however, require knowledge of their particular environment to truly thrive.
In terms of temperature, succulents should be kept in conditions that remain relatively consistent. While most succulents won’t fare well outside if temperatures drop below 40°F for an extended period, many can also survive if placed indoors and temperatures remain steady.
Succulents require a fair bit less water than other houseplants. Their soil should be moistened like a freshly wrung-out sponge, rather than saturated, and then allowed to dry out before it is watered again.
Drainage is essential for succulents, so be careful about placing them in glass containers, even though they can look fantastic.
You’ll really want to use succulent soil as well. This means lots of aeration, with perlite, and not a moist peaty soil like some plants prefer. You can either buy a mix yourself or make your own by combining 1 part regular potting soil with 4 parts perlite for a 20/80 mix.
Succulents are a great option for those looking to get their green thumb but who don’t necessarily want to take on a high-maintenance indoor plant.
Selecting your first houseplant
Choosing your first houseplant is both a thrilling and empowering experience. Indoor gardeners all have one thing in common: they have a plant or two!
Let me assure you, there’s really no wrong answer here.
We see guides on the best indoor plants, as though that’s something someone else can determine for you. Everyone has different tastes, skills, and time available. So, there’s no objective list of the best indoor plants that we can really recommend.
A lot of beginners opt either for succulents (which are very easy to keep) or other low-maintenance house plants like Pothos, snake plants, aloe vera, or even a peace lily. But there’s another way you can think about it, too.
Does a plant get you excited and all warm and fuzzy inside? It’s likely you can find a way to keep it! Whatever gets you excited is going to be what motivates you to really take an interest in indoor plant care, because you’ll want your plant to grow and thrive.
Still having trouble picking out a plant? Ask a friend that grows plants for a recommendation. If they have a plant they already love, they can take a cutting from the mother plant and even advise you on what the plant’s soil is, watering frequency, etc.
You can also use this as an opportunity to learn how to propagate houseplants yourself, so observe!
Lastly, really consider how much time you’re able to dedicate to taking care of your new leafy friend. Happy plants make happy owners, so temper any ambitions with an examination of your own time and expectations. If you’re looking for an easy plant, Yucca cane plants are incredibly resilient and fantastic at filtering the air.
Flowering plants can be difficult to grow so they bloom indoors, and many plants you might be familiar with as outdoor plants are better suited for that climate.
Selecting your first houseplant is so exciting, so don’t worry too much. Enjoy it, because at the end of the day, selecting a houseplant should be a fun experience.
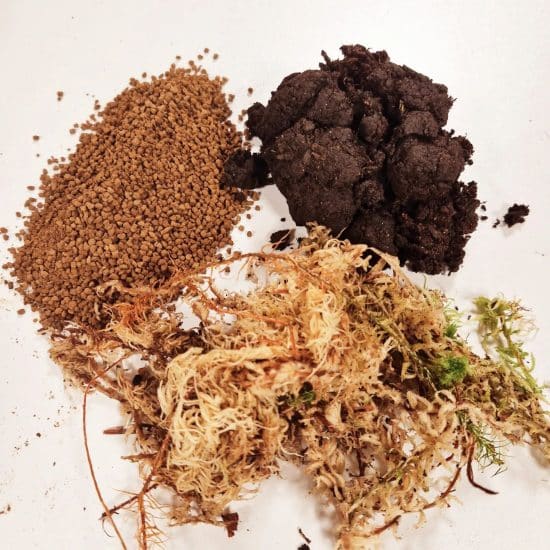
Making the right soil mixture
Finding the right soil mixture for an indoor plant is one of the houseplant care essentials. Of all of the plant care tips, this is probably the most important.
So much depends upon the soil you use, and we’re often faced with a difficult decision when getting a new plant: do we repot right away and potentially stress the plant? Do we continue to use the soil it came in?
If the plant is doing well, you can probably wait to repot. If you acquire a plant that’s a bit sad and you’re looking to recover it, I’d be more likely to recommend grabbing some fresh soil.
But fresh doesn’t mean from outside, since garden soil easily compacts, and most indoor plants thrive in lighter soil. So how can we make that?
We want soil that gives us water retention for root growth, but also is light enough to avoid waterlogging and that provides air space for the roots. We’ll need nutrients, organic compounds, and minerals.
Fortunately, we can get all of that pretty easily with a super simple mix. Just take store-bought potting soil (brand really doesn’t matter too much), and add perlite.
Perlite is made of volcanic rock that was heated up so quickly that it puffed up, like a corn puff. It’s incredibly porous, lightweight, pH neutral, and doesn’t break down easily.
This means it can hold water and release it to the roots over time, but not be so waterlogged that the soil remains wet and saturated. Now you’ll have soil that dries out and drains well, but that also provides those roots with everything they need.
Tips:
- Pick potting soil that doesn’t have fertilizer added to it. We’ll add this when we need to and not have it constantly being released from the soil.
- Match the potting soil to your plant. We have house plant care guides for all of the most common plants, where we give you the exact ingredients and proportions to use.
- When in doubt, mix together potting soil and perlite, 50/50. This works great for 90% of houseplants.
- Succulents and other plants that grow naturally in the desert prefer sandier soil, so go with a cactus mix, which you can still add perlite to as needed.
Once all these factors are taken into account, you can create the perfect soil blend that’s tailored specifically for your indoor plants, helping them to grow strong and thrive for years to come. So don’t be intimidated by mixing soil — get those hands dirty!
Using a pot with drainage holes
We all love a decorative pot, but for me, the days when I keep any indoor plant in a container that doesn’t have drainage available are over.
(We’ll discuss self-watering pots later.)
The amount of extra work required with containers that don’t drain is… pretty immense.
That being said, we can get the best of both worlds by using a secondary container that does have drainage holes. You’ll remove this container, water the plant thoroughly, and then return it to your pot when it’s no longer draining water actively.
(Just make sure to peek back inside later to ensure that water isn’t collecting at the bottom of your exterior pot: most plants don’t do well in standing water.)
Keeping indoor temperatures steady
Houseplants can sometimes surprise us with the wide range of temperatures they can tolerate, but keeping those temperatures within that range is essential for indoor plant care and growth.
Wide temperature fluctuations, even within the recommended range, can be stressful for plants and discourage growth. Additionally, if temperatures drop too drastically, you’ll have trouble recovering some plants entirely.
The biggest sign of cold shock is leaves suddenly turning brown and falling off.
So, how can we stabilize temperatures?
We have some tips:
- Avoid placing your plants near air vents or fireplaces, as they’re both pretty drafty and can expose your indoor plants to sudden changes in temperature
- Position your plants near a bright window to take advantage of natural indirect light. At night, you can move them away if it’s too cold or if you feel a draft coming in
- Maximize air circulation by opening windows or using fans
- If you keep plants outside during the summer, bring them in when temperatures overnight start dropping dramatically. Also try to avoid direct sun, as it’ll be a fair bit hotter for your plant, even just outside of the sun’s reach
- Look for sudden signs of wilting or yellowing leaves, or if the lower leaves turn brown and fall off
Plants can tolerate being a bit cooler at night, so you’ll want to keep that in mind when tracking temperature. Most indoor plants are happy at night between 65 – 75°F. During the warmer daytime hours, aim for 70-80°F.
How to water houseplants the right way
We previously discussed knowing when to water, but the how is just as important.
When it’s time to water, you want to treat it like making a coffee pour-over. You’ll saturate the top of the dry soil (not pouring water directly on the plant itself — a long gooseneck spout can help) evenly and slowly, and until excess water starts running out through your drainage holes.
This ensures water is distributed evenly throughout the soil and is able to reach the root system. Allow the soil to dry out moderately between waterings — if the plant leaves are wilting due to a lack of water, wait for the soil to be slightly damp before providing additional hydration.
Never leave a plant sitting in standing water.
Tap water is suitable for most plants. However, if you’re using well water, look out for signs of mineral damage (burnt edges, brown tips).
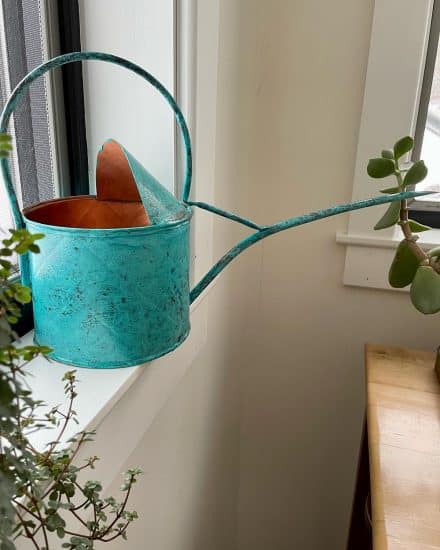
Dealing with hanging plants
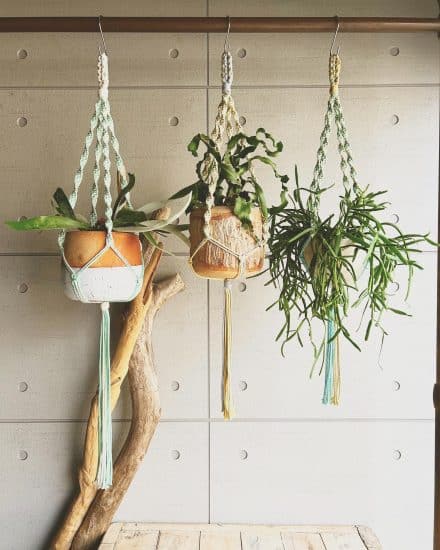
Hanging plants are a great way to take advantage of the vertical space in your room, provide a splash of green, and keep some plants out of the reach of pets & kids.
Whether you’re dangling ivy from a window pane, leading a trailing fern down your hallway, or misting a philodendron, these green companions come with an extra touch of… magic.
But while hanging plants add a whimsical touch to one’s home, they come with their own particular set of care needs that must be taken into consideration.
Like a proverbial sword of Damocles hanging over your head: what if these things fall down?
We recommend screwing in a stud (or brick) if you can find it when mounting your support. Hanging planters can get pretty heavy, especially with waterlogged soil. You’ll definitely want to avoid curtain rods for most plants.
If you’re renting or don’t want to screw into a stud, you can find over-the-door hangers that can mount on a closet or bathroom door to give your indoor plants some much-needed elevation without having to break out the power tools.
Speaking of, you’ll want to give your plant some time to drain before hanging it back up. A bathtub or sink are two spaces your hanging plant should get used to, because depending on the soil you’re using, they might take a bit of time to drain. You don’t want any surprise showers or messes to clean up.
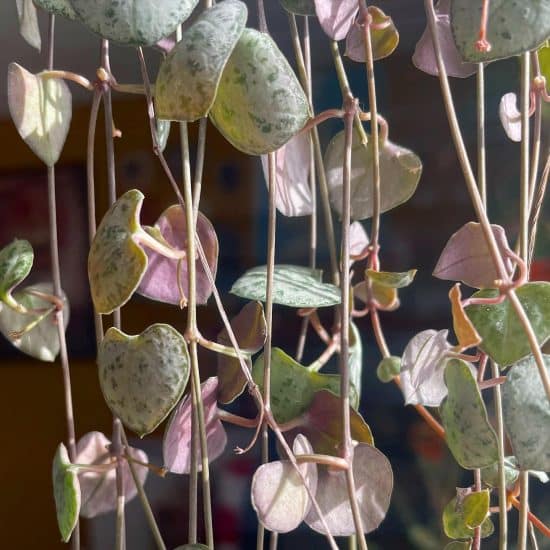
String of hearts, pothos, and philodendrons all make great hanging plants. Really, any epiphytic plant that likes to climb will be happy in the air as it lets down its hair.
The downside? Basically, all care takes a bit longer, from pruning to watering.
Fertilizing indoor plants
A lot of people will advise to never fertilize an indoor plant, that they don’t really need it, and that most people over-fertilize. You’ll also read never to fertilize in the winter and only during “the growing season.”
Well… what is the growing season, anyway? And even if it’s true as a general rule, what are the exceptions? If you don’t know yet, houseplant care is all about the specifics.
Well, if it’s warm in your home in the winter and you have artificial lighting (unless you’re reading this by candlelight, you probably do!) you might have a growing season all year long.
So, how to tell? If you haven’t guessed, the growing season is really just the time of the year you notice your plant growing. So if you’re seeing new growth in the winter, you don’t necessarily need to cut out the fertilizing.
Some plants truly do experience winter dormancy. For example, Snake plants (Dracaena trifasciata) do go dormant in the winter and shouldn’t be fertilized because this can lead to root damage. In fact, these plants also barely need any water during this period.
When you do fertilize, you’ll want a balanced complete fertilizer. We recommend liquids because you can dilute these to 20% or 50% strength. Some plants (like the Hoya kerrii) will reward well-timed use of fertilizing with beautiful flower blooms and vibrant growth.
If you do overfertilize a plant, you’ll want to flush the soil with plenty of water and either reduce the frequency of fertilizing or increase the dilution. Signs of too much fertilizer look like ‘burned’ leaves as the plant tries to push out the excessive nitrogen.
How to detect issues with your houseplants
Houseplant care isn’t really about getting everything right from the start. If you have a new plant, in some cases, it might be difficult to even know which variety you have! You might need some help identifying whether or not it has issues — especially if they already existed when you first bought it.
Fortunately, there are some common signs that apply across different genera and species. Let’s look at some of the most common issues we see with indoor plants and how to address them.
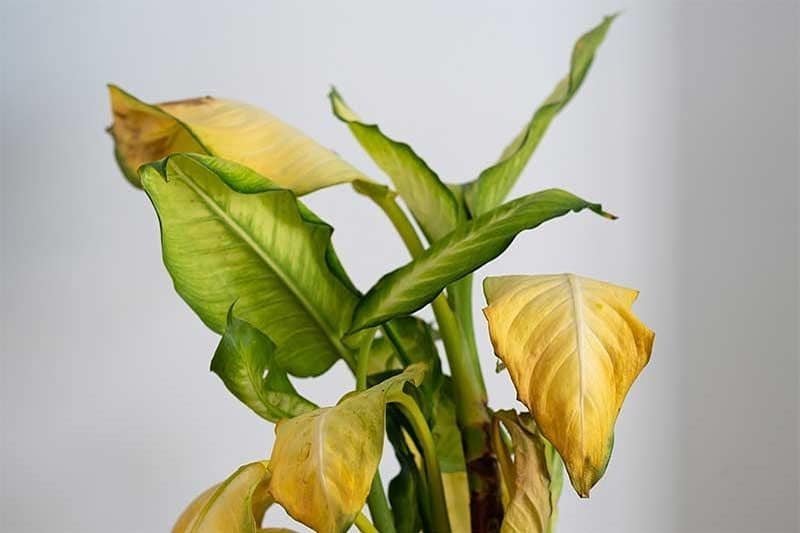
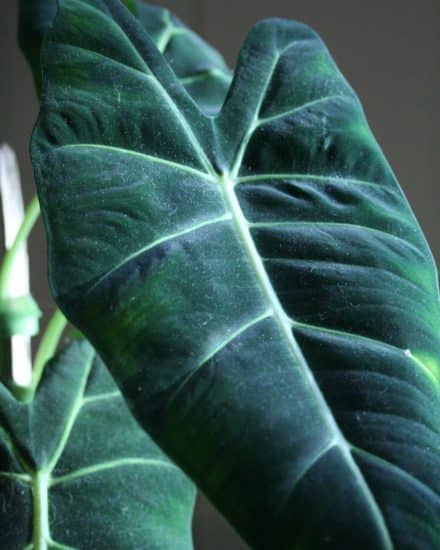
Leaf discoloration. This could be yellowing leaves, brown tips, or crispy edges. They all have their own causes, but generally, you’ll want to rule out overwatering and then water quality itself. Pay attention to whether all leaves are affected or just the lower, mature leaves. If the plant seems healthy but still doesn’t look quite right, you’ll need to make sure there aren’t pests (check for webbing, and droplets of sap on the undersides of leaves) and that the roots look healthy (they should be white and not slimy).
Root rot. Root rot is primarily caused by overwatering and soil that retains too much moisture. You’ll want to check the soil before watering most houseplants. Almost all plants require well-draining soil and don’t tolerate standing water. To increase drainage, consider adding perlite or LECA to your potting mix.
Leggy stems. Typically occurs when light exposure is low. This is a sure sign that your indoor plants are asking for more indirect light. You’ll want to either change the location of your plant or supplement with an artificial grow light, ideally one that is full-spectrum (you can turn it off at night). Also check to make sure the leaves aren’t too dusty, and rotate your plant so that all of its sides receive equal access to bright light.
Brown leaf tips. If your houseplant develops brown leaf tips, it may be indicative of a chemical or salt burn. This can be caused by overfertilization or exposure to salts present in tap water. You’ll want not only to reduce fertilizer usage but also to rinse the soil out to leach out some of the nutrients.
Removing dust
If you’re like me, you probably spend a decent amount of time dusting… vacuuming… dusting some more. And while this can seem like a never-ending battle against entropy, oh, the battle doesn’t end there with indoor plants.
Yup. Plants get dusty, and it can actually be a bit of a problem.
We don’t often recommend misting indoor plants, especially for raising humidity, but it’s super useful if you’re cleaning off the dust!
As dust accumulates on your plant’s leaves, it can block its fine stomata, the small holes on leaves through which carbon dioxide is taken in and oxygen is expelled during photosynthesis. When these pores are blocked, a decrease in the amount of light affects photosynthesis and impairs a plant’s health. Leaves without access to bright light are in for some trouble. You might notice them yellowing or showing some brown and black spots.
The solution is pretty easy: just use a damp cloth and gently wipe down your leaves every so often. Doing it as part of your watering schedule works great.
Tips:
- Wipe the leaves of large-leaved plants with a damp cloth and then use a dry cloth to dry them off
- Use warm (not cold) water and adjust the pressure before starting, as too much pressure or water could damage the plant
- Use a soft cloth or a soft-bristled brush for delicate, fuzzy-leaved plants
- Spray thinner-surfaced plants with lukewarm water and adjust the temperature and pressure beforehand
- Take your plants outside for a full shower once a month and let them dry before bringing them back indoors
There are some plants, like Tillandsia, that are epiphytic air plants. In nature, they attach themselves to other plants. These air plants can actually extract nutrition and water from the air (and dust!), so pay special attention to both keep their stomata functional but also not deprive them of that nutrition.
Repotting indoor plants
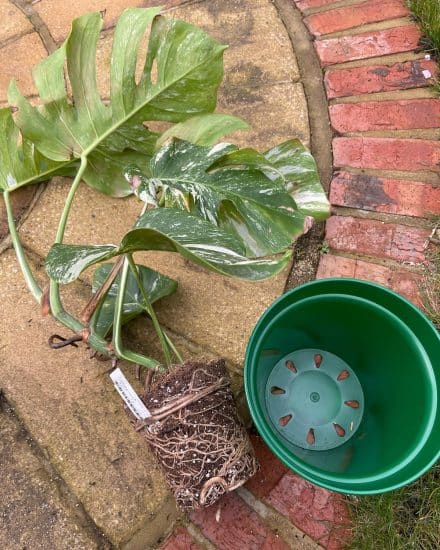
We get it; repotting plants can be stressful. They’re all safe and sound in their comfy container… and how do you know when to repot, anyway?
First, I want to assure you that you don’t always know if a plant is rootbound before taking a look: a potted plant hides a lot.
While sometimes you can see if roots are coming out of drainage holes (or you’ll have noticed that your container is draining more slowly already), often we just need to lift the plant up and knock that container off.
You’ll want to visually inspect the root cluster. If you do decide to repot, you’ll usually want to pick a container an inch or two larger so that the existing roots don’t become lost in a large container.
Remove/gently tap off some of the older potting soil and start pouring new soil into the container. You’ll want to use the same mix as before and fill it up so that your plant’s stems aren’t buried in new soil, but still sitting at the surface as before.
Avoid compacting the soil or really trying to pack it in. There’s some evidence that adding rocks/pebbles/drainage at the bottom actually encourages water to pool instead of drain, so just make sure your new pot has adequate drainage holes and that your potting mix is well-draining.
Tips:
- Choose a pot with drainage holes that is slightly larger than the current one
- Use the same potting mix as before
- Water the plant thoroughly after repotting
- Repot in the growing season
Embrace the challenge of repotting, take your time with it, and remember — no one is born an expert at taking care of indoor plants!
Pruning houseplants
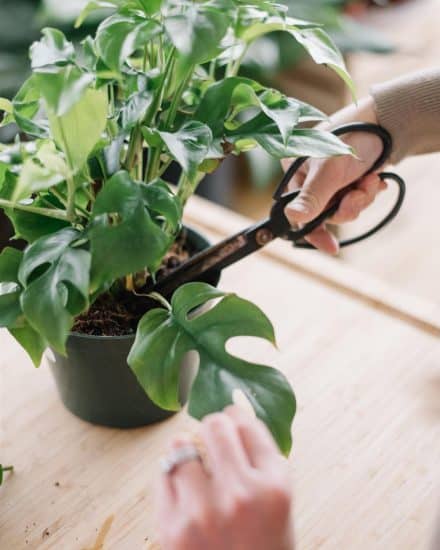
Pruning is an essential indoor plant care step: it doesn’t just keep your plants looking good, but also discourages pests and fungus from taking hold.
So, when should you prune indoor plants?
We recommend it during the growing season, from spring to early summer. This will give your plant time to heal and regrow without worrying about stressing it while it’s in its dormant period in the fall and winter. Though, if there is any damage due to frost or extreme cold, then you can trim off the damaged parts right away.
If possible, avoid cutting your plant. This might sound a bit confusing, but we’ll explain. Most pruning can be done without equipment (other than a pair of gloves). You’ll just pinch off (you can use a gentle twisting motion) the leaves that are yellowing or dying.
Waiting a few days for a dying leaf to really lose all green and crisp up before removing it gives your plant a chance to reabsorb any nutrients, and doesn’t leave a cut on the plant where disease/pests can infiltrate.
When we prune indoor plants, we really ensure that we’re not leaving any food for pests or fungi. Plus, it doesn’t hurt the appearance.
Deadheading is another type of pruning that (along with disbudding) can create large blooms. With disbudding, you’ll leave just a few buds, which means more nutrients can flow into those that remain to create larger flowers.
When pruning your indoor plants, keep these tips in mind:
- Use sharp, clean pruning tools to minimize damage and infection. Make sure to sanitize them before and after with boiling water or alcohol
- Get rid of dead, diseased, or broken leaves to avoid attracting plant pests
- Prune during the growing season when plants tolerate stress better
Growing season vs winter dormancy
When winter rolls around, our indoor plants need a bit of extra care. While the natural world outside slows down in preparation for the cold months ahead, the plants in our homes need some special attention as well to help them get through the winter without any hiccups.
As the weather starts to chill, your plants will likely enter a state of dormancy. The transformation starts at the cellular level, as hormones within the plant signal a decrease in photosynthesis and respiration. Additionally, temperatures that are too cold for growth mean that certain metabolic enzymes will stop working altogether, killing off leaves and causing plants to store as much energy as possible in their roots in order to help them survive.
Dormancy comes in two forms: endodormancy and ecodormancy. Endodormancy is when something inside the plant itself prevents any growth, even in sunny and warm conditions; while ecodormancy is when the plant’s growth is hindered by external environmental conditions, usually because it’s too cold.
So, what can we do to best ensure that our indoor plants receive the care they need during both the growing season and winter dormancy?
Here are a few tips from expert horticulturists:
During the dormancy stage, reduce amounts of fertilizer and water to prevent stressing your plant out, but be mindful to not wait until the last minute before reducing – try to start doing so earlier in the season, as it will be better for the plant.
It’s also essential to monitor the temperature and humidity levels within your plants’ environment – a cooler temperature in winter will usually cause them to enter their dormancy period earlier, so aim to keep them comfortable but not too warm or too cold.
Not all plants enter dormancy, so if you are still seeing vibrant growth during the winter, there’s no need to back off light, water, or fertilizer. We have plant care guides for the most popular houseplants, so be sure to look up your particular plant’s needs.
Dealing with toxic plants
Unfortunately, many indoor plants contain compounds that can cause skin and eye irritations, as well as poisoning in more severe cases. Knowing which plants to avoid, understanding the risks associated with them, and taking the proper precautions are essential for keeping your plants, home, and family safe.
Before bringing any new plants into your home, take the time to research their potential toxicity. While many plants require a large amount of their material to be consumed to cause serious harm, others, such as those containing calcium oxalate, can produce discomfort simply from skin contact. If a plant is known to be toxic, keep it away from children and pets.
Pets are particularly at risk from houseplants, so you’ll want to take a few precautions to minimize the chances of harm. If you have cats, keeping other healthy plants (like cat grass) available protects both them and the plant. You’ll also want to make sure that any water run-off from a planter is disposed of and that animals have plenty of fresh water available.
Next, let’s think about ourselves. Even if we’re unlikely to gnaw on our plants, there’s the potential danger of coming into contact with toxic plants while taking care of them. Remember to wear a pair of gloves when pruning or repotting, and be sure to wash up after handling.
Essential plant care accessories and supplies
We usually recommend that people start with what they already own, and not go out and buy a lot of supplies before they really know what’s going to be useful.
That being said, there are some essential items that can really help.
- Potting soil (regular + cactus/succulent mix) + perlite. These ingredients work for almost every plant.
- Pruning shears are fantastic to have on hand, but a pair of scissors you sanitize works great too, if that’s what you have.
- Watering can with a long spout. This makes it a lot easier to avoid the leaves and stems when watering. Treat that soil like a coffee pour-over.
- Terracotta pots with drainage holes. These will be porous enough to allow moisture to wick through, which helps prevent overwatering. Couple these with pot saucers to save your floors and furniture from any potential water damage — just make sure they don’t accumulate standing water.
- An all-purpose fertilizer, preferably liquid for easy diluting. Fertilizer is underused, in our opinion. Just make sure to use it correctly (diluted, infrequently) to avoid leaf burn or yellowing.
Picking plants based on the lighting conditions in your house
Just found the perfect plants for your home? Now comes the tricky part: figuring out where to put them! Before you move any of the plants out of their pots, the key question to ask yourself is: What is the lighting situation like in my home?
First, take a look at your windows and which direction they’re facing. Generally, south-facing windows will provide the brightest direct light, while west-facing windows give direct bright light in the afternoon. East-facing windows give more bright indirect light, and north-facing windows provide weaker bright indirect light.
Once you’ve got your light situation figured out, you can start exploring which plants are best for each room. Generally speaking, most houseplants like bright and indirect sunlight, whereas cacti and succulents such as Snake Plants and Jade plants can tolerate more direct light.
Lighting tips:
- Find plants that are compatible with the lighting available in your home
- If you have low light, either pick plants that thrive in those conditions or supplement with artificial lights
- If you find that direct sunlight is a bit intense for your plant, a sheer curtain may be helpful in diffusing it.
Conclusion
That’s it for our tips on taking care of indoor plants. We’ll summarize the highlights here for you:
- Most house plants thrive with lots of bright indirect light.
- Don’t allow the plant to sit in excess water.
- If you notice leggy growth or loss of variegation, your plant is probably in low light and needs more bright light shining its way. Consider moving it closer to a window or adding a grow light.
- Plant pests affect most houseplants, so don’t panic. Treat with neem oil and isolate until the problem resolves. Also, try to figure out if something was lacking with your houseplant care that weakened the plant to begin with.
- An indoor garden isn’t made overnight, so take your time and just add one indoor plant at a time.
- Hanging plants can really make indoor rooms look bigger — just make sure to avoid cold drafts or hanging them so high that they only receive moderate light.
Indoor plant care is an adventure. You’ll learn each of your plants and what it likes, and then if you’re anything like me… you’ll have to move and learn it all over again!
If you have any houseplant care tips that we missed out on, drop us a line on Instagram or Twitter.
Take care!
Sources
- https://warren.cce.cornell.edu/gardening-landscape/warren-county-master-gardener-articles/air-plants-tillandsia
- https://sites.uw.edu/libraryvoices/2020/04/15/whatever-the-weather-cold-weather-care-for-indoor-plants/
- https://extension.missouri.edu/publications/g6560
- https://extension.missouri.edu/publications/g6515
- https://today.oregonstate.edu/news/light-exposure-key-growing-successful-houseplants