
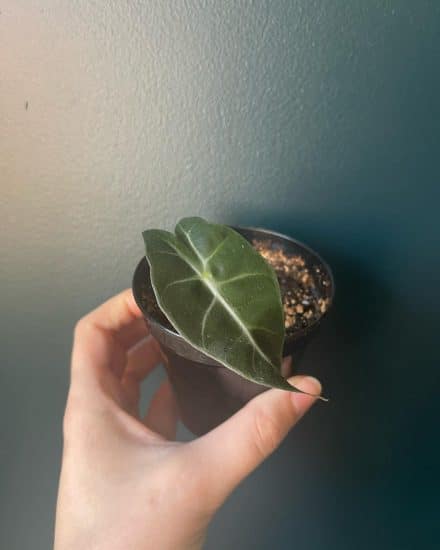
One of my favorite mutants: the beautiful Alocasia polly!
Alocasia Amazonica ‘Polly’ is a tropical plant prized for deep green and eggplant-colored leaves. As an indoor plant bred to be smaller than its parent, Alocasia polly is also perfect for less roomy spaces (or those already filled with plants).
While Alocasia polly is pretty easy to care for, there are a few difficulties unique to this plant. But don’t worry, we’ll cover them all, along with a watering schedule, the right amount of light, and how to avoid too much sunlight.
Table of Contents
Alocasia Polly Care Guide
History, habitat, and characteristics
Although the two are often mixed up, since they look almost identical except for size, Alocasia ‘Polly’ is actually a tinier mutant version of Alocasia ‘Amazonica’—and neither of them are from the Amazon! Here’s a brief rundown of how this mixup occurred:
The Alocasia Amazonica, the mother plant of Alocasia ‘Polly,’ also known as the African mask plant or Amazonian Elephant’s Ear, is a tropical plant from the Aracaea family. It used to be called Alocasia x amazonica, and it’s a hybrid of two parent plants:
- Alocasia watsoniana (aka Alocasia longiloba ‘Watsoniana’), from the tropical forests of southern China and Southeast Asia; and
- Alocasia sanderiana, from tropical forests in the Philippines
All well and good, but how did the term ‘Amazonica’ come into play? Turns out it’s named after Salvadore Mauro, a long-gone Florida greenhouse grower’s, business, Amazon Nursery. He produced the hybrid in the 1950s, but never registered the name officially.
(Nomenclature note: Although this plant was originally called Alocasia ‘Poly,’ it’s now commonly referred to as Alocasia ‘Polly.’ We’ll refer to it that way here throughout.)
And ‘Polly’? Travel ahead in time but stay in Florida still, please—Bill and Denis Rotolante found this smaller version of Alocasia ‘Amazonica’ in their stock at Silver Krome Gardens. They originally named it Alocasia ‘Poly’ because they thought the plant was a polyploid, which means it has double the amount of normal chromosomes and can change a plant’s shape, size, or other traits.
Spoiler alert: they were wrong. But the name stuck and eventually mutated to ‘Polly,’ as it’s commonly known now.
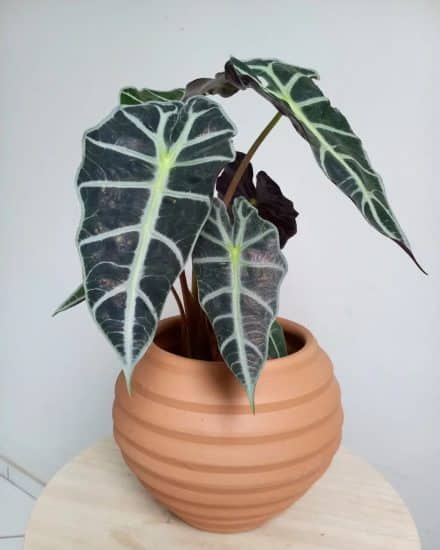
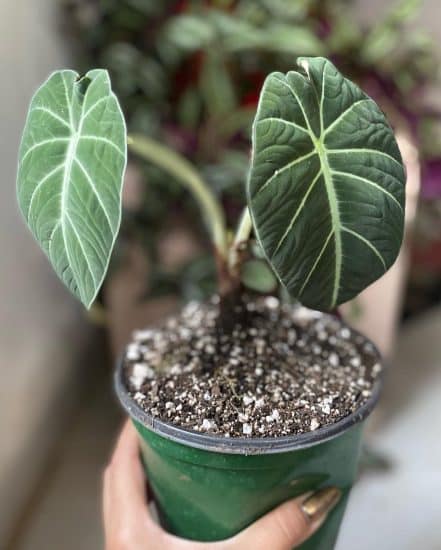
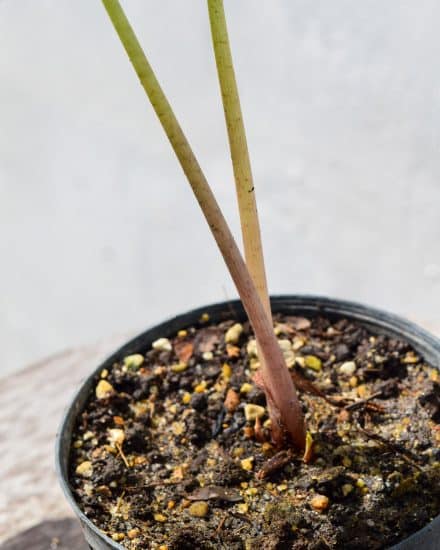
The Alocasia polly plant has long arrowhead-shaped leaves with striking white veins and a dark green base that gets lighter towards the middle. If you look under its leaves you’ll notice deep purples and pinkish stems.
Alocasia polly is a smaller version of the Alocasia x amazonica. It only grows 18 to 24 inches tall and 10 inches wide, although its leaves can grow to be 16 inches. It grows relatively slowly and can take anywhere from five to 10 years to fully develop. Like Alocasia amazonica, it’s rhizomatous, which means its root system grows horizontally underneath the soil.
Alocasia Polly Varieties
Besides Alocasia polly, there are some equally gorgeous alocasia varieties in the amazonica family:
- Alocasia amazonica: as you already know, ‘Polly’ is a smaller version of Alocasia amazonica. It more or less looks identical, but Alocasia amazonica leaves can get up to two feet in diameter, and its stems can grow to be four feet wide and six feet tall.
- Alocasia amazonica ‘Bambino’: the smallest Alocasia amazonica, measuring less than a foot tall/wide with leaves that max out at 6 inches long (how cute!). This dwarf version features purple leaf undersides, and deep green leaves with silver veins.
- Alocasia amazonica ‘Ivory Coast’: while this variety resembles the other hybrids in the alocasia and amazonica collection, it doesn’t have their trademark wavy edges. It also grows at a rapid pace, up to 2-3 wide and 3-4 feet high.
Now that you’re familiar with the varieties of Alocasia polly, let’s learn about care and this plant’s preferred environmental conditions.
Light
Alocasia polly plants do best in bright, indirect light. Remember, they bask in filtered light through a tree canopy in their natural habitat, so you want to mimic this as closely as possible. My alocasia plant thrives directly in front of a window where it gets bright indirect sunlight, as opposed to several feet away.
If you have a south-facing window that lets in too much direct light, however, moving your plant farther away from the window is your best bet, since the direct sun will scorch its leaves.
Make sure to rotate your plant every so often to keep light coverage even on all its leaves. This will prevent some of your Alocasia polly’s leaves from growing bigger and making the plant look lopsided.
If your plant isn’t getting enough light and you want to supplement with a grow light, make sure it has a spectrum of 4000k to 6000k and a light intensity of 4000 lux or lower for best results.
Water
Don’t rely on a strict watering schedule to maintain your Alocasia polly. Instead, dig a finger into the first one or two inches of soil. If it’s dry, you should water your plant. If it’s damp, your plant doesn’t need to be watered just yet.
Generally speaking, depending on the season and your geographic location, this plant will need water approximately once a week or every two to three weeks. I like to use distilled water, bottled, or rainwater with my alocasia plant to prevent salt and chemical residue buildup. Of course, like all plants, it will need less water in winter.
Alocasia polly loves being watered often, but it doesn’t like to be overwatered or left sitting in soggy soil for long periods of time. If this happens, it might be triggered into dormancy, which means it will lose all of its leaves and stop growing, just as it does in winter.
Temperature and humidity
Alocasia polly thrives in high humidity and warm temperatures. Outside, it grows best in USDA zones 8 to 11. Indoors it prefers common household temperatures of 60 to 75 degrees Fahrenheit, along with humidity levels at or greater than 50%.
Aloasia polly isn’t winter-hardy and despises when temperatures drop suddenly, so be sure to keep it away from drafty windows or vents.
If your home isn’t naturally humid enough for your Alocasia polly, all is not lost. There are some easy ways to increase the humidity around it, like:
- Placing a pebble tray filled with water under your plant, this raises the humidity in the local environment without raising it in the rest of your home.
- Placing plants that share humidity needs together so they can benefit from each other (a process called transpiration). If you have one, a greenhouse cabinet could be ideal for this plant.
- Running a humidifier close to your plant.
- Putting your Alocasia polly in a more humid area, like the bathroom or kitchen, as long as they get enough bright but indirect light.
- Misting your Alocasia Polly’s leaves, which will raise the humidity level around it temporarily.
Soil and planting
Alocasia polly requires moist but not sopping well-aerated soil with good drainage. You can buy an aroid soil mix from a garden store or craft your own. Personally, I like to use a mixture of:
- 25% sphagnum moss, mossy peat, or coco coir (helps retain water)
- 25% potting soil (helps retain water)
- 25% perlite (helps soil drain)
- 25% orchid bark or pumice charcoal (helps soil drain)
As long as your mix includes ingredients that help with water retention and drainage in a ratio that allows the soil to remain moist but drain quickly, it will be ideal.
Fertilizer
It’s a good idea to fertilize your Alocasia polly plant once a month during the growing season, preferably while watering. A balanced, water-soluble liquid fertilizer like NPK 20-20-20 is the way to go. N stands for nitrogen, P stands for phosphorus, and K stands for potassium, which are the three main macronutrients that keep your plant healthy.
Your Alocasia polly doesn’t need fertilizer during the winter months, since it will be dormant during this time and won’t be able to uptake the nutrients. In fact, fertilizing it during winter can do more harm than good due to potential chemical scorching.
Pruning
Alocasia plants don’t require pruning other than normal maintenance like cutting off any dead or dying leaves. This ensures the plant can continue to direct its resources toward healthy leaves.
Repotting
Alocasia polly actually likes being slightly root bound, plus it’s a slow grower, so it will probably only need repotting every few years. When you repot it, make sure to select a container that has at least one adequate drainage hole and a wide, shallow shape so its roots (remember, sideways growers!) can grow freely.
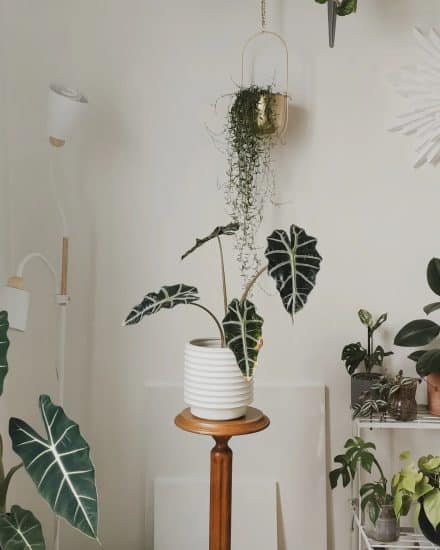
Since this plant needs moist soil, I recommend forgoing a terracotta pot in favor of a glazed ceramic one — it will retain moisture better and you’ll need to water your Alocasia polly less frequently.
We’ve discussed the necessary environment and maintenance for recommended Alocasia polly care—now let’s break down how to propagate it!
Propagation guide
Alocasia polly grows from a central corm, which is a ball of fibrous tissue resembling a bulb. This means the most surefire way to propagate them is by rhizome division during the growing months.
To propagate your Alocasia Polly by division:
- Take the plant out of its container and gently brush off excess soil. This plant grows in a clumping manner, which makes it easy to see where to divide the different clusters. Take a look at a helpful video about how to do that here (the plant in the video is an Alocasia amazonica, but the process is the same).
- Carefully pull the clumps you want to separate apart. If they’re tangled up, use a clean, sharp knife to cut them apart vertically. Be sure not to damage their root systems in the process.
- At this point, the clumps you’ve separated may have roots or not. If they do, you’re in luck —all you have to do is plant them in the same potting soil you used for the mother plant and keep it moist.If your clumps don’t have root systems, that’s okay, too. Put those in sphagnum moss or water first for several weeks so their roots develop. Then put them into an aroid soil mixture.
Now that your alocasia plant propagation skills are up to par, let’s tackle the most common Alocasia polly diseases and pests, and what to do about them.
Common issues
Let’s get into a few of the most common issues you’ll find with your Alocasia polly. Keep in mind, these are common for a reason: even the greenest of thumbs can experience these issues. Fortunately, they’re easy to detect and the solutions are pretty simple and completely in your control.
Drooping Leaves. If your Alocasia polly has droopy leaves, that’s a telltale sign of too little water or light. Locate it in a spot where it gets plenty of indirect bright light (never direct sunlight!), and perform the finger in soil test to see if it needs watering.
Yellow leaves. If your plant’s leaves are yellowing, it means one of two things: it’s getting either too much water or too little. Make sure to keep your Alocasia polly out of direct sunlight and only water it when the top two inches of soil are dry.
Crispy brown leaves. Is your plant’s soil dry? Alocasia polly is not drought tolerant. Brown leaves crisping at the edges could mean it isn’t getting enough water. Water it frequently to maintain a moist environment and ensure it’s in well-draining soil. If leaves are brown and curling, it needs more humidity or less harsh sun.
Dying Leaves: Leaves will naturally die off during this plant’s winter dormant period. Note also that some aging leaf yellowing and death is natural as your Alocasia polly plant ages.
If you do notice leaves dying during the spring and summer months you may need to increase the temperature around your plant or change its watering schedule. Move it away from drafty areas and pay close attention to keeping its soil moist but not sopping.
Diseases and pests
Alocasia polly can be prone fungal infections, as well as spider mites and other pests. Catch and handle any diseases or bug issues early, and be sure to address the underlying issues that led to a weakened plant. Also, if you suspect fungus or pests, isolate the plant away from its neighbors while you take care of it so that the issues don’t spread.
Root Rot
Root rot shows up in the form of mushy stems and wilting yellow leaves, along with slow growth. Avoid root rot by watering at a measured pace and making sure your plant’s soil isn’t overly saturated.
If you suspect this is the issue, gently remove the root ball from its container, snip off any roots that are black or overly soft, along with dying stems and leaves, and repot your plant in fresh soil in a pot with adequate drainage holes.
Fungus
Rust is a fungal disease that can cause your Alocasia polly to get brown or orange spots on its leaves. It often occurs when foliage is too wet. Cut off any discolored leaves, don’t mist them in the future, and ensure when watering to only wet the soil, not the plant itself.
Bugs
Alocasia polly are especially susceptible to spider mites, which love the hot environment these plants need. It can also be beset by whiteflies, aphids, or leafminers, all of which can cause brown and yellow patches on leaves and general discoloration.
To fight a bug infestation, use soap and water or diluted neem to spray your plant’s leaves and stems thoroughly, top to bottom. Clean the leaves of your Alocasia polly frequently with a damp cloth to remove pests and encourage healthy growth.
Conclusion
The Alocasia polly plant is an adorable smaller version of the Alocasia amazonica. It thrives in indirect bright light, a humid environment, and normal household temperatures. Make sure to place it in a potting mix that drains well to keep it moist but not totally soaking wet. Propagate it by division, and you’ll be well on your way to making new mini amazonicas!
Do you have an alocasia ‘Polly’ or perhaps an even smaller dwarf alocasia ‘Bambino’? Let us know and send in some pictures! If this article was helpful, feel free to share it with a friend or ask us a question if you’re having any issues.
FAQ
Are Alocasia Polly hard to take care of?
Like all alocasia plants, this variety isn’t a “set it and forget it” type like, say, Sansevieria. But I wouldn’t say it’s difficult to care for. Rather, it requires you to pay close attention to its heat, humidity, light and soil moisture levels, which might need a little adjusting at the start to get just right.
How do you make Alocasia Polly grow more leaves?
The key to getting the luscious large leaves and growth Alocasia Polly is known for is simple: light, light, and more light! As long as it receives plenty of bright and indirect light every day, your plant will put out large healthy leaves naturally.
Is Alocasia polly safe to touch or for pets?
Per the ASPCA, the alocasia polly plant should be handled carefully by humans and avoided by animals due to the calcium oxalate crystals its stems and leaves produce.
Sources
- https://www.rhs.org.uk/plants/96161/alocasia-x-amazonica/details
- https://www.missouribotanicalgarden.org/PlantFinder/PlantFinderDetails.aspx?taxonid=250070&isprofile=0&=
- https://www.aroidpedia.com/journal/alocasia-amazonica
- https://www.aspca.org/pet-care/animal-poison-control/toxic-and-non-toxic-plants/alocasia
