
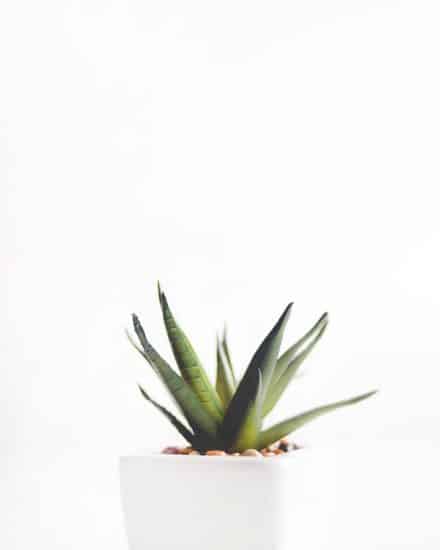
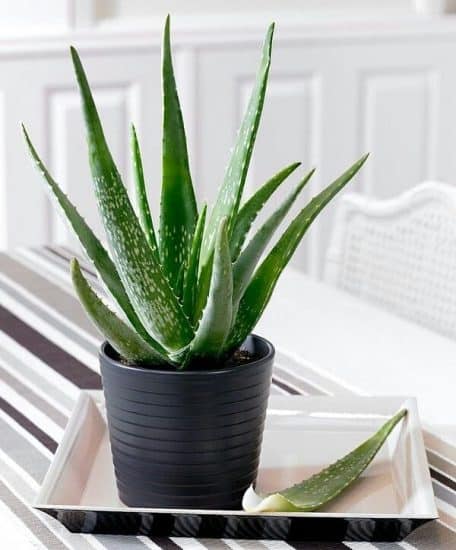
The Aloe Vera plant is famous for being low-maintenance and offering numerous benefits. This versatile plant, sometimes fondly referred to as the “plant of immortality,” is a true multitasker.
Its thick, fleshy leaves store water and contain soothing aloe gel, which can come in handy for sunburns and other scrapes.
We’ll teach you everything you’ll need to know about Aloe Vera care, from its ideal light and temperature conditions to the most common issues we see. We’ll also cover propagating new Aloe Vera plants (in case you want to get that aloe gel factory up and running)!
Table of Contents
Aloe Vera Plant Care Guide
History, Habitat, and Characteristics
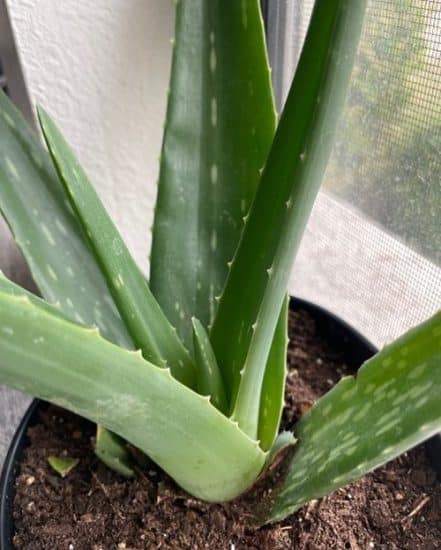
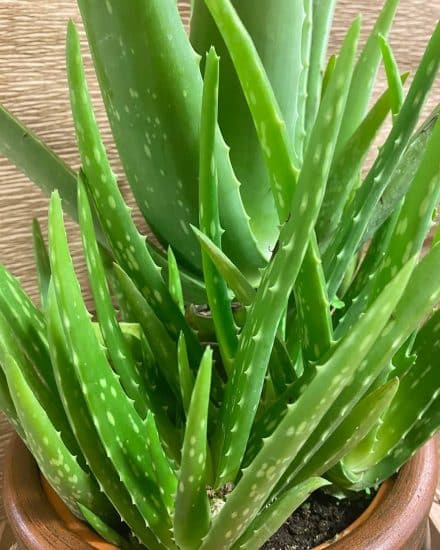
Aloe Vera (Aloe barbadensis miller), originating from the Arabian Peninsula, is a real survivor, spreading and thriving in diverse and challenging terrains. When we take a close look at this plant, it shows us exactly how it’s been able to be so successful.
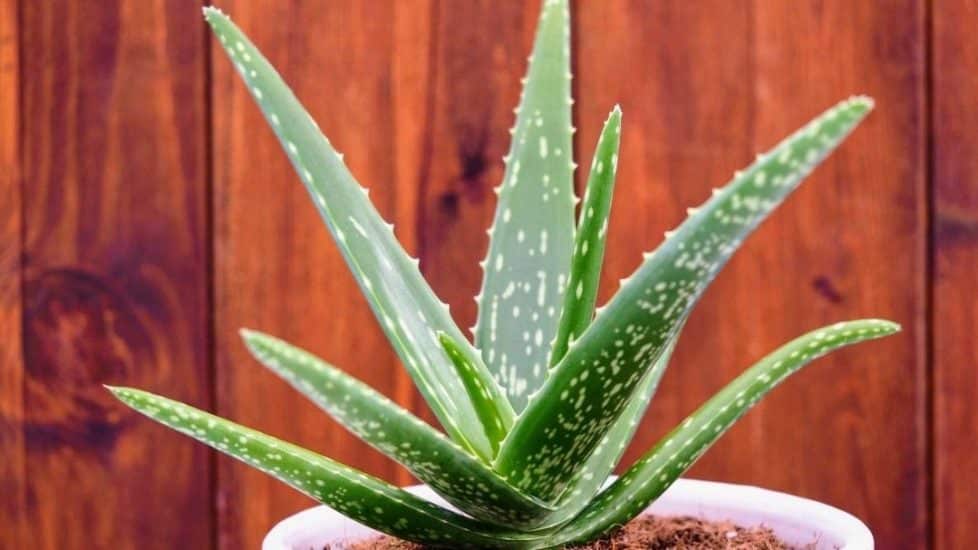
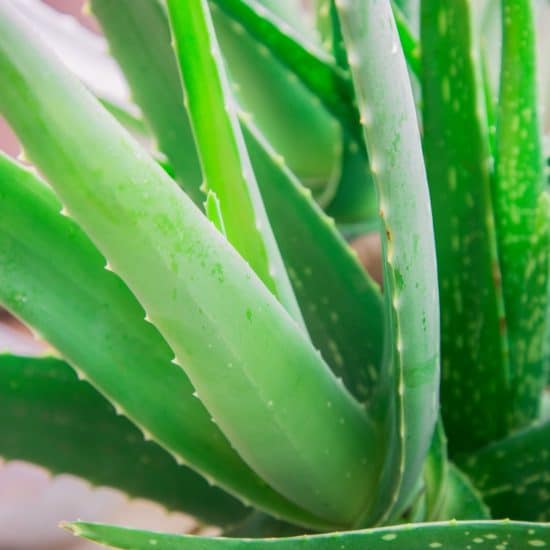
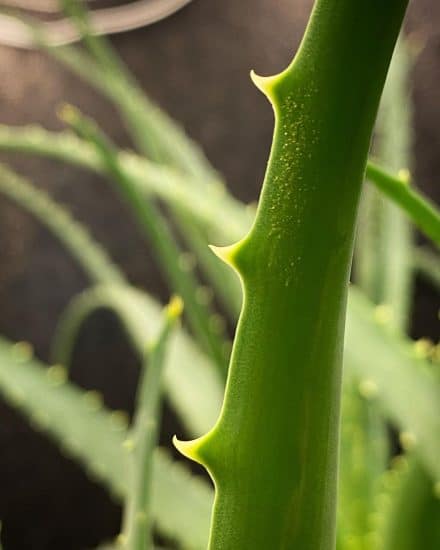
This succulent boasts a shallow root system and plump, tapered leaves. The leaves, all aboard a U- or boat-shaped cross-section, may feature prickles along their edges or surfaces.
As Aloe Vera grows, it forms stunning rosettes and can adopt various growth forms, such as stemless, tree-like, or even creeping across the ground like a leafy explorer.
Aloe Vera is in good company among hundreds of other plants in the genus Aloe, including the popular Aloe arborescens, or Krantz Aloe, and Aloe polyphylla, or Spiral Aloe. But it’s Aloe Vera that’s the most popular, commonly associated with its medicinal and skin-care properties.
And now, a little aloe-lujah moment:
As the Aloe plant matures, it may develop woody stems or protect itself with a “skirt” of dead leaves around the base.
And let’s not forget the pièce de résistance: its vibrant blooms! Growing on long stalks, Aloe flowers add a pop of color with hues of red, orange, cerise, or yellow.
Light
Growing Aloe Vera plants love a good dose of sunshine, and do well in full sun or an otherwise bright spot. While their darker-hued leaves can manage with less light, blue-tinted leaves favor more intense bright light.
(When it comes to seedlings, keep them away from high-intensity sun to prevent damage).
Not enough light might cause your Aloe Vera plant’s leaves to become thin, weak, and elongated as the plant “reaches” for sunlight. In such cases, you may also observe slow or nonexistent growth and fading of its vibrant green color.
On the other hand, excessive light can lead to burnt appearances on Aloe leaves, with brown or yellow patches. Even the tips of the leaves might turn dry and crispy. In some cases, excessive sunlight can lead to the paling of the Aloe plant’s green leaves.
Lighting tips:
- Emulate Aloe’s natural habitat by positioning it near a south- or west-facing window, ensuring adequate light.
- Consider using artificial light, such as a grow light (LED, preferably), for supplemental lighting if natural light isn’t easily accessible.
- Pay attention to the color of your Aloe plant’s leaves and adjust the light accordingly — darker leaves cope better with less light, while blue-tinted leaves require more intensity.
- Rotate your Aloe Vera plant occasionally, ensuring even exposure to light for the entire plant.
- Shield young Aloe Vera plants from harsh sunlight by placing them further from the window or using a sheer curtain to diffuse the light.
Water
Aloe Vera plants are succulents, meaning they store water in their leaves. This means they need less water than non-succulent indoor plants. Water your Aloe plant when at least the top tw/o inches of the soil has gone dry, otherwise you risk overwatering.
Overwatering your Aloe Vera will lead to soft, mushy leaves that may show discoloration. In this swampy scenario, you may spot brown or black spots on the leaves, signaling a case of root rot.
To fix this, reduce your watering frequency and ensure the potting soil dries out properly between waterings.
If your Aloe Vera isn’t getting enough water, the Aloe leaves will become thin, wrinkled, or curled. You might also notice the Aloe leaf tips turning brown as a result of underwatering.
To remedy this, adjust your watering schedule to deliver more frequent moisture to your thirsty Aloe Vera plant.
Our watering tips:
- Use a well-draining soil mix to avoid waterlogged roots and allow your Aloe Vera plant to dry out efficiently.
- Practice the “finger test” by feeling the soil a few inches deep. If it’s dry, your Aloe Vera plant is ready for a drink.
- Ensure your Aloe Vera pot, whether it’s plastic, ceramic, or terra cotta, has drainage holes for excess water to make a smooth exit.
- Pay attention to seasonal changes and humidity levels in your home. These factors can impact your watering schedule, so make necessary adjustments to keep your Aloe Vera hydrated and happy.
Temperature and Humidity
Proper Aloe Vera plant care involves ensuring warm temperatures for optimal growth. Aim to keep indoor temperatures between 55-80°F (13-27°C) for a happy, healthy aloe.
Aloe Vera plants can handle various temperatures, but yellow, mushy leaves are a red flag signaling chill damage.
To prevent chill damage, always keep your aloe vera away from drafty windows and doors, especially during the colder months.
Aloe Vera plants like moderate humidity around 40%-50%. Too much humidity can lead to issues like root rot, while too little humidity may cause dry, shriveled leaves. Keep an eye on your home’s humidity levels and adjust as needed.
Got too much humidity? Watch out for signs of rot, such as blackened or mushy leaves. On the other hand, if your Aloe Vera plants can handle various temperatures, but yellow, mushy leaves are a red flag signaling chill damage. needs more humidity, you might notice brown leaf tips or dry, wrinkled leaves.
To raise humidity:
- Create a mini oasis with a tray of water and pebbles placed beneath the plant.
- Bring out the big guns (aka a humidifier) to raise the humidity in the room.
- Let your Aloe Vera plant socialize by grouping it with other plants, allowing them to share moisture through a process called transpiration.
Remember, misting the leaves won’t solve the problem. Instead, to care for Aloe Vera plants properly, wipe the leaves with a damp cloth to remove dust bunnies and potential insect pests.
Soil and Planting
Plant Aloe Vera in a well-draining potting mix that allows its delicate roots to breathe easily.
To create the perfect soil composition for growing aloe vera, create a potting mix that’s a combination of these materials:
- Perlite
- Horticultural sand
- Clay
- Volcanic stones
This gritty mixture ensures proper drainage, preventing the dreaded root rot. Terracotta pots and plastic pots are excellent options for Aloe plants because they offer superior moisture control. Ceramic pots are likely to retain excess moisture, which your Aloe plant won’t love.
When it comes to fertilization, applying a succulent fertilizer can give them a helpful boost. During the growing season in the spring and summer, it’s a good idea to fertilize your indoor Aloe plant on a monthly basis.
However, if you happen to skip a few months, don’t worry — your plant will still survive. Aloe plants aren’t heavy feeders.
Beware of over-fertilizing, though, which can lead to soft, mushy leaves and root damage. If you spot these signs, simply cut back on the amount and frequency of fertilization while flushing the soil with water to wash away any excess fertilizer buildup.
Propagation
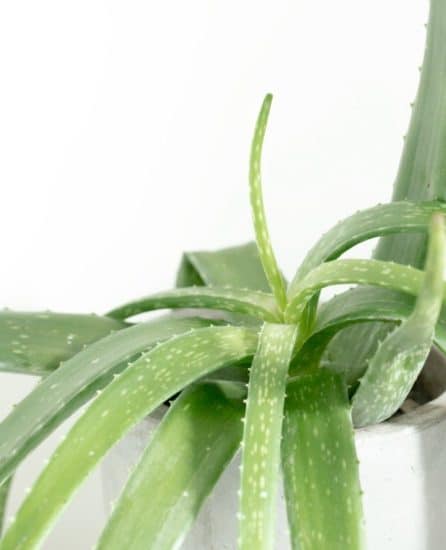
Pup division is an easy method for propagating Aloe Vera, and we prefer it to leaf cuttings. We’ve put together a step-by-step guide to help you successfully grow Aloe Vera plants at home.
Propagating Aloe Vera via pup division:
- Choose the right pups: Start by identifying healthy Aloe Vera pups growing around your Aloe plant. Look for offsets that are about 1-2 inches in size and have their own root system or a small part of the stem.
- Gather your tools: Make sure you have a clean, sharp knife or gardening shears, a pot with drainage holes, fresh potting mix, and a watering can or spray bottle ready to go.
- Separate the pups from the parent plant: Carefully use your knife or shears to remove the chosen pups from the mother plant. Ensure each pup has some roots or a small part of the stem for better growth chances. Be gentle to avoid damaging both the Aloe pups and the parent plant.
- Let the pups dry out: After detaching the pups, leave them in a shaded area for a day or two to let the cut ends form a callus. This helps protect the young Aloe plants from infection and rot when planted.
- Plant the pups in fresh potting mix: Fill a pot with the well-draining mix we described above, create a hole in the center, and place the Aloe pup in the hole, covering with soil to anchor it. The pup’s base should sit just above the soil line.
- Give the new pups a good drink: Thoroughly water the pup, ensuring the soil is moist but not soaked. Let the soil dry out slightly between waterings for healthy root development.
- Care for the new plants: Place the propagated Aloe Vera pup in a spot with bright, indirect sunlight. Gradually increase the light exposure over a few weeks. Keep an eye on the Aloe plant and adjust its care as needed.
Our propagation tips:
- Wait for the Aloe pups to develop roots or stems before attempting propagation, improving the odds of successful plant growth.
- Always use clean, sterilized tools when removing pups to minimize infection or disease risks.
- Check on the new Aloe plants regularly, making sure they receive enough bright light, water, and nutrients for healthy growth. Adjust care as necessary.
Common Issues
Aloe plants are usually low maintenance and easy to care for, but they can encounter a few issues along the way.
Yellow Leaves
Overwatering or exposure to cold temperatures can lead to yellow, mushy leaves on your Aloe Vera plant. To spot this issue, look for leaves that feel soft and mushy, not just yellow in color (this indicates the problem goes beyond simple discoloration).
The key to solving this issue is adjusting your watering habits. Let the soil dry out completely between waterings, and keep your plant in a location with stable temperatures, ideally between 55-80°F or 13-27°C.
Red Leaves
When Aloe Vera leaves turn red, it’s often due to intense sunlight exposure. Interestingly, this reddening is also a natural protective mechanism for the plant.
While it’s not necessarily a cause for alarm, it is a good idea to ensure your Aloe Vera is receiving enough bright, indirect light, rather than direct sun, which can be too harsh.
To achieve this, place your plant in a spot that offers bright light without exposing it to full sun. If you think the redness might be causing harm to your Aloe Vera, simply move it to a location with partial shade or use a sheer curtain to filter the sun’s rays.
Pests and Diseases
Pests
Occasionally, your Aloe Vera might become a home for pests like mealybugs or scale insects. Mealybugs resemble tiny cotton-like clusters on the leaves and stems, while scale insects appear as small (often brown or white), flat oval-shaped bumps.
Don’t worry! Here’s how to tackle these pests:
- First, isolate your Aloe Vera to prevent any unwanted visitors from spreading to your other plants.
- Next, use a damp cloth or cotton swab dipped in rubbing alcohol to gently wipe the plant and remove the bugs.
- In case of severe infestations, apply horticultural oil or insecticidal soap. Just be sure to follow the directions on the label.
- Keep an eye on your Aloe Vera to ensure the pests don’t return, and follow our care guide to ensure a healthy plant, which will be less inviting to pests.
Aloe Rust
This is a fungal issue that may cause round, brownish spots on your Aloe Vera’s leaves. If ignored, the spots can multiply, leading the leaves to yellow and die off.
To treat rust, carefully remove all affected leaves and dispose of them. Don’t compost the infected parts. This can spread the fungus. Apply a fungicide specifically designed for aloe rust according to its label instructions.
We all suggest shifting your Aloe Vera to an area with better air circulation. This helps reduce humidity and discourage fungal growth.
Conclusion
That’s a wrap for our Aloe Vera care guide!
Aloe Vera really is an easy plant to care for indoors. Unlike many ornamental plants, it can also be used to produce aloe vera gel, which hopefully you won’t ever need!
Aloe Vera plant care summary:
- Aloe Vera plants thrive in bright light.
- Water these succulents sparingly, ensuring the soil dries out between waterings, and always use a well-draining soil mix.
- Maintain a temperature range of 55-80°F, and aim for moderate humidity levels.
- Fertilize monthly during the growing season, but be cautious of over-fertilization, which can lead to mushy leaves and root damage.
- Propagate your Aloe Vera through pup division, creating new plants from a single mother plant.
We hope this guide has been helpful in helping you learn the ins and outs of aloe vera plant care. If you have any questions or concerns, don’t hesitate to reach out to us on Facebook or Instagram.
Take care, and happy planting!
FAQ
Can you grow plants that produce Aloe Vera gel?
Absolutely! Aloe Vera plants are known for their incredible gel content, which offers numerous health and beauty benefits.
To maximize your Aloe Vera plant’s gel production, choose a healthy, mature aloe plant (ideally 2-3 years old) because younger plants won’t produce as much gel. Provide the right conditions, including ample sunlight and fast-draining soil. Water the plant sparingly to avoid overwatering, which can lead to root rot and poor gel production.
Finally, harvest the leaves properly by removing the largest, outermost leaves at the base of the plant. This promotes new growth and results in more gel-filled leaves.
Remember, patience is key. Your Aloe Vera plant will need some time to replenish its leaves and gel content after each harvest, so allow it to grow and recover before harvesting again.
Can you grow Aloe Vera plants for their juice?
Yep! Juice is extracted from the leaves of the Aloe plant, and it’s an excellent natural remedy with numerous health benefits. So yes, you can absolutely grow Aloe Vera for its juice!
Just like growing Aloe Vera for gel, providing the right growing conditions will encourage your Aloe Vera plants to produce plenty of leaves for juicing.
To make your own aloe vera juice:
- Choose a healthy, mature plant for juicing (2-3 years old is ideal).
- Harvest the largest, outermost leaves from the base of the plant.
- Wash the leaves thoroughly and remove the spines on the sides.
- Fillet the leaves to obtain the clear gel within (avoiding the yellow latex layer).
- Place the gel in a blender and add water or a mild fruit juice to taste.
- Blend and refrigerate the mixture for up to a week.
- Enjoy your homemade juice!
Can you grow Aloe Vera outdoors?
Growing Aloe Vera outdoors is definitely possible, but it largely depends on your climate and location. Aloe Vera plants thrive in warm, sunny environments (zones 9-11) and can handle temperatures between 55-80°F.
If you live in an area where temperatures fall below 50°F, consider growing your Aloe Vera plant outdoors in a container. This way, you can easily bring it indoors during colder months to prevent chill damage. If your outdoor space has limited sunlight, make sure to place your Aloe Vera in a spot that receives at least 6 hours of direct sunlight each day.
Water your outdoor Aloe plant sparingly, allowing the soil to completely dry out between waterings, and take care to protect it from heavy rainfall or overly wet conditions. In arid climates, you’ll need to water potted plants more often than you would indoors, especially if they’re in full sun.
Is Aloe Vera toxic?
While the gel is considered edible, the aloe leaf can produce aloe latex, which is considered toxic to pets by the ASCPA.
