
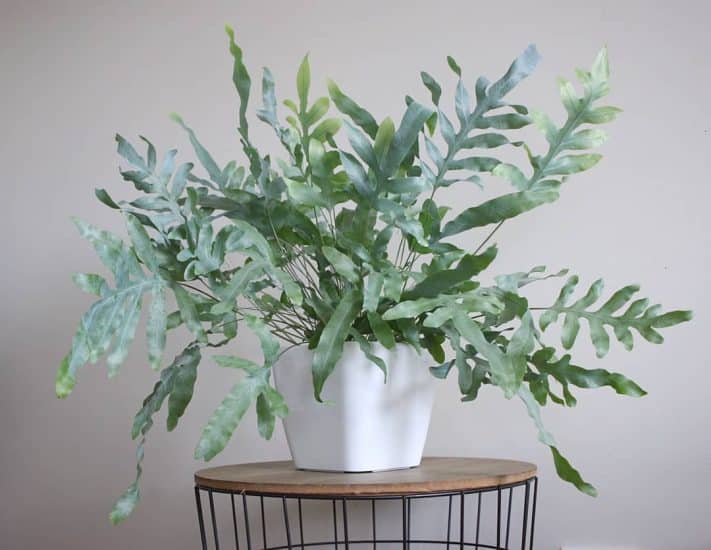
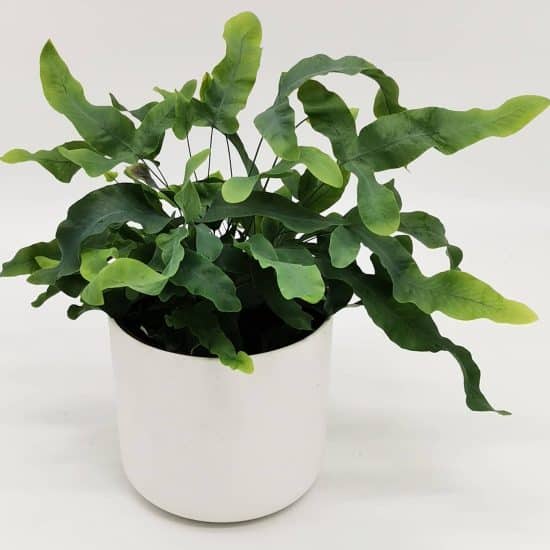
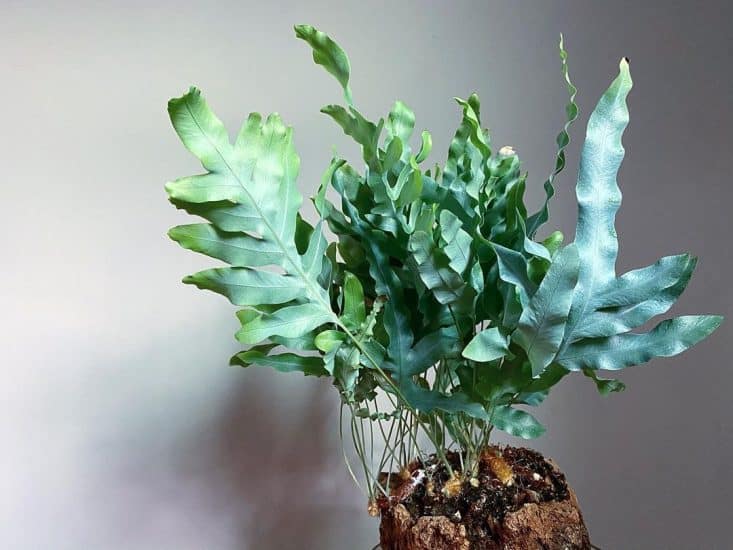
With its blue-green fronds dancing playfully from the pot, the Blue Star Fern brings an extraordinary pop of color to any room. It’s also a relatively low-maintenance plant that won’t give you any sass for occasionally forgetting to water it.
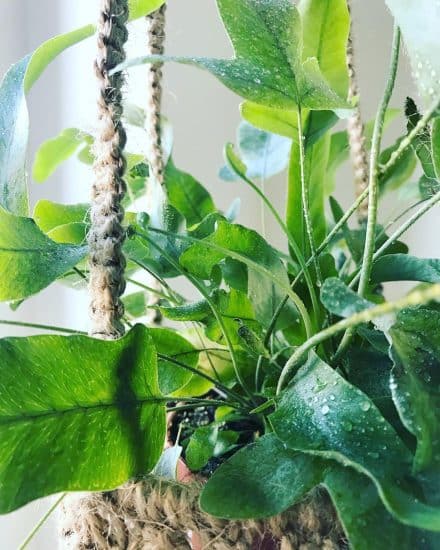
Now, you might be thinking, “A fern that doesn’t need constant attention? You’ve got to be kidding me!” While it may seem too good to be true, we assure you, the Blue Star Fern is very real and eager to grow without much help. (And it looks fabulous in a hanging planter!).
In our Blue Star Fern care guide, you’ll learn everything you need to know to keep this ferntastic species healthy and happy.
Table of Contents
Blue Star Fern Plant Care Guide
History, Habitat, and Characteristics
The Blue Star Fern (Phlebodium aureum) is native to North and South America. In fact, it’s the only phlebodium species found in North America!
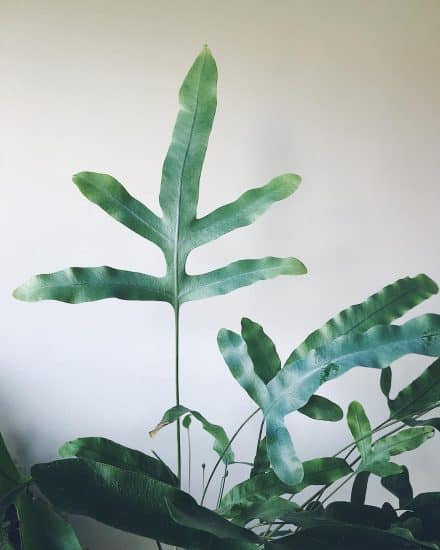
In nature, this epiphytic fern grows right on trees, soaking up moisture and nutrients from its surroundings. It features long, thin, blue-green foliage that grows in a bushy pattern and slightly curls.
One of the Blue Star Fern’s special features are its rhizomes — modified stem tissues that help it collect precious water. These rhizomes wear a golden yellow fuzz, kind of like a stylish outfit. And let’s not forget about those gorgeous leaves! With a look similar to staghorn ferns, these ferns are real head-turners.
In addition to staghorn ferns, the Blue Star Fern is often mistaken for the blue rabbit’s foot fern, which features similar leaf structures. Not only that, but it also shares a nickname with a palm tree. Blue Star Fern is also known as cabbage palm fern, but there’s a cabbage palm tree, Sabal palmetto, that doesn’t resemble the Blue Star Fern at all.
Fun fact: The Blue Star Fern isn’t just about tree-hugging! It’s found growing in rock crevices, too, proving its resilience in diverse environments.
Light

Blue Star Fern likes low to medium indirect light. For best results, provide your Blue Star Fern with filtered light or dappled shade that mimics what it receives in its native habitat. An east- or north-facing window will be ideal to give it ample light without scorching its leaves.
This fern species can thrive in some indirect bright light, but avoid too much direct sun. While they’re more sun-tolerant than many other fern species, if you must place your Blue Star Fern in a west- or south-facing window, set it a few feet away or use a sheer curtain to diffuse the light.
Too much direct light can lead to brown, crispy, and wilted Phlebodium aureum foliage. Of course, some houseplant collectors will overcorrect and give their ferns insufficient light. If your Blue Star Fern is getting too little light, you might notice slow growth, weak and leggy stems, and leaves that stretch toward the nearest light source.
Our Blue Star Fern care lighting tips:
- Position your fern near a north- or east-facing window for the perfect amount of indirect sunlight.
- If your fern is close to a west- or south-facing window, scoot it a couple of feet away to protect it from excessive sunlight or filter the light with a sheer curtain.
- If you spot slow, leggy growth and leaves reaching for light, your fern could use more light.
- Watch for leaves that turn brown, crispy, and wilted, signs that your plant is getting too much direct sunlight.
Water
The Blue Star Fern, like other fern species, like moist soil, but won’t appreciate being soaking wet. Give it room-temperature water, preferably filtered or distilled, about once a week (or twice if it’s outside). Feel the soil surface regularly — there shouldn’t be dry soil, but it should feel more like a wet sponge that’s been squeezed out.
Blue Star Ferns are tough cookies and can handle more drought than many ferns out there, but you’ve still got to maintain a moist environment. Insufficient water can cause Phlebodium aureum foliage to become dry, brittle, or wilted. If you spot these signs, your fern needs more water.
On the other hand, too much water can lead to yellow or brown fronds, a mushy base, or even a stinky smell. If you think you’ve gone overboard with the water, let the soil surface dry out a bit before you water again.
Our watering tips:
- Keep Blue Star Fern soil moist, and check for proper moisture by sticking your finger a couple of inches into it. It should feel damp but not soaking wet.
- When you water your fern, dampen the soil evenly. Resist the urge to pour water straight onto the crown.
- It’s okay for the soil to dry out a bit between waterings when the weather is cooler or during slow growth periods.
Temperature and Humidity
Phlebodium aureum flourishes in standard household temperatures, which generally range between 60 and 75°F (16-24°C). While they can tolerate a bit of fluctuation, it’s essential to keep them away from cold drafts, open windows, or direct heat sources, because extreme temperatures can harm the plant.
Blue Star Fern prefers a humid environment, with humidity levels between 40% and 60%, which is typical for most homes. If you notice the fronds starting to crisp on the edges or developing brown tips, the humidity might be too low. However, if your Blue Star Fern begins to show signs of a sick plant, such as wilting or fungus, it could be in overly high humidity.
In arid climates or during winter months with excess dry air, use a humidifier or place your Blue Star Fern on a pebble tray filled with water. This will increase the surrounding moisture without making the plant too damp.
Be cautious about misting the fronds directly, though. Excess water on the leaves can lead to fungal issues like powdery mildew.
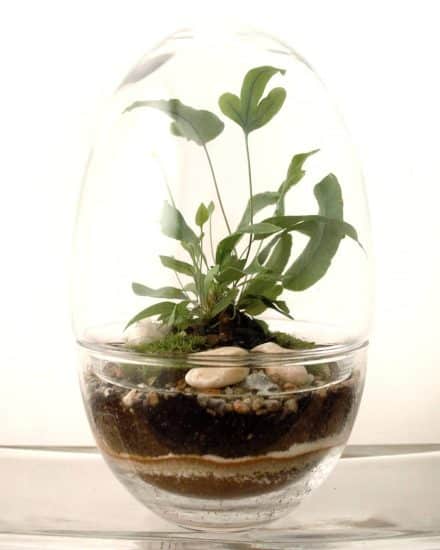
Soil and Planting
Phlebodium aureum thrives in well-draining potting soil that supports its epiphytic nature. Although it can grow in regular potting soil, using an orchid mix can create the ideal soil composition. Mix ordinary potting soil with orchid bark to help your Blue Fern flourish.
Poor soil can lead to various issues for your Blue Star Fern. Signs of inadequate soil composition include wilting, yellow leaves, and stunted growth. Ensuring that the potting mix is well-draining and provides the right balance of nutrients is essential for the plant’s overall health.
When repotting your Blue Star Fern, it’s crucial to keep the creeping rhizomes above the soil line to prevent rotting. Terracotta pots, glazed ceramic pots, and even a plastic pot are all acceptable for Blue Star Fern. But it’s absolutely essential to use a pot with a drainage hole to provide adequate drainage.
Fertilizing
In addition to mixing a bit of compost in with your potting soil, fertilizing periodically is the best way to ensure high nutrient content for your Blue Star Fern. An outdoor Phlebodium aureum should be fertilized every 4 to 6 weeks during the growing season.
For indoor plants, apply a standard houseplant fertilizer once a month during the growing season, but cut the recommended amount in half to avoid overfeeding. Whether outdoors or in, don’t fertilize during the winter when your Phlebodium aureum isn’t actively growing. This can encourage over-fertilizing.
Over-fertilizing Blue Star Fern can lead to brown tips, yellow leaves, and poor overall growth. If you notice these symptoms, address the issue promptly. First, flush the soil with water to wash away excess fertilizer and its salts. Next, reduce the frequency and amount of fertilizer application so you don’t have to go through the whole process again!
Propagation
Blue Star Fern propagation can be done through reproductive spores or rhizome division. While both routes are equally easy, we’ll go over the division method here.
Propagating Blue Star Fern by rhizome division:
- Gather supplies: Make sure you have sterilized gardening shears, a container with a drainage hole filled with moist orchid mix, and, of course, your beloved Phlebodium aureum mother plant.
- Spot those creeping rhizomes: Gently take your Blue Star Fern out of its pot and give the root ball a quick look-see. You’re searching for rhizomes, the thick, horizontal stems that connect the roots. They’ll be the chunky parts of the root system, so you can’t miss them!
- Divide and conquer: With your sterilized shears, carefully cut through the creeping rhizome. Make sure each new section has some healthy roots and foliage to give your baby ferns the best possible start in life.
- Pot the new divisions: Fill a container with moist orchid mix and plant each new Phlebodium aureum section separately, ensuring the appropriate pot size for each division. Press the soil gently around the roots, but avoid squishing it too tight. Keep each section at the same depth as it was in the original pot.
- Nurture your new ferns: Place your potted Blue Star Ferns in a bright spot without direct sunlight, and keep the soil consistently moist. Monitor your fern babies closely and never let the soil dry out entirely. In just a few weeks, you should see new growth!
Common Issues
Blue Star Ferns are generally low-maintenance, but they may still encounter a few challenges. Keep an eye out for these common issues and learn how to tackle them effectively so your fern continues to thrive.
Yellow Leaves
Repotting shock or inconsistent watering can cause yellow leaves on your Blue Star Fern. Repotting can be stressful for your plant, resulting in drooping or yellowing leaves. To help your fern adjust to its new pot, avoid overwatering during this time (and at all times, actually) and allow the soil to dry slightly between waterings.
Another way to protect your Phlebodium aureum from potting shock is to keep the light mild and indirect. Blue Star Fern can handle some mild direct light in the early morning, but not much beyond that. Monitor the light your fern is getting, especially if you notice yellowing leaves.
Additionally, Blue Star Ferns may struggle in locations with frequently fluctuating moisture levels. Ensure proper drainage and maintain consistent soil moisture without overdoing it to prevent further yellowing. Overwatering can cause yellowing, so make sure your pot has proper drainage.
Sun Scarring
Sun scarring can damage the appearance of your Blue Star Fernif it’s too close to a south-facing window, especially if the leaves press against the warm glass. To avoid sun scarring, move your plant away from direct sunlight and choose a spot with bright, indirect sunlight.
If your Phlebodium aureum has already developed sun scarring, trim the damaged leaves to encourage new growth and improve the overall look of your plant. Rotating your Blue Star Fern regularly not only ensures even growth, but also helps to prevent sun scarring.
Pests and Diseases
Mealybugs and Spider Mites
Even though Blue Star Ferns are pretty tough when it comes to pests (in fact, they’re way more resilient than other ferns), there’s still a chance that common pests like mealybugs, fungus gnats, and spider mites might infest your plant.
If you notice a soft, cottony substance along the leaves and stems of your Phlebodium aureum, or thin webbing with tiny bugs crawling on it, your first step is to isolate the plant so your other plants aren’t affected.
Next, remove the pests from your Blue Star Fern with a cotton ball soaked in isopropyl alcohol. After you’ve removed as many of the little bugs as possible, you can spray the plant with a biopesticide, such as neem oil. Keep the plant out of the sun while you treat it to avoid shock.
To keep insect infestations from affecting your Phlebodium aureum in the future, be sure to provide it with the appropriate levels of sun, water, and fertilizer. Too much or too little of either can invite pests and diseases.
Root Rot
This usually happens when Phlebodium aureum soil stays soggy for too long. Be on the lookout for wilting leaves or a funky smell coming from the soil (it’s not pleasant, trust me), and check for roots that look dark and slimy.
Step one: Gently remove your blue star fern from its pot. Next, using a clean pair of scissors, snip away any affected roots. Toss out the old soil, give the pot a good wash, and repot your fern in some fresh, well-draining soil. If the original pot doesn’t have a drainage hole, replace it with one that does.
To avoid root rot in the future, let the soil dry out a bit between waterings, and make sure your pot has enough drainage. Try not to overwater, and keep the soil moist but not too wet — a moisture meter can help with this. Finally, give your Phlebodium aureum a spot that has good air circulation, which helps prevent excess moisture.
Conclusion
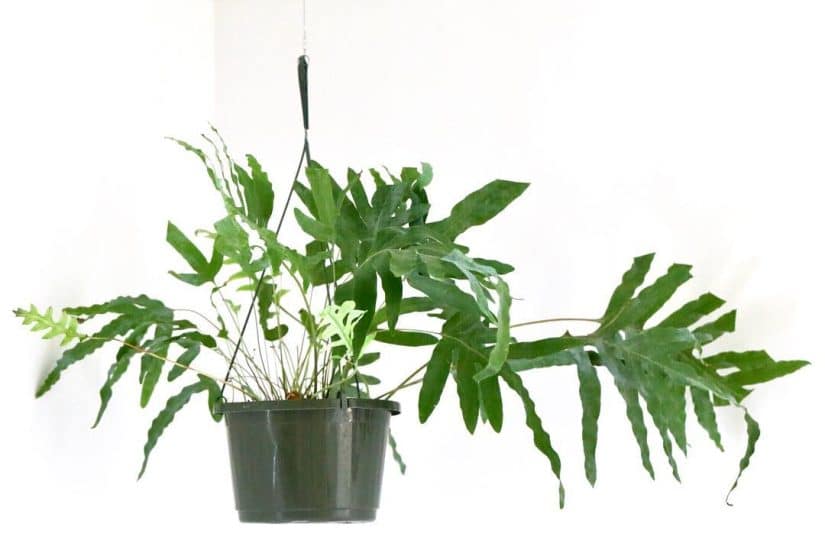
That’s a wrap for our Blue Star Fern care guide! With its stunning blue-green fronds and adaptable nature, the Blue Star Fern is easy to maintain and looks killer in a hanging basket to boot.
Blue Star Fern care summary:
- Provide low to medium indirect light by placing your fern near a north- or east-facing window.
- Aim for consistently moist soil, but not soggy, and allow it to dry out slightly between waterings.
- Maintain comfortable household temperatures between 60 and 75°F, and aim for humidity levels of 40%-60%.
- Use a well-draining potting mix and a container with drainage holes to prevent root rot.
- Fertilize your Blue Star Fern with a balanced organic or synthetic fertilizer during the growing season.
Embrace the beauty and low-maintenance nature of the Blue Star Fern and watch it thrive in your home. If you have any questions or need further assistance, don’t hesitate to reach out.
Take care, and happy planting!
FAQ
Are Blue Star Ferns hard to care for?
Blue Star Ferns are relatively easy to care for compared to their fern cousins. With their adaptability and resilience, they’re perfect for both seasoned plant enthusiasts and newbies alike. Just remember to provide them with the right amount of filtered light, and find that sweet spot when it comes to watering. Slightly damp but not soaking wet is the key.
Where do you put a Blue Star Fern?
When it comes to finding the perfect spot for your Blue Star Fern, think moderately bright indirect light. A north- or east-facing window will provide ample light without overpowering it with too much sun.
If your only option is a west- or south-facing window, just make sure to scoot your fern a couple of feet away to protect it from harsh direct sun.
Should you mist a Blue Star Fern?
Misting your Blue Star Fern is an excellent way to provide a little extra humidity, which they adore. However, they’re not as sensitive to humidity as some other ferns, so don’t feel the pressure to mist them every day. Misting can also help deter common pests.
Is Blue Star Fern toxic?
Blue Star Ferns are nontoxic to both humans and pets. So, whether you’ve got curious kiddos or playful fur babies, you can enjoy the beauty and charm of this tropical gem without worrying about their safety. Remember, though, that nibbling on any plant can cause digestive issues, so it’s always best to keep plants out of reach of little hands (and paws!).
