Calla lily, despite its name, isn’t actually a lily at all.
And its flowers? Not actually flowers.
(Don’t get us started on its stems.)
We’ll cover all of the beautiful mysteries of this plant, including a guide on taking care of Calla lilies indoors.
Since it’s not typically grown as a houseplant, we’ll teach you how to tame its tempestuous nature and what to do in the winter months.
We’ll also cover the most common issues we see when growing calla lilies, propagation, and answer the questions we’re asked the most.
Table of Contents
Care Guide: Grow Calla Lilies Indoors
History, habitat, and characteristics
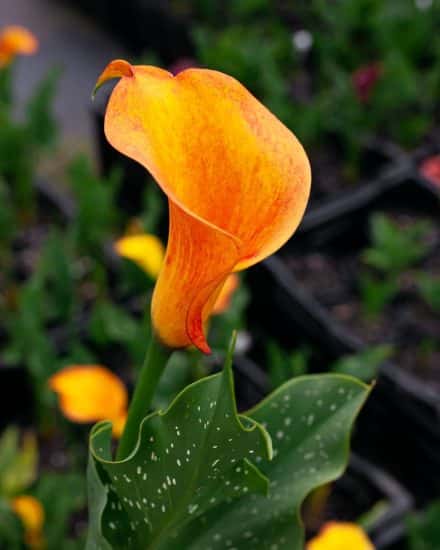
Calla lily (Zantedeschia aethiopica) is better known as an outdoor plant in most of the world, but in recent years, it’s found new popularity as a beautiful flowering indoor plant.
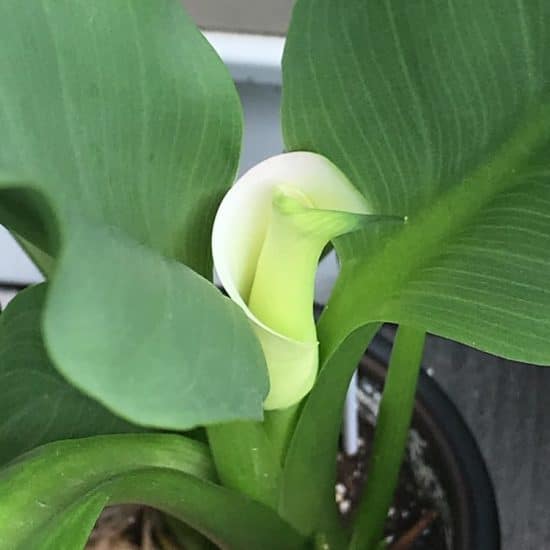
Its colorful “petals” are actually leaves called spathes that surround the true flowers. These tiny flowers are located on a cylindrical spike at the center of the spathe.
And that’s not its final deception. Those stems? Not actually stems!
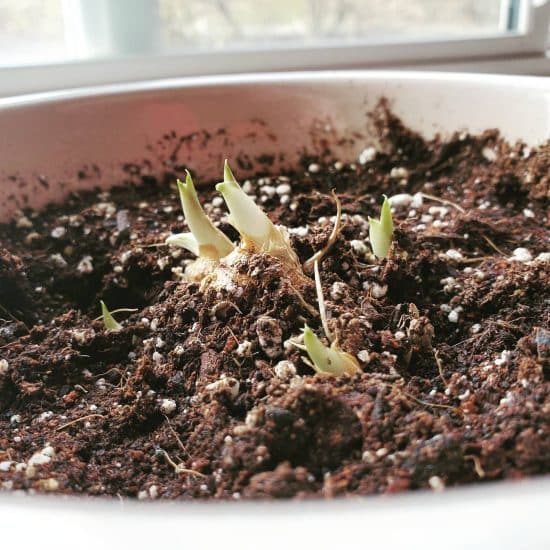
Underneath the soil, lying in wait, is the Calla lily rhizome, a kind of underground stem that stores its nutrients and water for difficult days ahead and the long winter.
So whether you’re finding yourself with a young plant from Easter or trying to grow a new plant from a rhizome, we’ll cover everything you need to know in this guide.
Let’s first tour some of the most popular cultivars available!
Varieties
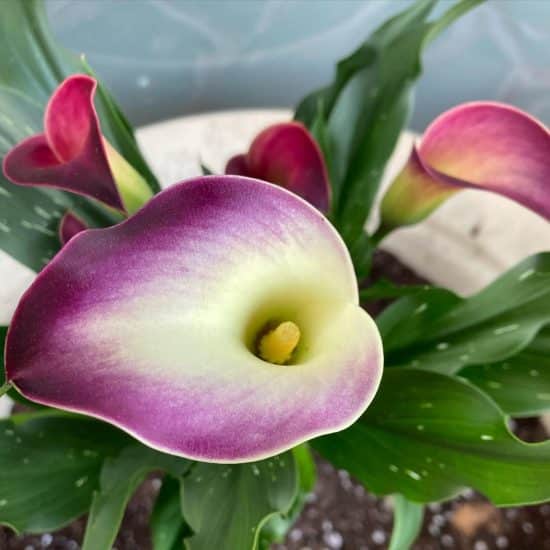
One of the best things about calla lilies is the wide variety of cultivars available. Each type has its own unique features and characteristics, all equally stunning!
Each of these features the silver-flecked, arrow-shaped foliage of the Calla lily.
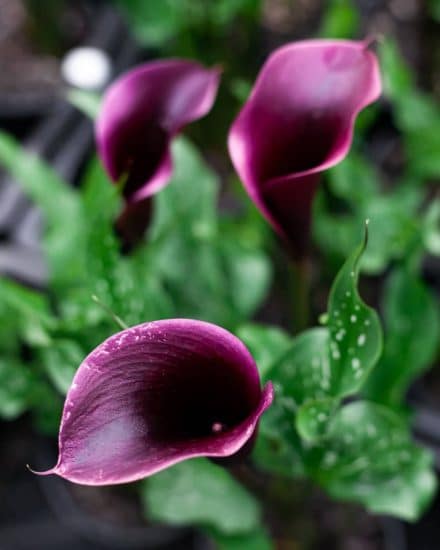
Edge of Night: Black calla lilies (also known as Black Star) are dramatic Calla lilies that range from dark purples through light pinks.
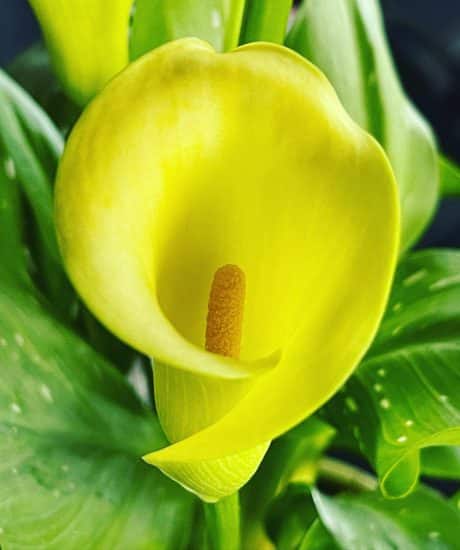
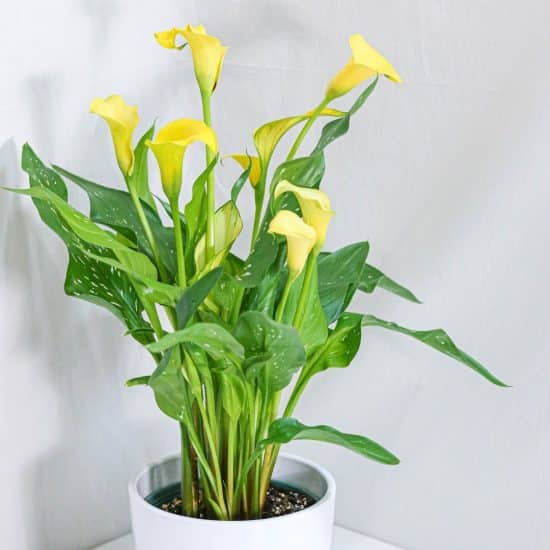
Sunshine: A beautiful contrast, the Sunshine Calla Lily sports a bright yellow flower and large, rich green leaves.
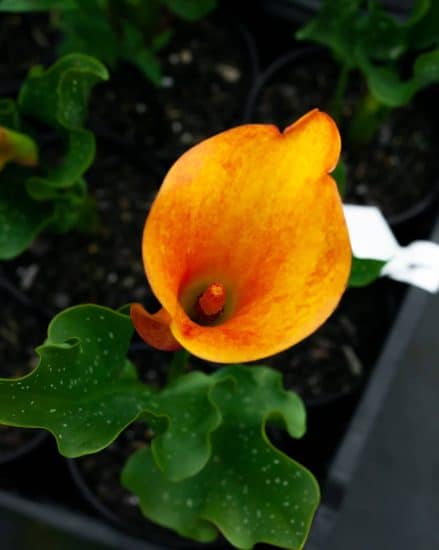
Red Alert: The ‘Red Alert’ makes a fantastic container plant, with its bright red spathes that feature flecks of orange around an interior orange spadix.
Picasso: Artistic and colorful bi-colored flowers ranging from creams through its purple center. These really love sun.
Calla lilies have so many looks, and you can mix and match bulbs (or rhizomes) in the same container to create a living bouquet. Remember: they’ll come back next year, often larger and brighter!
Light
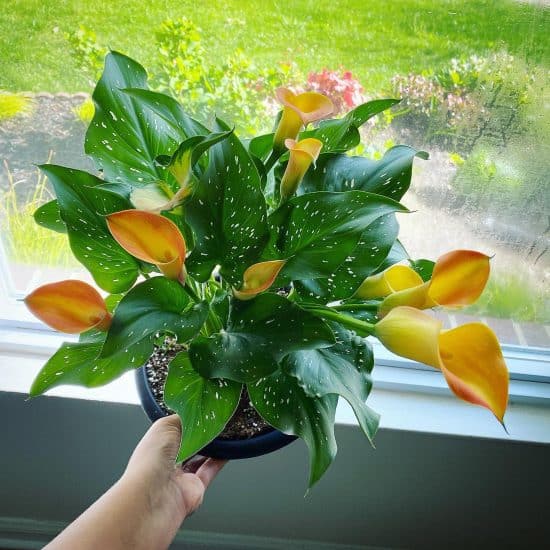
Calla lilies really prefer bright, indirect light as houseplants, as much as you can give them. So you’ll want to place them near any window that isn’t south-facing.
Too much light will result in yellowing leaves, brown tips, or even small holes throughout the plant.
Not enough sun and you’ll see pale foliage, slow growth, leggy and spindly stems, and no blooms. You may also notice a bloom that doesn’t open completely.
Light tips:
- Rotate your pot every week or two for even, symmetrical growth.
- Avoid too much direct sunlight by adding a sheer curtain to a window or placing your Calla lily behind another plant (thanks, plant friend!). If the leaves look curled, brown at the edges, or even burnt, that’s a sure sign of too much direct light.
- Supplement low light with an LED grow light (full spectrum or as close as possible), or hunt around for a sunny window if your plants are in partial shade.
- East or west-facing windows provide plenty of bright indirect light, which is optimal for this plant.
Water
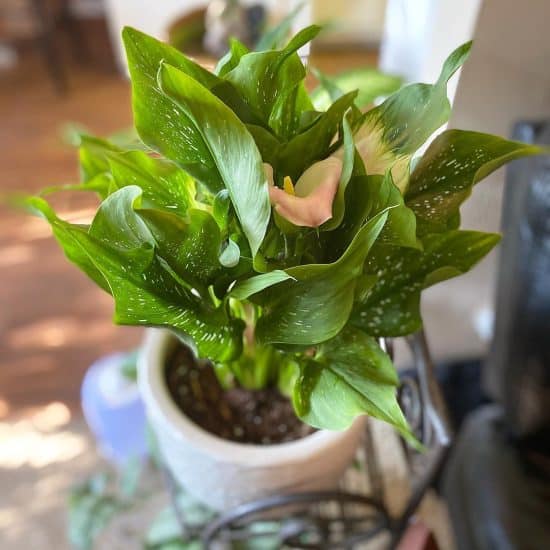
Calla lilies thrive in moisture. If we look at their natural habitat, they often grow in muddy conditions near bodies of water and prefer moist soil.
However, overwatering or sitting in standing water can cause rot and serious damage to the rhizome.
So how can we tell?
Overwatering happens pretty frequently. When people hear that this is a tropical plant that wants to be wet, it’s easy to provide a bit too much care. If the soil doesn’t drain well or if you don’t have drainage in your pot, this plant will stay wet for way too long. If you notice yellowing leaves or brown spots, you’ll want to cut back on the watering frequency.
You’ll want to test the water with a finger and avoid any rigid schedules. If the top inch or so is dry, water. Depending on your home, it might be every week or so on average.
Watering tips:
- Don’t let your calla lily sit in standing water. If your pot doesn’t have drainage holes, switch it out for one that does.
- If you’re double-potting, make sure to pour out any water that accumulates in the decorative outer pot.
- Use room temperature water on the base of the plant. Really saturate the soil slowly, letting it pour out of the bottom of your pot. Leave it in the sink for at least a few minutes so that it can drain completely.
- Tap water can work well, but if you know it has high mineral content, you should filter it or switch to distilled.
Temperature and humidity
Calla lilies can be a bit sensitive to your home’s environment and want just the right temperature and humidity.
So how can we provide that?
Temperature: During the growing season, Calla lilies do best between 60 and 85 degrees Fahrenheit, ideally around 70-75. You’ll want to avoid any areas that get cold drafts or extreme fluctuations of temperature. South-facing windows can produce a lot of heat, so be careful there.
Humidity: These lovely plants love a moist environment. Aim to keep humidity levels around 50-60%, as this level can help the calla lily grow robustly. However, this can be a challenge in an indoor environment. A humidifier or a tray filled with pebbles and water can increase humidity levels around the plant.
Winter dormancy
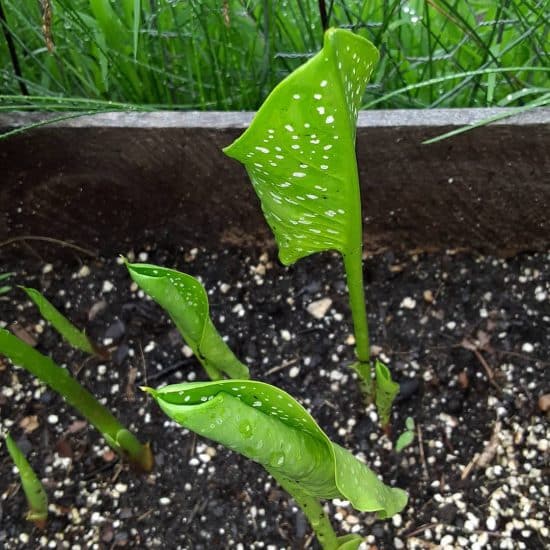
Many people think they need to toss out their Calla lilies after they bloom, or once they start to go dormant. This isn’t the case!
If you can store your plant in a location that’s dark and ideally under 55 degrees, you’ll have a plant ready to grow and bloom again in the spring when you take it back out. Basements tend to be a great location, just make sure they don’t get exposed to too much moisture when temperatures drop.
(During this time, you’ll want to stop watering completely.)
Winter dormancy is something many plants experience, but to differing degrees. Most houseplants will just stop growing, but calla lilies will die off completely, and everything above the soil will be lost. The rhizome underneath, however, has stored all of the nutrients it needs for the next growing season.
You’ll notice that in the spring when your plant comes back, it will be larger than last year, as the rhizome grows year after year. So definitely don’t toss your plant, as many do in the winter – it’s evolving itself!
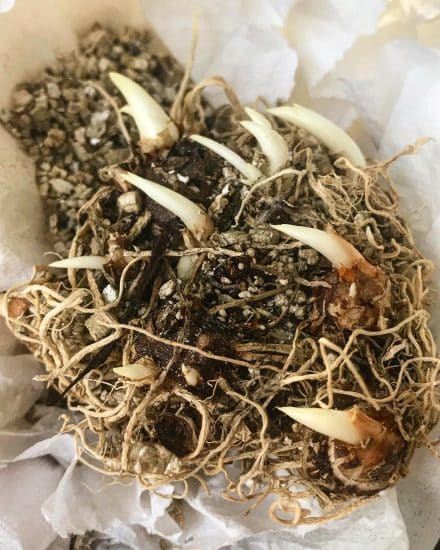
If you are storing rhizomes out of the soil, you’ll want to replant in early March, and normal care for Calla lilies applies from there.
Soil and planting
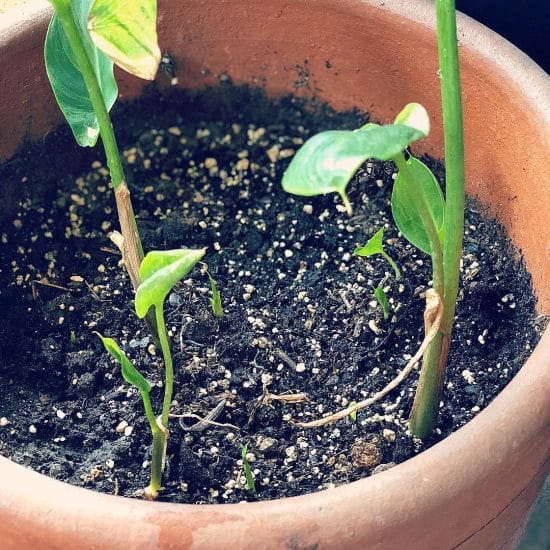
Calla lilies love, love, love moisture and water, but want soil that can dry out. So how can we balance these priorities?
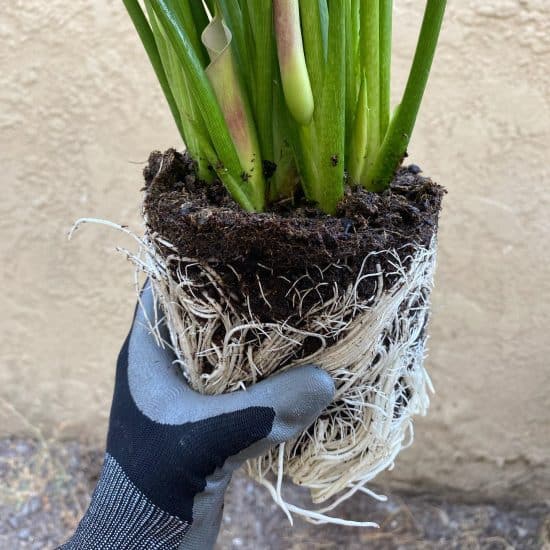
You’ll often see that we tell you to pay attention to the roots for the kind of conditions an indoor plant wants.
With a Calla Lily that might mislead us, rhizomes store water, right?
We’ve found the best soil for Calla lilies is a mixture of regular potting soil and coco coir. This combination provides the necessary moisture retention, while also allowing the soil to dry out between watering, which is essential for preventing rot.
Coco coir is a natural fiber that comes from the husk of a coconut. It’s great at retaining water while still allowing for good drainage. You can find it at most garden centers or online.
We really recommend using a terracotta pot, as this allows moisture to wick out of the sides of your pot, since it’s porous and can breathe.
Fertilizer is also important for getting the most out of your calla lily’s blooms. You’ll want either a balanced fertilizer or one that’s labeled as a bloom boost or flowering plant fertilizer. They’ll typically have more phosphorus, which promotes the production of flowers.
Signs of too much fertilizer: yellowed or burned leaf edges are most typically the first sign. If you notice this, stop fertilizing and flush the soil with water, and then resume at a higher dilution in the future.
Propagation guide
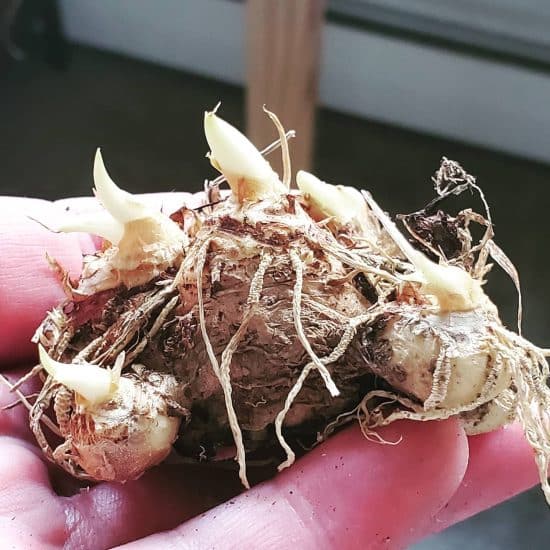
Unlike actual lilies, Calla lilies grow from an underground stem (its rhizome) instead of a bulb.
Propagation will involve digging up these rhizomes, separating them, and then repotting them in separate containers.
Some tips:
- Wait for winter dormancy before beginning.
- Choose a healthy plant to propagate, as it has higher chances of success.
- If propagating through seeds, be patient, as calla lilies can take years to reach maturity.
- Ensure that the soil is well-draining and slightly moist – they should not be allowed to dry out.
Rhizome division is my favorite way to propagate an indoor calla lily. It’s straightforward, and the success rate is close to 100%.
Seeds require a lot of patience and expertise, but are a fun alternative, because you’re now playing with the plant’s genetics and creating completely new combinations.
Common issues
Calla lilies not only suffer from a lot of the same common issues that most houseplants do, but they also have a few unique issues because of their extreme… winter vacation.
Yellow leaves
Yellow leaves are a telltale sign that you might be overwatering your calla lily. Remember, calla lilies like to be kept moist, but not drenched. Ensure proper drainage with a pot that has drainage holes, and let the soil dry out between watering sessions. Doing so can help alleviate this issue.
Not blooming
If your Calla lilies are feeling flower-shy, this isn’t too abnormal. A lack of blooms is often an issue with moisture or not enough nutrients.
If you aren’t using one yet, try a bloom booster fertilizer. Calla lilies really respond well, because if your nitrogen-to-phosphorous ratios are off, they’ll produce leaves instead of beautiful white flowers.
For moisture, it’s really all about keeping the humidity up and making sure the soil doesn’t go dry for too long.
Diseases and pests
Calla lilies grown indoors can attract some pests, and because they do like wet soil, this can often promote fungus or bacterial growth.
Root rot
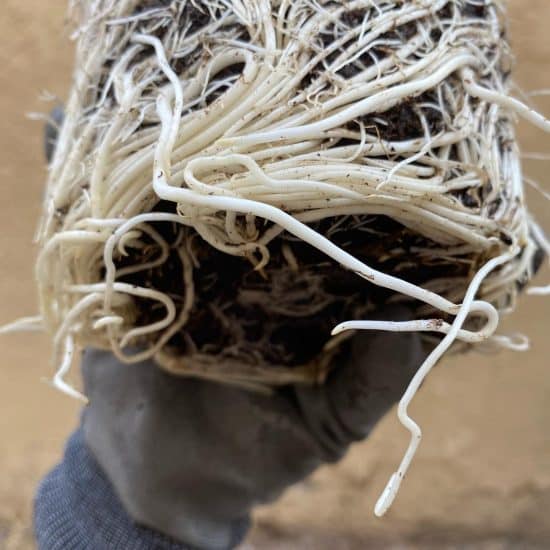
Root rot is almost always caused by keeping the soil moist and not giving it a chance to dry out completely.
You might notice: yellowing leaves, dark spots on the edges and surface of your foliage, stunted growth, or even a funky smell.
To fix this, you should immediately take your plant out of its pot and take a look at the roots. If they look white and healthy, phew, you’ve avoided this issue. If instead, you notice brown and slimy roots, you need to cut away any affected roots with a sterilized knife or shears.
Let your old pot sit in the sun for a few weeks, and instead, use a fresh pot with fresh potting soil. Make sure you have well-draining soil and a pot with adequate drainage. If you’re not sure, you can add coco coir or perlite to your soil to improve aeration and make sure it doesn’t get compacted.
Cut back on watering, too. Let the soil get on the verge of drying out before adding any water.
Pests
Spider mites, mealybugs, and aphids (especially if your plant is outside sometimes) are the common pests that can be an issue with Calla lilies. They’re attracted by dead plant debris and usually leave healthy plants alone.
Spider mites are tiny, almost transparent red insects that feed on the leaves and leave a web-like substance on the plant’s surface. Mealybugs, you’ll often notice as little puffs of cotton on the stems and undersides of leaves.
With mites, lots of water and moisture is the key. You can rinse off the leaves with water daily, or if you want a solution for both: apply neem oil every 2-3 weeks until you stop seeing them return.
Bulb storage rot
Bulb storage rot is a disease that commonly affects the rhizome of your Calla lily. You’ll often see it caused by the same conditions as bacterial soft rot.
You’ll want to store bulbs in a cool location with lots of airflow and ventilation to prevent this. Remember not to water during winter dormancy and get rid of any bulbs affected by rot.
Conclusion
That’s it for our guide on how to take care of Calla lilies as a houseplant. Whether you’re keeping your plants inside all year long or just when it gets a bit too cold out, we sincerely hope you’ll take on the sometimes tricky challenges of indoor gardening.
The flowers on the Calla really do reward you.
Calla lilies prefer:
- Lots of light and water during their growing season.
- Flower-balanced fertilizer (or a low-nitrogen fertilizer) – it’ll have those gracefully shaped flowers blooming in no time.
- Keeping their soil moist by letting it dry out slightly before giving them another drink.
It’s not too difficult to grow Calla lily indoors at all. We’d love to see your flower arrangements and blooms, so send us pictures or drop us a line on Twitter/Facebook/Instagram.
Take care!
FAQ
Is Calla lily care indoors different than outside?
Overall care is the same, but there are a few key differences. Indoor soil will be different, mostly because of drainage and watering frequency. You’ll also have a lot more control over light and temperature, as you can adjust the placement of your Calla lily indoors.
Do calla lilies grow in the winter?
Calla lilies experience winter dormancy in a pretty extreme way and usually die off with first frost outdoors, or in late fall. You can store your rhizome outside of the soil in a paper bag in a cool location, or keep it in its pot.
How long do potted calla lilies last?
As long as you take care of them! Just follow the winter dormancy guide section above and your Calla lily will come back yearly.
Do calla lilies come back every year?
They do! If grown outside in the ground, they do need to be either protected from frost or brought inside as rhizomes.
Are Calla lilies toxic?
According to the University of Utah’s Poisonous Plant Database, Calla lily is considered to be toxic and should be kept away from pets and small children.

