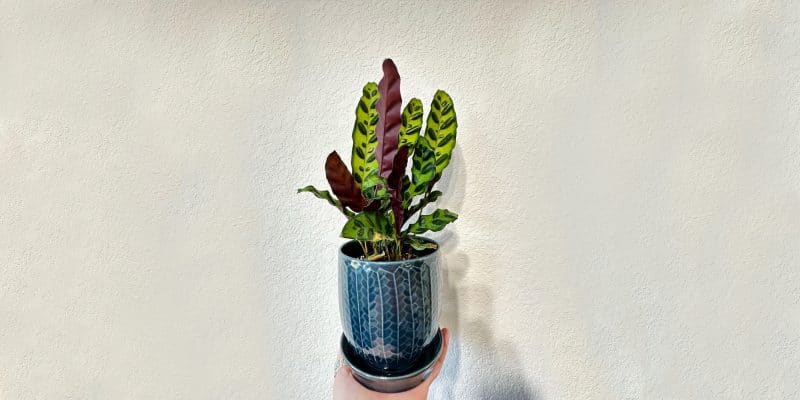
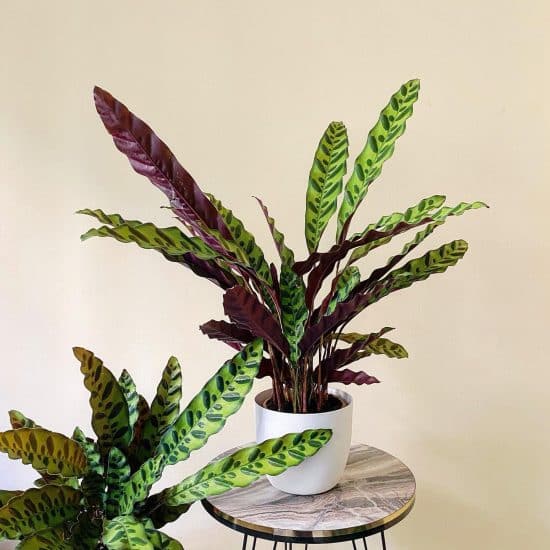
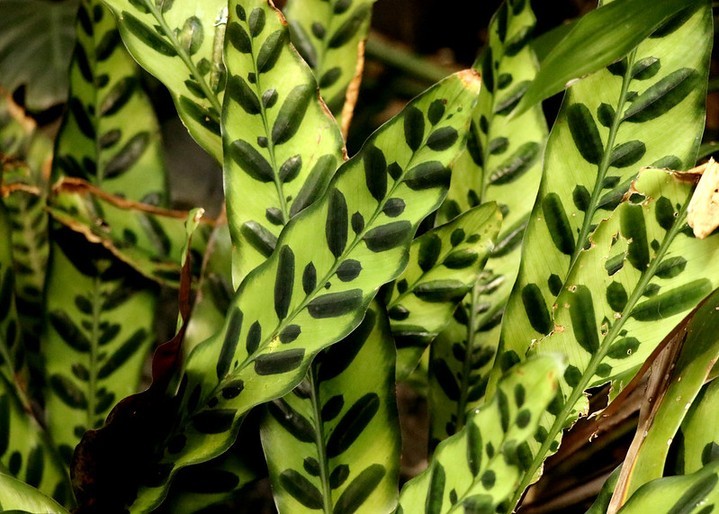
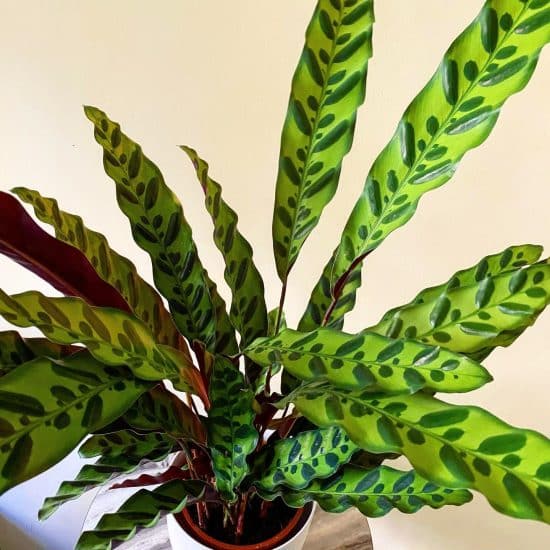
The Rattlesnake Plant is here to shake its leaves and steal your heart! With its crinkly green spotted leaves (the dark spots almost look like seeds trapped inside) and purple undersides, this twisty showstopper is a snake made to meet your gaze.
We’ll guide you through everything you need to know about Rattlesnake Plant care, including its secret survival tactic, preferred living conditions, and common problems that might arise.
So, ready to tend to your own Rattlesnake houseplants? Let’s get growing!
Table of Contents
Rattlesnake Plant Care Guide
History, Habitat, and Characteristics
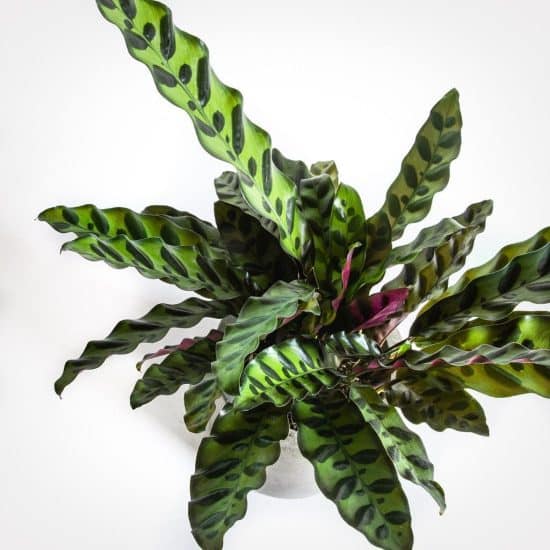
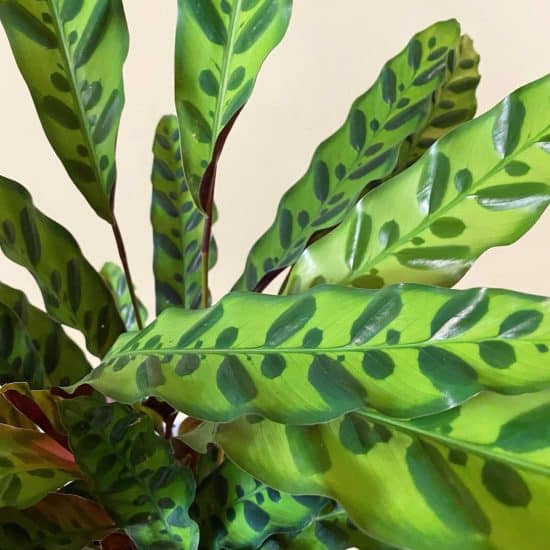
Rattlesnake Plant (Goeppertia insignis, formerly Calathea lancifolia) hails from the lush rainforests of Brazil. Its long, narrow, and crinkled leaves have light green surfaces adorned with dark green spots that resemble the markings on a rattlesnake.
As if that weren’t enough, the Rattlesnake Plant has purple undersides to complement its serpentine markings.
The Rattlesnake Plant is often called a prayer plant. However, it’s not a true prayer plant, though it is a part of the Marantaceae family. Calathea plants, like Maranta plants, are heliotropic — their leaves move in relation to sunlight.
But whereas true prayer plants — Marantas — fold their leaves nightly as if in prayer, calathea rattlesnake leaves, like those of the peacock plant (Calathea makoyana) and other calatheas, move up and down but don’t fold.
Heliotropism is the plant’s survival tactic, helping it soak up sunlight and conserve water in its native habitat. So despite the fact that the Rattlesnake Plant isn’t a true prayer plant, it still moves in a cool way, like a daily sun dance.
Around late spring and early summer, this plant is in the mood to bloom. Though the small, tubular yellow flowers may not be as showy as the leaves, they add a pop of color to an already stunning plant.
Keep in mind, however, that like most plants, Rattlesnake Plant are unlikely to bloom when grown indoors.
Light
The Rattlesnake Plant is easygoing when it comes to light. It can tolerate lower-light conditions and definitely prefers them to direct sun.
Rattlesnake Plants crave indirect bright light but can also thrive in low-light conditions. Morning light is their favorite, so place them near an east-facing window for best results. Be sure to protect them from intense afternoon light. Keep them far enough from the window to avoid receiving direct light.
Watch for signs of too much or too little light. If your Rattlesnake Plant isn’t getting enough light, you might notice slow growth, and the leaves may lose their vibrant colors and patterns.
Conversely, too much light could result in scorched, faded, and browning leaves.
Lighting tips:
- Position your Rattlesnake Plants close to an east-facing window, ensuring they receive a good dose of morning light without direct afternoon sun.
- Seeing slow growth or fading colors? It might be time to increase light by moving the plants closer to a window or adding an artificial light source (a full-spectrum LED works wonders).
- If the leaves are getting scorched or turning brown, move the plants further from the window or add a sheer curtain to soften the light.
Water
To give your Rattlesnake Plant the best care, use distilled water or filtered water — tap water may contain chemicals that are harmful to plants.
Because too much water can lead to yellow leaves and mushy stems, let the top 1 inch of soil dry out before you water. Touch the soil to gauge its dryness, and water thoroughly until the water drains from the pot’s drainage holes.
Don’t let your plant sit in standing water — this can lead to overwatering and problems with the root ball.
Even though overwatering is common and the easiest way to kill calathea Rattlesnake Plants, they can be underwatered as well. Curled leaves, wilting, or browning leaf tips may indicate insufficient water. Aim to keep the soil evenly moist.
Watering tips:
- Use filtered or distilled water for Rattlesnake Plants.
- If using tap water, let it sit for 24-48 hours to evaporate harmful chemicals.
- Aim for consistently moist soil, but avoid letting Rattlesnake Plants stand in water.
- Curling or wilting leaves can indicate underwatering — adjust your watering routine accordingly.
- Yellowing leaves, rotting stems, and constantly wet potting soil are signs of overwatering — time to cut back.
Temperature and Humidity
Rattlesnake Plants grow natively in a tropical environment, so maintaining consistently warm temperatures is essential for its well-being. It thrives in temperatures between 65 and 85°F (18-30𝆩C).
You’ll really want to avoid any extreme temperature changes, like drafty windows, cold air conditioners, or radiator and heating vents in the winter. Sudden temperature changes or consistent extremes can damage the plant’s foliage and overall health.
If the temperature is too low, the leaves may droop and the plant’s growth might slow down significantly. In contrast, excessively high temperatures can lead to leaf curling or drying out the plant. To maintain the ideal temperature, monitor room temperatures regularly.
Like many tropical plants, Rattlesnake Plant prefers humidity levels of at least 50% to ensure optimal growth. If your plant is getting insufficient humidity, you may notice the leaves curling or the tips getting brown and crispy.
For more humidity, you can place a tray of water and pebbles beneath your Rattlesnake Calathea, use a humidifier, or group it with other humidity-loving houseplants.
Of course, too much humidity can also be a problem. Watch for moldy, rotting leaves or stems, and decrease humidity, ensure proper ventilation, and avoid overwatering if you notice these signs.
Temperature and humidity tips:
- Maintain temperatures between 65 and 85°F.
- Aim for humidity levels of at least 50% for optimal growth.
- Increase indoor humidity with a tray of water and pebbles, a humidifier, or by placing the plant in a naturally humid location.
- Keep your Rattlesnake Calathea Plant away from cold drafts or direct heat sources.
Soil and Planting
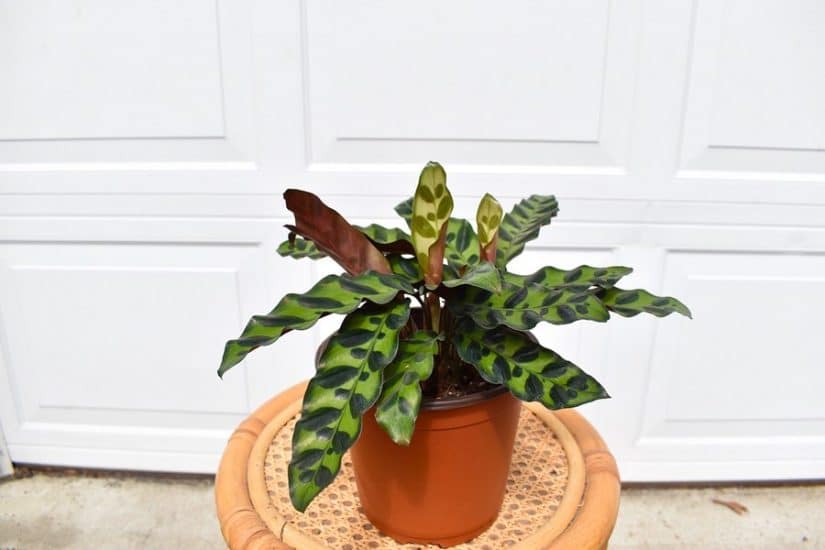
You should only have to repot your Rattlesnake Plant every 2-3 years in spring. Choose a pot a few inches larger than the last and a well-draining mix with 20% perlite or pumice. This helps plant’s roots grow, allowing them to take up essential nutrients and promoting optimal aeration.
Signs of poor potting soil include leaves regularly yellowing, slow growth, and root problems. To avoid these issues, ensure that the soil mixture is suitable for Rattlesnake Plants and provides adequate drainage. Always make sure that your pot has drainage holes.
Fertilizing
When it comes to fertilizing your Rattlesnake Plant, be cautious not to overdo it. Fertilize the plant once a month during the early spring and summer using a diluted liquid fertilizer. You do not need to fertilize in the winter.
In fact, because most plants are less active in the winter, fertilizing during this time can lead to over-fertilization and problems with your plant.
Signs of too much fertilizer include leaf burn, wilting, and overall poor plant health. If you suspect your plant is suffering from over-fertilization, flush the soil with water to leach out excess nutrients, and consider adjusting your fertilizing schedule.
Propagation Guide
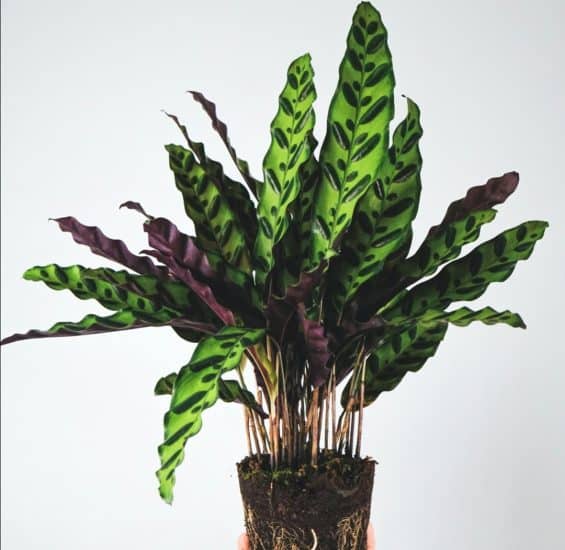
Ready to grow a new little Rattlesnake Plant? You’re in luck! Propagating these plants through root/rhizome division is a piece of cake.
Propagating Rattlesnake Plant via division:
- First, remove your plant from its pot and find a section of your Rattlesnake Plant with a robust, healthy root system. This will give your new plant a head start in life.
- Now that you’ve found a strong section, carefully massage the roots and rhizomes and separate them from the main plant. Remember, to be gentle with the roots. You want them in tip-top shape for your new plant.
- Prepare a new pot with a high-quality potting mix.
- Gently plant the separated section in its new fancy pot, making sure to position it at a similar depth as it was in the original pot. Give those roots some space to breathe and spread out evenly in the mix. Replant your original plant in its pot, adding fresh soil to take the place of the bits you divided.
- Give your new plant a good drink of water, then place it in a spot with indirect light. Keep the root ball slightly moist, but not soggy, and provide the same TLC that you would give to the parent plant and other houseplants.
Propagation tips:
- Be gentle as you separate the roots and rhizomes.
- Just like Rome, your new Rattlesnake Plantwon’t grow overnight. Give it some time to work on its roots before expecting some mind-blowing growth up top.
- Make use of a humidity tray or a humidifier to ensure your new plant grows well.
- Watch out for any signs of struggle, like droopy leaves or slow growth. If something seems off, adjust its care to help your propagated Rattlesnake Plant flourish.
Common Issues
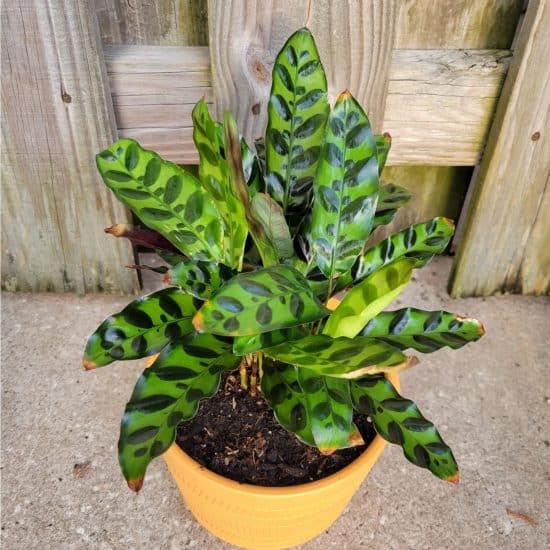
Crispy Brown Leaf Tips
Crispy leaves could be due to underwatering, dry air, or too much light. If the leaves are looking droopy and you’re losing some, chances are your Rattlesnake Plant isn’t getting enough moisture or humidity.
To give your Rattlesnake Plant the TLC it needs, make sure to water it more frequently, keeping the soil moist but not drenched. Boost the humidity around your plant by placing a tray filled with water and pebbles underneath it or using a humidifier.
And if it’s receiving too much direct sun, simply move it to an east- or west-facing window with bright but indirect sunlight.
Spots or Yellow Leaves
This might be due to overwatering or even root rot. To tell if it’s root rot, look for black spots on the leaves or a funky smell coming from the pot.
To reverse this situation, cut back on watering and let the soil dry out a bit between waterings. Take a peek at the roots and trim away any black, mushy, or rotten sections.
If necessary, repot your plant in fresh, well-draining soil and make sure the pot has drainage holes to prevent this problem from happening again.
Curling Leaves and Dry Air
Curling leaves can be a sign of dry air or not enough water. Check the leaves — if they’re dry and brittle, that could be the issue.
To help your Rattlesnake Plant bounce back, be consistent with watering and allow only the top layer of soil to dry out between waterings. Increasing humidity is also key: Try misting the leaves or using a humidifier.
And if the problem keeps up, you might need to investigate potential nutrient deficiencies and tackle those accordingly.
Pests and Diseases
Spider Mites
You might not see them at first, but these tiny critters can mess with your plant. Keep an eye out for webbing or a fine, dusty trail on the leaves and stems (like someone sprinkled powdered sugar on your plant).
Got pests? Here’s what to do. First, give your plant daily showers for two weeks. Yup, you heard me right — showers! This helps wash away and eliminate those little buggers.
If that doesn’t do the trick, grab a natural insecticide, like neem oil, specifically designed for these pests, and follow the instructions carefully.
To prevent future pest infestations, remember to wipe down your plant’s leaves with a damp cloth every once in a while . . . Clean leaves are happy leaves! And always keep an eye on your plant — the sooner you catch those pesky critters, the better.
Root Rot
This is a common issue for indoor plants, including the Rattlesnake Plant. It’s what happens when your plant grows in soggy soil for too long… and eventually, the rot will kill your plant.
So how do you know if your plant has root issues? Look for signs like yellowing leaves and a sad, wilting appearance. If you see these red flags, gently remove your plant from its pot and check the roots. The unhealthy ones will be mushy, slimy, and brown or black.
To fix these root issues, you’ll need to grab some sterilized scissors and snip away those icky roots. Then, repot your plant in fresh, well-draining soil (add perlite, pumice, or LECA for extra aeration and drainage).
The best way to prevent root issues in the future is to be smart about watering. Wait until the top inch of soil is dry before watering, and make sure your plant’s pot has drainage holes. It’s also a good idea to check the roots when repotting or doing routine maintenance.
Conclusion
That’s a wrap for our Rattlesnake Plant care guide! By now, you should have a good grasp on how to keep this unique houseplant thriving and healthy in your home.
Rattlesnake Plant care summary:
- Rattlesnake Plant prefers indirect bright light.
- Keep the soil consistently moist, but not soggy. Use distilled, filtered, or rainwater for best results.
- Maintain a temperature range between 65 and 85°F and aim for humidity levels of at least 50%.
- Use a well-draining soil mix with added perlite or pumice for optimal root health.
- Fertilize sparingly during the growing season, and repot your plant every 2-3 years.
- Propagate with ease through root and rhizome division, and watch as your Rattlesnake Plant family grows!
We hope this guide helps you cultivate a stunning Rattlesnake Plant, adding a touch of the exotic to your indoor garden.
If you have any questions, feel free to reach out and drop us a line. And if you found this care guide helpful, why not share it with fellow plant enthusiasts?
Take care, and happy growing!
FAQ
Do Rattlesnake Plants purify air?
Rattlesnake Plants have the ability to absorb indoor pollutants, giving you a breath of fresh air, quite literally. So not only will these beauties add a vibrant touch to your space, but they’ll also work their magic in purifying the air around them.

