
Say hello to the fantastic spider plant (Chlorophytum comosum), possibly the all-star of indoor plants. I’m not going to say it thrives on neglect, but I’m not not going to say that either, double negative or . . . not.
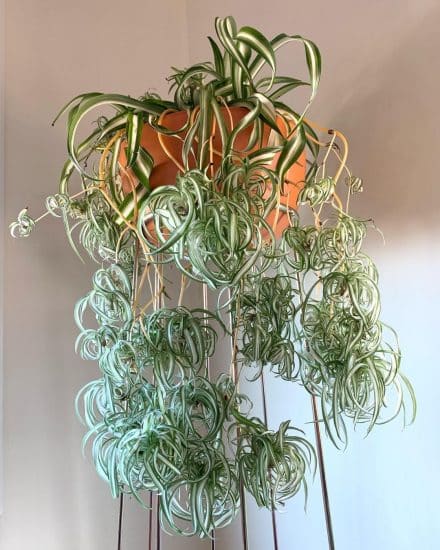
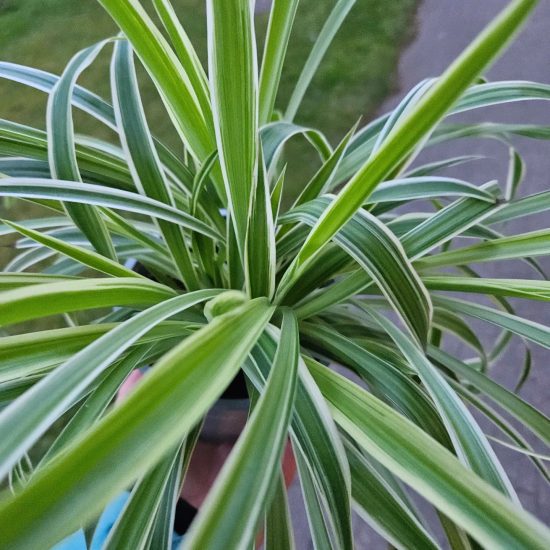
With its graceful, arching leaves and eye-catching green and white stripes, it’s no wonder the spider plant has become a household favorite. There’s even a variety that curls.
And there’s more! Spider plants have a unique way of producing cute little baby plants, or “plantlets,” which are super easy to propagate.
Ready to become an expert in spider plant care? In this guide, we’ll share everything you need to know, from perfect lighting conditions to watering tips, and even how to propagate those adorable plantlets.
Plus, we’ll tackle the most common issues you might face with your spider plant and offer solutions to keep it thriving.
Let’s get growing!
Table of Contents
Spider plant care guide
History, habitat, and characteristics
The spider plant (Chlorophytum comosum) may have many names (it’s also known as the airplane plant, ribbon plant, and spider ivy), but it’s a singular plant known throughout the world for its air-filtering ability . . . and the fact that it’s nearly impossible to kill.
Spider plants are in the Asparagaceae family, just like the lily. Chloros is Greek for “green” and phytum means “plant.” Comosum translates to “furnished with a tuft.” So, a green plant with a tuft (a collection of things held together at the base — in this case, leaves). Spot on!
The spider plant originally hails from Central and Southern Africa. Now these low-maintenance beauties have made their way into our homes, charming us with their slender, arching narrow leaves that range from solid to striped green, white, and yellow.
Did you know: Longer leaves can pull your spider plant’s pot over if they get too weighty or concentrated on one side, so make sure your pot is heavy enough to maintain its ground (or stay off of it)! when your plant gets older.
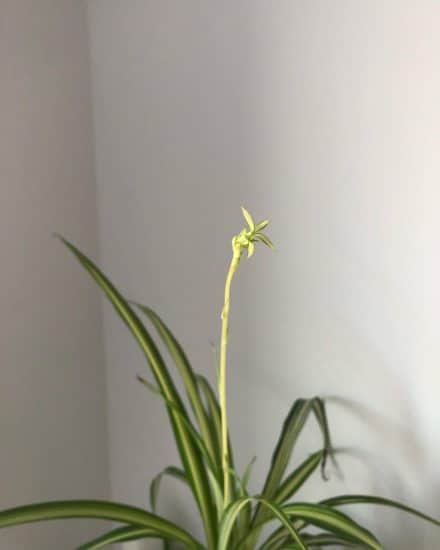
Oh, and here’s a fun fact for you: Spider plants, particularly the Chlorophytum comosum, have this super cool way of producing baby plants called “pups” or “plantlets.”
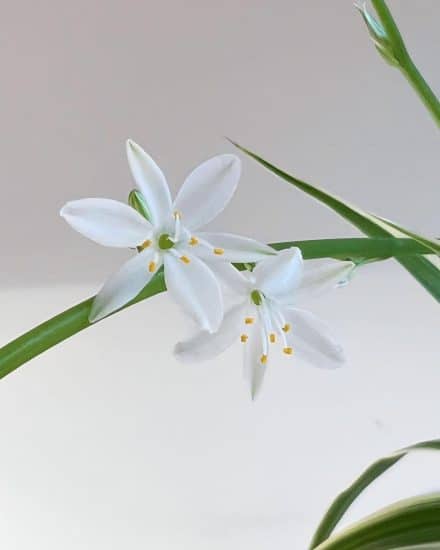
As they mature, they shoot out long stems that sprout adorable little star-shaped spider plant flowers. If those flowers are fertilized… voila! Tiny fruits appear. When the flowers bid adieu, the plantlets form, ready to be turned into new potted plants.
Isn’t that just a green-thumb dream come true?
Varieties
There are over 200 spider plant varieties. We’ve listed them all here alphabetically so you can fall asleep reading about them at night. No, we haven’t. But here are some of the most popular:
- Chlorophytum comosum ‘Variegatum’: Green stems and wide green leaves edged in white, with a dark green stripe in the middle. Usually produces less plantlets than other varieties.
- Chlorophytum comosum ‘Vittatum’: White stems and green leaf margins with a white stripe down the center. Grows more slowly than more green varieties.
- Chlorophytum comosum ‘Bonnie’: Smaller than the others with slightly curly leaves that have green edges and a creamy stripe down the center. Puts out yellow flowers.
- Chlorophytum comosum ‘Milky Way’: Green leaves with a broad cream or white center, overall lighter than other varieties.
- Chlorophytum comosum ‘White Stripe’: Features a thin cream or white stripe in the middle of its leaves that disappears as they mature. Flower stalks are creamy and yellow.
- Chlorophytum comosum ‘Hawaiian’: New leaves have green margins and a white stripe in the center that fades as they age, making a nice color contrast between old and new fronds.
Bonus: Spider plants absorb chemicals from the air, including xylene, benzene, formaldehyde, and carbon monoxide, to purify it. Neat!
Now that we’ve covered their history and characteristics, let’s go over how to grow spider plants and take proper care of these cute little fellas.
Light
Time to shine some light on spider plant light needs. These plants can grow in light shade outdoors or indirect sunlight indoors. But you know what they say – too much of a good thing is never great. Too much (direct) sunlight can burn their leaves, while too much shade can stunt their growth.
So, how do you strike a balance? Simple! Place your spider plant near a window that gives it enough indirect sun without roasting it alive (we’re not making leaf-fries here!).
Ever noticed your spider plant looking a bit sad and its growth slowing down? Chances are, it’s not getting enough light.
On the other hand, if its leaves are turning yellow, it’s time to scoot it away from harsh sunlight!
To help your spider plant bask in the perfect glow, follow these lighting tips:
- Place it near a north or east-facing window, which get lots of indirect light – no sunburn for this green buddy!
- If you have a south or west-facing window, move your plant farther away or use a sheer curtain to diffuse bright direct light.
- Give the pot a little spin every few weeks for even light exposure and growth.
Water
Now let’s dive into the watery part of plant care. Spider plants dig moisture, but they’re not into swimming – so no waterlogged soil, please!
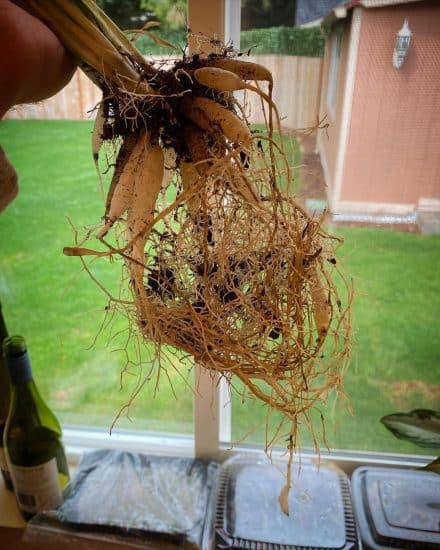
They’re also total troopers, sporting groups of fleshy white tuberous roots that hold water, so they’ll cope even if you space out on watering once or twice (benign neglect, anyone?). But remember, overwatering is a no-no, as it can lead to rot.
Water spider plants when the top inch of potting soil gets dry. Pour until water drips from the drainage holes, then empty any leftover water from the saucer beneath
Oh, and those pesky chemicals like fluoride in tap water? They turn spider plant leaf tips brown, so try rainwater, filtered, or distilled water instead. (You can even boil tap water and wait to water until it’s room temp; this gets rid of chlorine).
Underwatering can stunt growth while overwatering can rot those roots.
Temperature and Humidity
Originating from South Africa, it’s no wonder spider plants flourish when the temperature ranges between 55 and 80 degrees F. Warmer temperatures help with the plant’s energy and growth.
Spider plants struggle in temperatures below 50°F, so remember to keep them away from chilly drafts and air-conditioning vents.
If temperatures are too low, you’ll see slow or stunted growth and soft, mushy leaves. If they get too high, you’ll notice burnt, crispy leaves.
Spider plants do well in moderate to high humidity levels, preferably 40% to 80% (remember: tropical plants). Normal household humidity will work, but aim for the higher side. If it isn’t humid enough for your spider plant, you’ll see signs like curled leaves, wilting, or leaf tips that are brown.
Spider plant humidity tips:
- Use a humidifier right by your plant so that it raises the local humidity and not throughout the house.
- Group plants with similar humidity needs together so they can share moisture.
- Place a pebble tray with water near your spider plant to increase humidity, especially during the dry winter months.
Soil and Planting

Spider plants can grow in various soil types, but they prefer loose, loamy, well-drained soil with a neutral pH. They can tolerate slightly acidic to slightly alkaline conditions, but high salt levels can cause leaf tips to brown.
A store-bought potting mix will work just fine, but if you’re seeing issues like stunted growth or discolored leaves, you might want to loosen up that soil and get oxygen to your spider plant’s roots. Add some perlite or pumice (the large particle kind) and bark or coconut coir.
Pruning
Prune the usual brown, dry leaves off with sterilized scissors or shears. If your spider plant is getting too gangly for your taste, prune off its spider pups so the plant directs more energy to its existing leaves.
Repotting
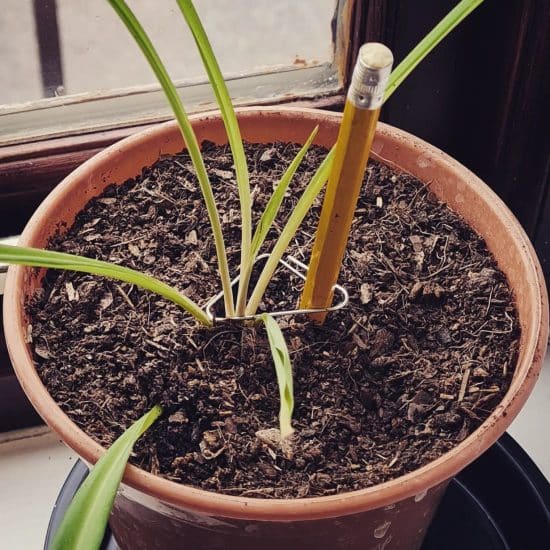
Spider plants may need to be repotted every 2-3 years, as they can outgrow their containers. To repot, gently remove the plant from its current container, loosen the root ball, and place it in a new pot (with at least one drainage hole) with fresh potting mix. Water your plant thoroughly to help it settle into its new home.
Fertilizing
Fertilize your spider plant once or twice per month in the spring and summer with a balanced half-strength fertilizer. Follow the instructions on the package. Also, don’t fertilize in winter, as your plant doesn’t need the nutrients then and can’t take them up anyway.
Signs of too much fertilizer: Over-fertilizing your spider plants can lead to salt buildup in the soil, causing brown leaf tips and even root burn.
If you suspect your plant has been over-fertilized, flush the soil with water to remove excess nutrients and consider changing up your fertilizer brand or amount in the future.
Propagation
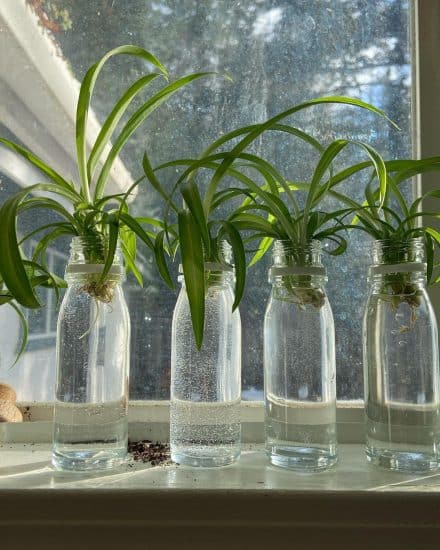
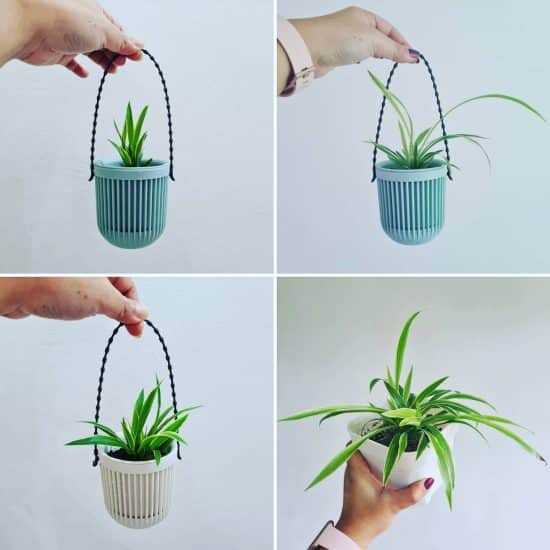
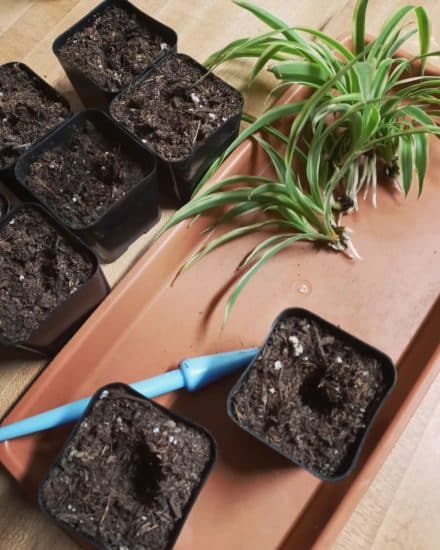
Ready to multiply your spider plant family? Propagation with these guys is a cinch. Using the pup (or plantlet) method is your best bet to grow spider plants. Just follow these steps, and you’ll become a spider plant propagation pro in no time!
Propagate spider plant by plantlets:
- Find a healthy baby: If you can, pick a spider plantlet with roots or showing signs of root formation – healthy babies equal better chances of success. But if you can’t find one, don’t worry.
- Snip it off: Grab clean scissors or pruning shears and cut the plantlet away from the parent plant, leaving some long stems to help with rooting.
- Pot it up: Fill a small pot with moist, well-draining potting mix (with drainage holes, of course).
- Plant the little one: Make a small hole, pop the roots in, cover them with soil, and give it a gentle press for good root-soil contact.
- Show it some love: Treat this new addition like a mature spider plant – bright indirect light and moist (not soggy) soil, and watch it grow!
Another way to propagate spider plants is by dividing mature plants. Just separate the root ball and plant the sections in separate pots with fresh potting mix.
Extra spider plant propagation tips:
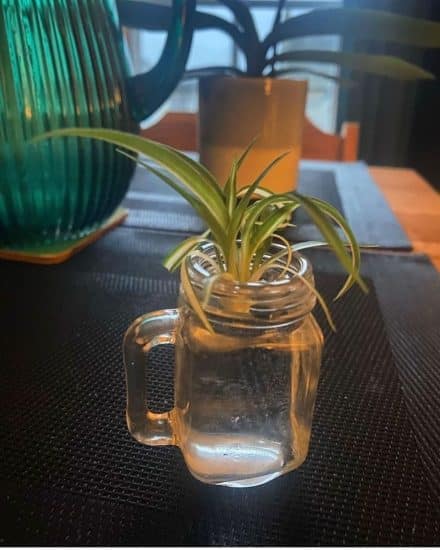
- For spider plantlets without roots (solid green or variegated forms), just lay them on moist potting mix in a nearby pot while they’re still attached to the mother plant. Roots will grow pretty quickly, usually within 1-2 weeks, at which point you can just snip off the baby and plant it in the new pot.
- Boost your odds of success by dipping the cut end of the plantlet in rooting hormone before planting.
- If you want a bushier look, tuck a spider plantlet baby or two into the soil around the mother plant, and it will grow from there.
Common issues
Spider plants are everywhere, and any problem you experience has 100% been dealt with before. Yellow leaves? Pshaw, we’ve got you covered.
Brown leaf tips
This can be due to chemicals or salts in tap water, too much direct sunlight, or low humidity. If you’re using tap, boil it and wait till it cools to room temperature, or use filtered water.
If your plant is receiving direct sunlight, move it a few feet away from the light source or use a curtain to diffuse it. Finally, if your humidity is on the low side, check out our “Temperature and Humidity” section above for ideas on how to raise it.
Leggy growth
If your spider plant isn’t getting enough light, it might get leggy. Move it to a brighter location (or closer to a window with indirect sunlight). If your spider plant is root-bound or overcrowded with plantlets, this might also be the issue.
Try repotting and dividing it to redirect energy to the main plant.
Yellowing Leaves
Caused by overwatering, poor soil drainage, or excessive direct sunlight. Ensure your spider plant is in well-draining potting mix with amendments like perlite, pumice, or coco coir; water only when needed (the top inch of soil is dry); and make sure it’s getting bright, indirect sunlight instead of harsh direct sunlight.
Pests and diseases
The usual bugs and fungus can afflict spider plants. Here are some tried and true solutions.
Root Rot
Overwatering or poor soil drainage can cause root rot. Prevent it by watering spider plants only when the soil is dry one inch down, using a well-draining potting mix, and keeping your plant in a pot with drainage holes.
If you suspect root rot, which looks like black and mushy roots, remove the plant from the pot, trim away affected roots, and repot it in fresh soil. Don’t water it for a few days after.
Pests
Spider mites (patterns of silvery dots with webbing under your plant), mealybugs (fluffy cotton masses), and aphids (very small, pear-shaped, come in multiple colors) suck sap from your spider plant’s leaves and stems.
For mild infestations, rinse the plant with water to dislodge pests. For more severe cases, use diluted neem oil weekly until the issue is gone (and even for a week or two after to get rid of potential eggs).
Conclusion

That wraps up our spider plant care guide! Versatile, low-maintenance, air-purifying, and doesn’t even look too much like a real spider! What more could you ask for?
Plus, propagating with spider pups is a breeze.
We hope our guide has been helpful, and that you’re feeling confident about growing and nurturing your spider plant.
If you have any more questions (or just want to send plant pics: we get it!), feel free to reach out on social media. Share this guide with fellow plant enthusiasts, and happy growing!
Take care!
FAQ
Should I cut the babies off my spider mother plant?
Yes, you can cut the babies, or plantlets, off your spider plant. This allows you to propagate and grow new plants. Make sure to pick a healthy plantlet with roots or signs of root formation and follow our propagation guide above.
How much sun does a spider plant need?
Spider plants prefer bright, indirect sunlight. Place them near a north- or east-facing window to give them enough indirect light without exposing them to harsh direct sunlight, which can burn their leaves.
What happens if my spider plant doesn’t flower?
If your spider plant doesn’t flower, it’s usually not a cause for concern. It could be due to insufficient light or inadequate nutrients. Make sure your plant is getting enough indirect sunlight and fertilize it sparingly during the growing season.
Are spider plants safe for pets?
Yes, spider plants are non-toxic and totally safe for pets. However, it’s always a good idea to prevent your pets from chewing on houseplants, as ingesting any plant material in large quantities may cause digestive issues.
