
The ZZ plant has a reputation for being one of the easiest houseplants to take care of. We’ve even heard stories of people forgetting about their plant in a closet or dark room and opening it up months later to find not only is their plant still alive… it’s been growing?
In the dark?
We’ve put these claims to the test ourselves and the results might shock you.
This is usually where an article would implore you to just “read on” to discover the answer, but we’re nice at Plantcarefully!
It actually does grow in almost zero light!
We’ll get into the nitty-gritty details on how exactly it can do this, along with our complete ZZ plant care guide.
We’ll cover propagation, everything from lighting conditions through humidity levels, and go over the most common issues your Zamioculcas zamiifolia can experience.
(Like always, if you want to skip to a section, just expand the table of contents below and hop right to the area you need.)
Table of Contents
ZZ plant Care Guide
History, habitat, and characteristics
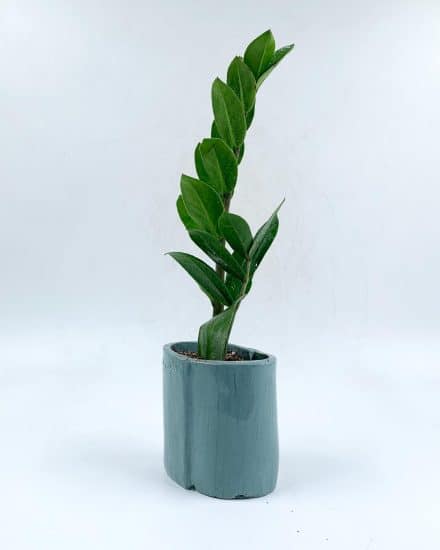
The ZZ Plant (botanical name Zamioculcas zamiifolia) might hold the title for the most popular plant in the world right now. Hailing from Eastern Africa, at first appearance, it doesn’t look all that different from other tropical houseplants.
So what’s the deal?
These slow-growing plants were introduced to the world in the 1990s and sold as the easiest houseplant to take care of. You’ll see it on basically every “list of best indoor plants,” but does it really warrant that title?
It does.
You could literally place this plant in a closet or dark room, leave it there, and then come back months later to find it still alive.
No nutrients, low light, no water… but still new growth. It won’t look amazing,but it will survive. So how does it do that?
Well, the ZZ plant (or zu-zu plant, Zanzibar gem, emerald palm… there are a lot of names) was promoted as a sort of super-plant, and the key to its survival is found in the soil just underneath.
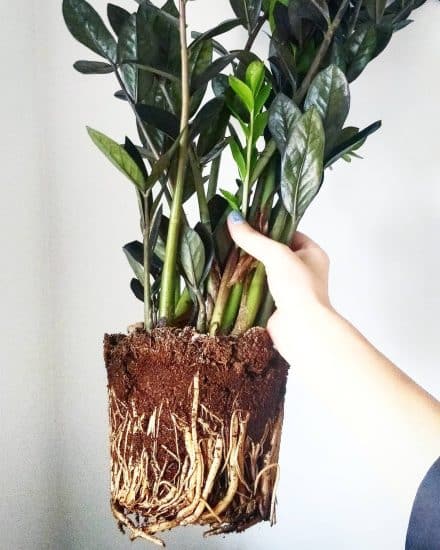
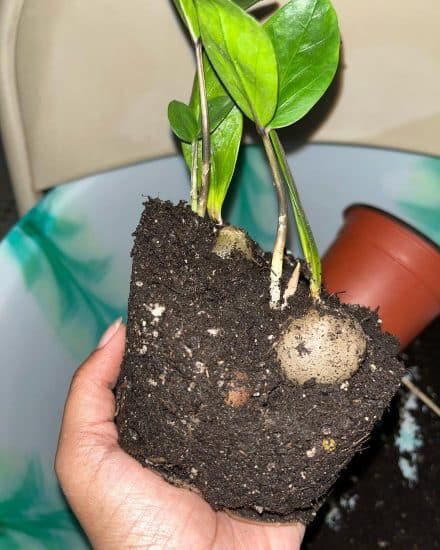
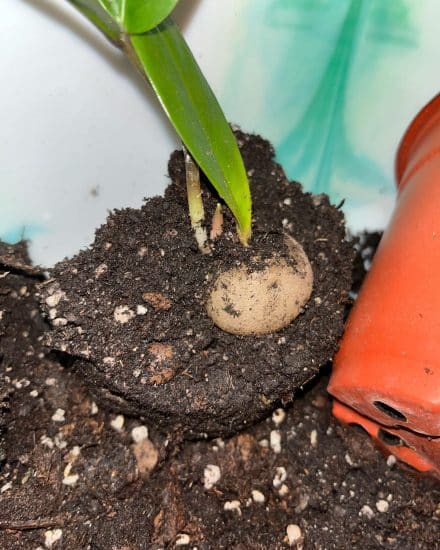
This plant features a rhizome, or tuber, that sits in the soil. If you were to dig yours up, it would look just like a little friendly potato.
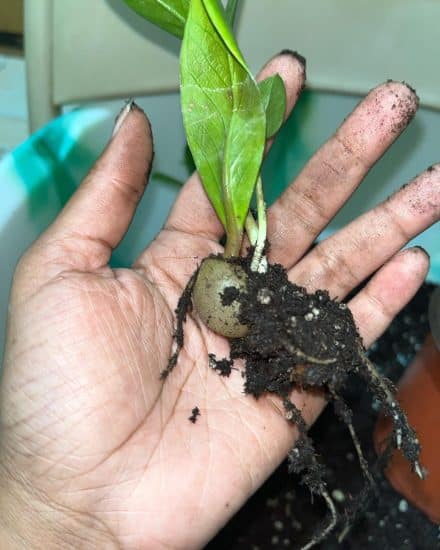
So what’s in this potato? Nutrients, water, and lots of them.
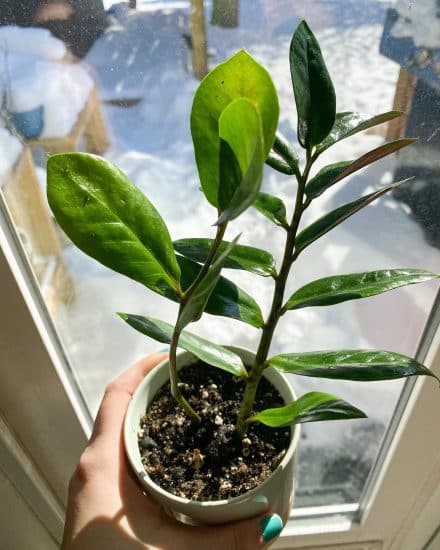
You’ll see throughout this care guide that we highlight just how resilient this plant is, and that’s because it comes with a little built-in margin of error. If you examine its stems, you’ll notice that they’re thick, and its leaves are succulent-like and waxy.
All of these features really clue us in that this is going to be an easy plant to care for.
(They do call it the eternity plant for a reason.)
Flowers
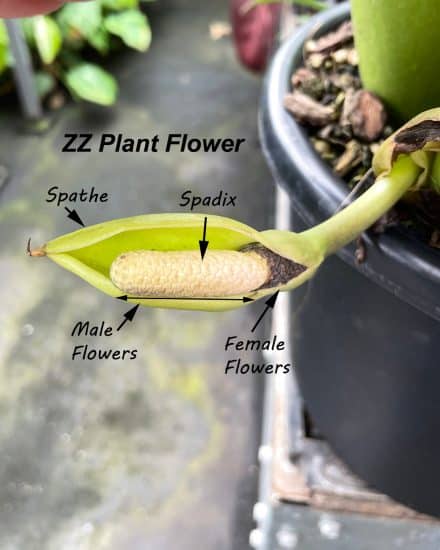
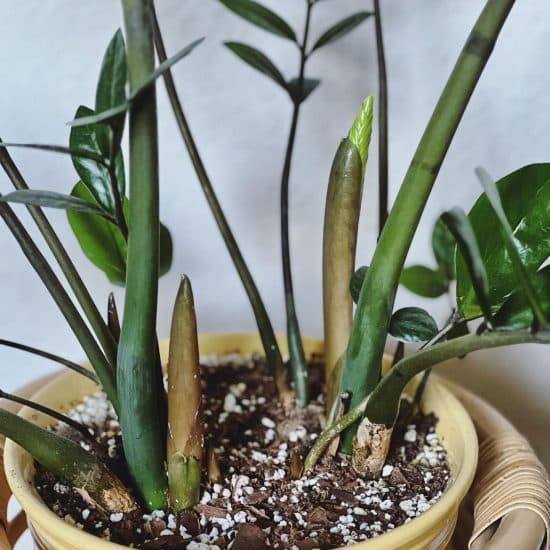
The ZZ Plant’s flowers aren’t especially pretty (it’s an aroid palm), and you’ll notice they don’t bloom off of a pre-existing leaf. Instead, they come from a new stalk at the bottom of your pot.
Unlike some other indoor plants (looking at you, Dracaena) these flowers don’t sap the nutrients from your plant, and you can let them grow if you like them.
Actually, they’re a pretty decent sign that you have a healthy plant and that it’s been in a fantastic environment.
If you don’t see any flowers, that’s not really an issue if your plant is doing well otherwise. ZZ plants rarely flower, and you aren’t missing out on much, honestly.
Picking your ZZ plant
We’ll cover cultivars in the next section, so be sure to check that for a quick primer on the different varieties available.
Zamioculcas zamiifolia comes in a variety of sizes, from small two-inch pots all the way up, so your first decision is going to be how large of a plant you want to start with.
Quality? It’s not that important. These are plants kept for how easy they are to care for, so you can go with the cheapest option if you aren’t picking out a variegated ZZ plant.
We recommend:
- Pick the plant with the most stems emerging from the soil. You’ll have more rhizomes and it will be easier to divide later if you want.
- Roots don’t matter too much, since these plants have huge root systems. You can keep an eye on the sides of the pot – if you see it swelling slightly, that means a robust root system with large tubers.
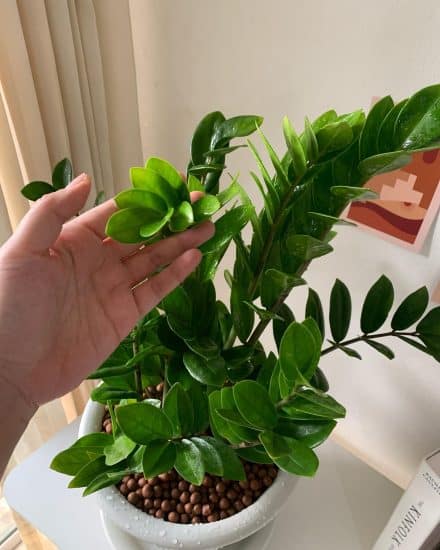
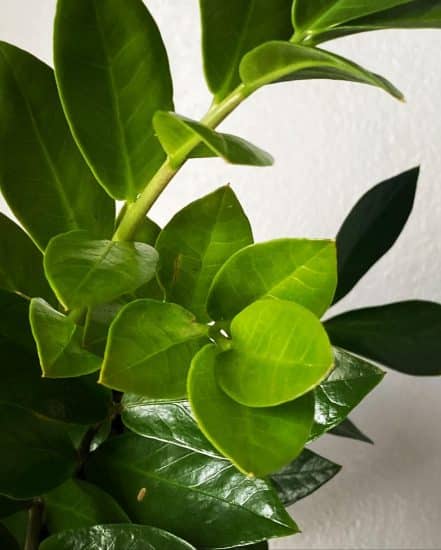
- Newer stems should have light green leaves, with thick, waxy/glossy cuticles.
Since this plant stores water and nutrients in a potato-like rhizome, it has everything it needs for difficult days, and this is the secret behind its easy care.
Varieties
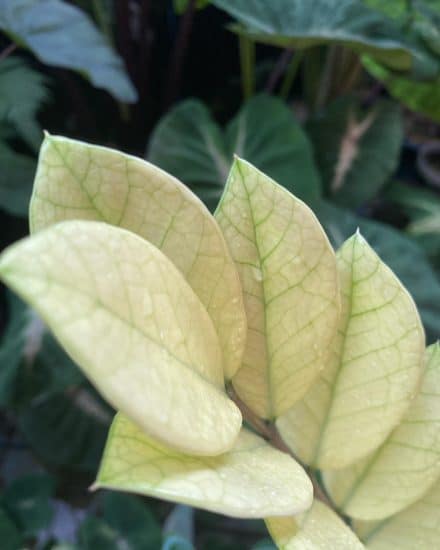
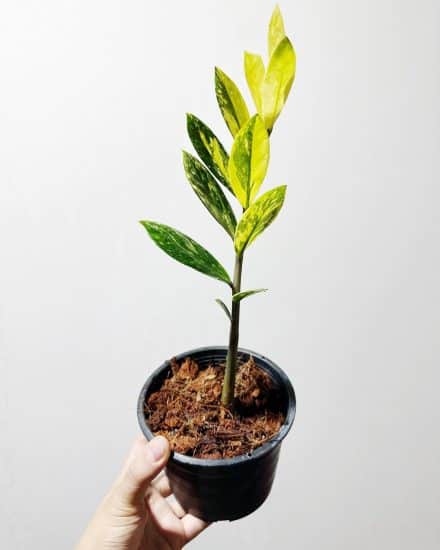
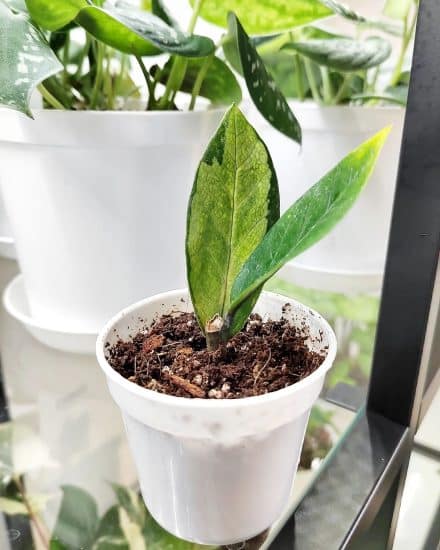
Akebono: Features a pretty unusual variegation where leaves come out as almost entirely white and then turn green over time. Similar to the Black Raven, don’t be worried that your plant is reverting or that you’ve placed it in the wrong light – this is completely natural.
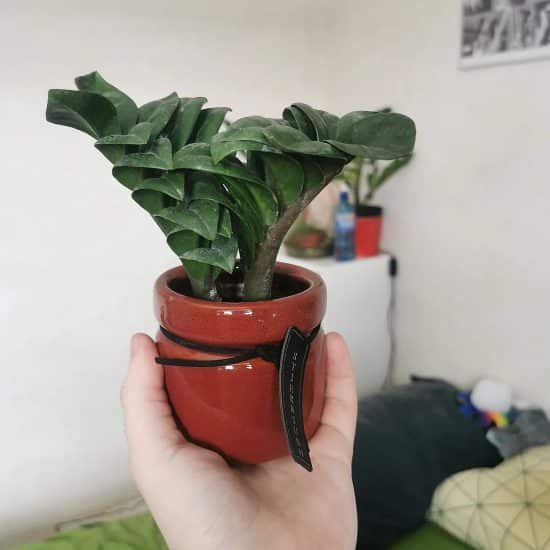
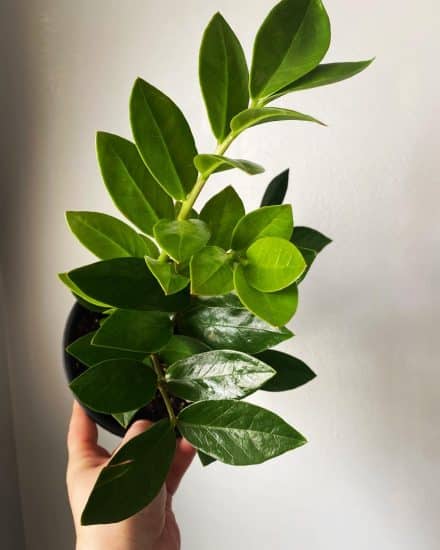
Zenzi – Smaller with compact leaves, very shiny and waxy. The Zenzi has shorter internodes, which means a bushier, compact look. Stems are a fair bit thicker. This doesn’t grow too large, as it’s a dwarf version, and interestingly enough, this cultivar was developed by the same creator (Ashish Hansoti) as the Manjula pothos!
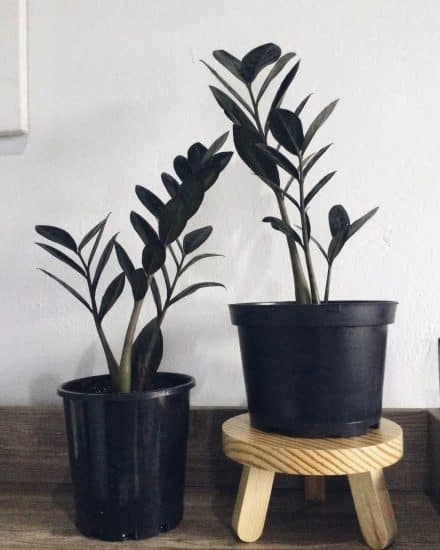
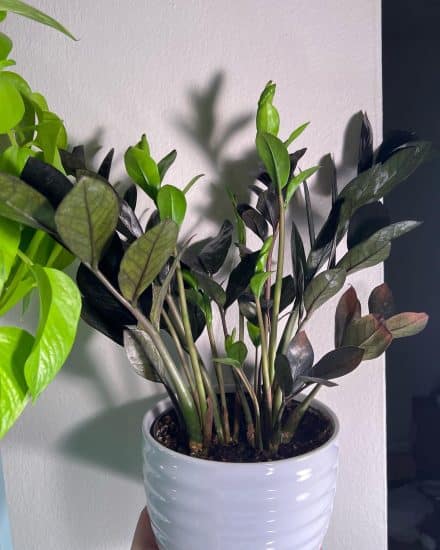
Black Raven: ZZ Black Raven features thick, waxy leaves that appear almost black. New leaves will start off as a light green, so don’t worry that your plant is reverting. They’ll move from dark green to black as they mature. Very stylish, oh so goth. Grows pretty slowly.
Super Nova: Also features darker leaves, but not quite as dark as the Black Raven. Newer growth will stay green for a while, and everything on this ZZ plant is super-sized. Grows taller with thicker stems and larger leaves.
Lucky Classic – Very Pilea or Hoya-like with its broad, round green leaves.
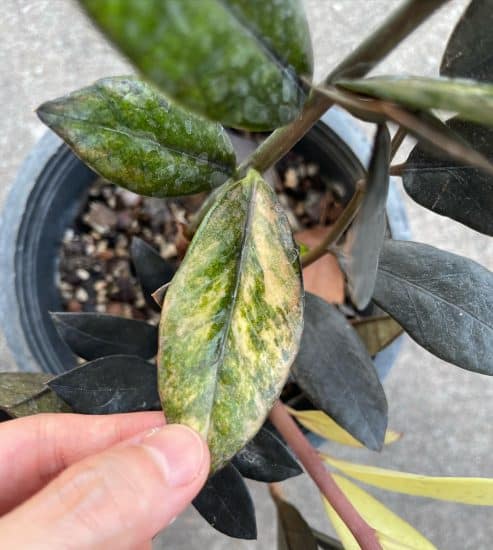
Other variegated varieties are extremely rare and often very expensive. They typically feature bright yellow or minty green variegation. You’ll want to be careful and buy these from a reputable source, and if it seems too good to be true, it likely is.
Light
ZZ plants grow in low light environments, which begs the question: how much sunlight do they really want?
Since they do like to photosynthesize a bit from time to time, we recommend giving them plenty of bright, indirect light.
The benefit is that even if you do get its placement a bit wrong, your ZZ plant isn’t going to just give up on you. You’ll probably have a few years of it gently nudging you… “More indirect light… please?” before it starts to have serious issues.

That being said, you should avoid south-facing windows because ZZ plants do not like direct light. With more indirect light, you’ll notice faster growth. Give it more if you want your plant to grow larger!
Signs of low light include:
- Slow, leggy growth.
- Yellowing leaves
- Almost all white new growth
Signs of too much light (especially direct sunlight) can include leaves looking faded or bleached out and crispy, brown leaf tips. You’ll want to either add a sheer curtain to your window, place your ZZ plant behind other houseplants that want more light, or even just move your plant back a foot or two.
Lighting tips:
- Wipe down your ZZ plant’s leaves with a soft cloth to help remove dust and keep its stomata working optimally.
- Rotate your plant once a month to ensure all sides receive equal light exposure if you want even growth.
- If you need to relocate your ZZ plant, make the move over several days to help it adjust to its new home gradually.
- If you have trouble getting enough indirect bright light for this plant, you can add an artificial light source like an LED grow light, but usually this won’t be necessary if you have any windows at all.
Water

ZZ plants are prone to overwatering, so it is essential to wait for the soil to dry out completely before watering. Make sure to check the soil moisture level by sticking your finger a few inches into the soil.
They do go dormant in the winter and will grow a lot more slowly. With slower growth and less light, you’ll want to really cut back the watering.
The easiest way to damage your Zamioculcas zamiifolia is to give it too much water. Any plant that shows you waxy leaves and thick rhizomes/stems is telling you that it really doesn’t need a lot of water or attention.
Make sure that you especially let water drain out of its soil, as waterlogged roots are really difficult for this plant to recover from. That means a pot with drainage holes.
When you are feeling the soil, you can really let it go completely dry. And as far as watering needs: if your other plants are being watered weekly, you’d expect this plant to be a bit off-schedule, closer to every 2-3 weeks instead.
Signs of underwatering Zamioculcas zamiifolia are previously firm, smooth stems shriveling up, shrinking, and sinking in on themselves. This plant holds a lot of water in its stems, so if they wither away, that’s a pretty strong indication that you need to water more frequently.
Temperature and humidity
ZZ plants are tropical/subtropical plants and do well in high humidity and temperature. But unlike some other houseplants, they’re incredibly robust and can do great in normal household conditions without any adjustments.
Temperature: ZZ plants prefer warm indoor environments, with temperatures between 65-80℉ being the ideal range. It doesn’t love getting too hot, and also can get shocked if it’s freezing, especially during transportation. If you purchase it in the winter, make sure to give it a little bit of protection on the way to your car.
Tip: We often try to avoid drafty windows, but your ZZ plant will do just fine in a location like this. The trade-off will be that you’ll have a bushier, smaller plant. If that’s what you’d like, then place it in an area that does get a little chilly overnight, and you’ll have a plant that looks more Zenzi than Lucky Original.
(This doesn’t mean you should toss it in the snow, since it is a tropical plant, but you can modify its growth habits with this trick.)
Humidity: High humidity isn’t required for your ZZ plant – normal household levels are just fine. They will grow a bit more with higher humidity, so adjust as you like to control for the rate of growth. If your house is between 40-60% humidity, your plant should do just fine.
Too hot and your plant will shrivel, similar to how it would look underwater. Your ZZ plant will try to cool itself down by sweating off as much water as it can. This means that even with its thick rhizomes and stems, it will have trouble retaining the water it needs to grow and look healthy.
Soil and planting
Our patented, secret, 100% private soil recipe for your ZZ plant is: a regular potting mix.
You just have to add… actually nothing.
That’s it, that’s the section.
Surprised? You shouldn’t be. These plants are durable, and that means easier care.
If you really want to feel like you’re giving it a good home, you can add some perlite to the soil to increase drainage, but it’s really 100% optional. Most houseplants prefer this, so if your soil already has perlite added, that’s absolutely fine.
Zamioculcas zamiifolia can also live in just water, yup! Who needs soil? It’s the 21st century!
Fertilizer
If growing in water, you will need to fertilize your plant, because it does need to get nutrients from somewhere. You’ll want to use an opaque container so that the roots aren’t exposed to any sources of light.
You can find fertilizers that are intended for water plants, and those are preferred.
If planted in soil, ZZ plants grow without needing too much fertilizer. When you see it growing, fertilize a few times in its active growing season of spring and summer.
Less is more with fertilizer, so use a balanced liquid fertilizer that’s diluted more than 50%. You can increase in the future once you know your plant is tolerating it.
Repotting your ZZ plant
With many houseplants, we encourage you to let it sit in its plant for a good while, but your ZZ plant actually likes being repotted – especially if the nursery pot it came in is bulging out and full, or you see roots coming out of its drainage holes.
You don’t want to repot it in an excessively large pot, just go up one size at a time, and only whenever you see it pushing the sides of the pot out or the soil is coming out of the top.
A large volume of soil means more water is available to your plant, and ZZ plants don’t really care for that. It’ll just take longer for that soil to dry out, which isn’t necessary, because we can rely on the rhizome to store water for the future.
Your pot should have drainage holes, and you can optionally use a self-watering system. If you do have a self-watering pot you’ll want to make sure to let it go empty every so often. Zamioculcas zamiifolia does want periods of dryness, and this creates a more resilient plant.
Propagation guide
We’re going to cover three methods of propagating your ZZ plant. All of them work well, and you can even try all three to get some experience with a very forgiving plant.
Let’s start with rhizome division.
Propagating your ZZ plant by division
This method has an almost 100% success rate because you’re starting off with a mature, healthy plant. It does take a bit of time to actually separate the plants, so it is a bit more labor intensive (and stressful on you and the plant) than some other methods.
You likely have several plants in your pot. Each of these plants should have several tubers. You can knock your pot off and take a look. You’ll see a very extensive root system with pretty thick roots.
Being as gentle as possible, you’ll want to untangle and separate these roots. If you need to, you can separate by cutting off roots, just make sure to use a sterilized knife to avoid any bacteria or fungus.
When separated, you don’t need to treat this plant any differently, just make sure to plant with its tuber entirely underneath the soil.
Propagating ZZ plants by stem cutting
Quicker initially, but it can take a few months to see enough root growth. You don’t necessarily have to start this with a cutting, either. If you knock/break a stalk accidentally… that works too. But if you are cutting, you’ll want to start with a sharp knife or sterilized shears.
- Cut off a stem close to the bottom. If you’re working with a broken stem that fell, you want to make a fresh cut.
- Let the cut stem dry out for a day and callus over.
- Place your stem cutting in just a few inches of water – no leaves should be immersed.
- Switch the water out regularly. Daily is great, twice a week is pretty good, but weekly might be too infrequently.
- Once you see a new rhizome growing, it’s time to repot this plant in soil. There should be roots a few inches long, too.
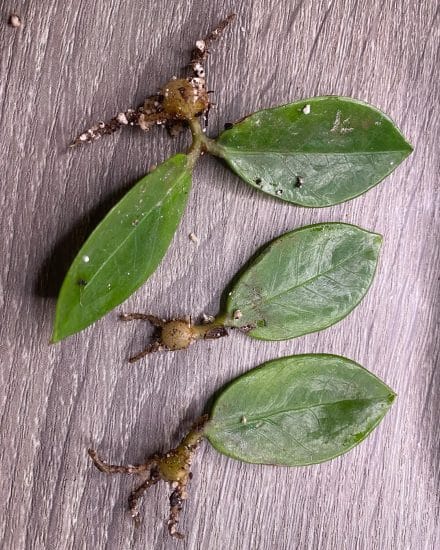
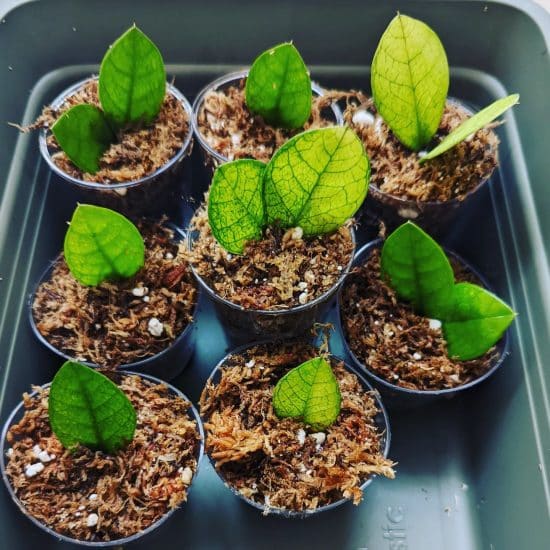
Propagating ZZ plants via leaf cutting
If you thought one plant was a lot from a stem… how about 12?
- You’ll remove all of the leaves from your stem, noticing the small petiole where it attaches to the stalk. This is the part we need for rooting, and when you cut this leaf off, try to grab a little bit of the stalk too.
- Gather your leaves and let them callus for a day.
- Stack your leaf cuttings standing up, and place just enough water to cover the petioles and a tiny bit of the leaf. Half an inch to an inch is pretty normal.
- The more often you can switch up the water, the better. You really can’t do this too frequently. Daily or twice a week are great.
- Each leaf will form a small tuber (so cute!) and then roots. Once you see roots an inch lon, you can replant these into the soil, making sure the tuber is entirely underneath.
- Keep the soil very moist and humid at first, then apply normal ZZ plant care.
Note: the leaf will die off and turn completely yellow. That’s completely normal: bye little leaf, thank you!
Propagation tips:
- Consider which method of propagation is going to be best for your ZZ plant. Leaf cuttings and leaflets are great for smaller plants, and division is fantastic if you have a plant that’s growing a bit unruly.
- Always sterilize your cutting tools – you don’t want to introduce an issue from the start.
- ZZ plants are slow-growing and very slow at propagating. This will take time.
- Keep your new plants in lots of bright indirect light with high humidity levels.
Common issues
While ZZ plants are celebrated for their low-maintenance requirements, even these hardy plants can experience issues. Here are three of the most common problems ZZ plant owners encounter and how to tackle them:
Brown leaves
If you’re noticing brown edges or leaves that feel like crunchy fall leaves, that’s a sure sign of not enough water. You’ll want to increase the frequency of watering, not how much you water at once. Check the stems – if they seem a bit shriveled, that should confirm the issue.
If you’re just seeing brown leaf tips, that’s likely due to impurities in your water, and you should begin using filtered water or rainwater. Brown spots are usually bacterial or fungal, which we’ll cover in our next section.
Yellow leaves
Yellowing leaves should be a big warning sign spelling out: too much water! You’ll want to cut off that yellowing stem and really let your plant dry out. You might also notice the big, thick stems of your plant feeling soft instead of firm, and you’ll see stalks just falling over completely, no longer able to support themselves.
If leaves are only a little bit yellow, it could be from direct light or an issue with fertilizing. Just the younger leaves? Likely not enough light.
Curling and drooping leaves
Curling leaves can signify both underwatering or overexposure to direct sunlight, while drooping leaves may mean that the plant is getting too much water. Check the light conditions in your ZZ plant’s location and adjust as needed, and monitor the soil moisture regularly to prevent overwatering.
Diseases and pests
The ZZ plant almost never experiences insect infestations or diseases, thanks to its thick, glossy leaves. However, too much sun will weaken the waxy cuticles, giving access to their juicy interiors to any opportunistic pests which might be lurking.
Too much water or soil that stays wet can also lead to rotting issues, so let’s cover those first.
Root rot
Overwatering can be a problem for ZZ plants and lead to root rot, a fungal disease that attacks the roots of the plant. Symptoms of root rot include yellowing leaves, wilting, and drooping. If you notice your plant is less firm than it used to be, take a look at the roots.
The solution to root rot is to cut off any affected roots and repot the plant in fresh, well-draining soil. Water the newly potted plant sparingly, allowing the soil to dry out before watering again. You can also mix perlite into your potting soil to improve drainage.
To avoid root rot, ensure there is proper drainage beneath your pot, and water only when the top few inches of soil feel dry to the touch.
Pests
If you do see pests, it happens, but it’s likely from another plant, and they’re not living off of your Zamioculcas zamiifolia. You’ll still want to isolate each plant and inspect it to see how much assistance they need.
Common invaders for the ZZ plant are mealybugs, spider mites, scale, and aphids – the common insects we see with indoor plants.
You’ll start by giving your plant a quick shower. Really rinse off all sides of the leaves, and knock as many pests off as you can. Mites specifically hate water, so this alone can deal with them.
Next, apply some soapy water or neem oil to the leaves and stems. You’ll want to reapply in 2-3 weeks to disrupt the eggs as well.
To prevent pests from attacking your ZZ plants, keep the leaves clean and free of dust and debris. Any damaged leaves should be removed from the pot because insects love to sink their teeth into them.
Conclusion
That’s it for our ZZ plant care guide!
Zamioculcas zamiifolia is an exceptionally easy indoor plant to keep, especially if you’re looking for a slow grower that will be patient with you as you learn.
ZZ plant care summary:
- This slow grower does well in low light conditions, but prefers bright indirect light. Keep it close to any window that’s not south-facing.
- Avoid direct sunlight if possible, as this can damage the plant’s leaves, making them vulnerable to pests.
- Propagate via leaf cuttings if you want a bounty of new plants from a single stem, or by division if you have an unruly plant that’s outgrowing its pot.
- ZZ plants grow to be a bit root-bound without any issues, but do grow faster in larger containers.
- Don’t let excess water pool at the bottom of your pot. If it doesn’t have drainage holes or you notice roots coming out of a drainage hole, it’s time to find a new pot.
- Fertilize 2-3 times during the growing season.
We really hope this guide helped you, and if it did, share it with a friend! If you have any questions that we didn’t cover, feel free to reach out and drop us a line.
Take care!
FAQ
Where did Zamioculcas zamiifolia come from?
ZZ plants originate from Eastern Africa and are found natively throughout Kenya.
Is the ZZ plant an air purifier?
Yes, the ZZ plant is a fantastic air purifier. Studies show that it is highly effective at down-regulating many VOCs such as benzene, formaldehyde, and xylene, along with other airborne toxins.
Should you mist a ZZ plant?
Misting doesn’t really do much for humidity, and mostly encourages pests and issues with bacteria or fungi. Instead, we recommend dusting the leaves off with a slightly moist cloth.
If misting is really fun for you, you can still do that, but wipe the leaves down after spraying.
Is a ZZ plant safe for pets?
You can handle this plant, but according to the ASPCA, it is toxic, so keep it away from cats and dogs, as well as any small children.
Can you place Zanzibar gem outside?
While ZZ plants are robust, they should avoid direct sunlight. You can definitely keep them outside as long as there’s plenty of indirect bright light. Bring them back inside once temperatures start dipping underneath 60 F.
Is the Zanzibar gem a succulent?
It’s commonly mistaken as a succulent due to its thick glossy leaves, but it’s actually classified as an aroid palm.
Is it okay to touch a ZZ plant?
People used to think ZZ plants were not safe to touch, but they shouldn’t cause skin irritation or allergic reactions. According to the University of Florida, this plant does contain irritants, so make sure not to consume it.
